

This post may include affiliate links. Thank you for your support.
If you who loves the idea of dessert for breakfast, but you’re trying to be healthy, you are going to flip for these tasty, nutritious breakfast popsicles with yogurt, cereal, and fruit. My simple, kid-friendly recipe for Banana Popsicles is made with just 6 wholesome ingredients and just 10 minutes of active kitchen time, making it perfect for your meal prep day.

Update: This post was originally published in August 2016. I made edits to include more information about making these creamy banana yogurt pops at home.
Table of Contents
About these popsicles with fruit
They say that breakfast is the most important meal of the day, but before my first cup of coffee, I’m practically dead to the world. How’s a girl supposed to feed herself or her loved ones when she’s out of go-juice?
Luckily, my simple recipe for popsicles with fruit is perfect for making in advance so breakfast is ready to go by the time your bleary eyes open. With this easy recipe, there will be no more scrambling to make a plate of something nutritious for yourself, your hubby, or your hungry kiddo while you’re still knocking the sleep off your brain. You can night-owl meal prep these banana cream popsicles for the morning win!
If you love frosty desserts, be sure to try this recipe for strawberry ice cream sundae.
Why you’ll love these homemade popsicles
Aside from being make-ahead friendly and absolutely delicious, these greek yogurt popsicles with fruit are also:
- Made With Only 6 Simple Ingredients, so your shopping list will be short and your tastebuds will be happy.
- Wholesome Goodness. With a good balance of probiotics, protein, fat, and carbs and no refined sugar, these frozen breakfast treats might taste like dessert but are secretly wholesome. Shhhhhhhh! Don’t tell!
- Versatile. This homemade banana popsicle recipe is a cinch to customize! Swap out the yogurt, the fruit, and the cereal whenever you’re in need of some variety.
- Quick and Easy. All you need is 10 minutes of prep to blend these ice cream pops and get them ready for the freezer. In fact, they’re easy enough for your kiddos to help.

Ingredients for banana popsicles
As promised, you only need 6 ingredients to make this easy popsicle recipe with yogurt. Here’s what to grab:
- Plain Greek Yogurt. Make sure to reach for full-fat yogurt for the best, creamiest experience. Substitution: You can substitute flavored Greek yogurt for plain, just make sure you are using full-fat yogurt. Skyrr and labneh can also be used in place of Greek yogurt. Plant-based yogurt is also totally copacetic.
- Milk. I’m a full-fat dairy kinda person, so I also use whole milk. Feel free to swap in lower fat options like 2%, 1%, or skim. Substitution: Try plant-based milk if you prefer. I suggest reaching for unflavored and unsweetened options so you have greater control over how much sugar goes into them, but you do you.
- Honey. I recommend adjusting the honey in this recipe for banana popsicles to suit your specific taste. Substitutions: You can also use agave nectar, maple syrup, date syrup, or brown rice syrup if you prefer.
- Cinnamon. I love the warmth that ground cinnamon adds, and I think it’s a perfect pairing for my banana flavor popsicle. Substitutions: Feel free to omit it if you prefer, or experiment using different flavor additives like ground ginger, pumpkin pie spice, nutmeg, peanut butter powder, or cocoa powder instead.
- Granola OR Honey Bunches of Oats Cereal. So long as you’re reaching for a crunchy cereal, you should be good. Bonus points if there are clusters of yummy goodies!
- Bananas. These potassium-packed banana pops are always in stock at my house because they’re delicious, versatile, and inexpensive. Brown-flecked ripe bananas are sweeter, making them extra delicious in this popsicle recipe. Substitution: Feel free to swap in sliced strawberries, mango, papaya, or persimmon. You can also use any type of fresh or frozen berries (frozen fruit is just as good for you as fresh!).
If bananas are on sale at the store, grab some extra and put them to good use here: banana jello pudding, banana breakfast muffins, andbanana breakfast cookies.
Variations
While I love eating a frozen yogurt popsicle with fruit for breakfast, there are plenty of ways for you to make these your own. Here are a few variations to consider:
- Bump up the protein. Use a scoop or two of your favorite flavored protein powder to add flavor and nutrition to the mix.
- Different fruit (e.g. berries). Swap out the bananas and opt for your favorite fruit.
- Add chocolate! If you love chocolate covered bananas, layer some chocolate chips in your popsicle.
- Add a swirl of jam or nut butter by layering in some of the cereal/milk/yogurt mix, then topping with a bit of jam or nut butter, then adding more of the mix, then more of the swirl, and finally topping it off with more of the mix to hold everything together.
- Dip them in homemade Magic Shell. Mix melted chocolate or seed or nut butter with some coconut oil, which helps the tastiness of your choice harden on your treats.
- Try different flavored yogurt. Greek yogurt comes in all kinds of flavors these days, so go buck wild! Or try whipping yogurt for a lighter texture.
- Use other crunchy cereals. Any variety that has clusters is a winner here.
- Make them vegan. Opt for plant-based milk and Greek yogurt, swap in any other liquid sweetener for the honey, and use a vegan-friendly cereal.

Chef expert tips for perfect results every time!
- Dip the popsicle mold in warm water to get them to easily release.
- If you’re trying to cut back on fat, use lower-fat milk and full-fat yogurt so you get the creamiest texture in your banana flavored popsicles.
- Don’t have greek yogurt? Take regular yogurt and strain it through a paper towel-lined mesh strainer for about 6-12 hours. Save the whey to add to your smoothies!
- Use more flavorful yogurt whipped cream instead of regular yogurt.
- Add more fruit to your popsicles! Make it extra fruity by layering in your favorite fresh fruit purees – strawberry, blueberry, and passion fruit purees are my favorite here.
- Experiment with granolas. Swap the cereal for granola and experiment with different flavors like homemade granola chocolate or homemade cinnamon granola (just omit the large apple chips here).
FAQs: frequently asked questions
Below you’ll find the most common questions and answers about making this recipe. If you have a question you’d like answered, please drop it in the comments section below!
Can I make banana popsicles without a mold?
Sure! Simply use mini paper cups as your molds. Cover each with some plastic wrap then make a hole for the popsicle stick; the plastic will help keep it straight and centered.
Alternatively, you can use a mini loaf pan to act as a multi-pop mold. Cover with plastic wrap, then 6 insert popsicle sticks at even distances. When the banana pop mix is frozen, remove the entire loaf, then use a heated knife (run it under hot water and dry it) to cut it into individual popsicles.
Do I have to store Greek yogurt popsicles in the mold?
Nope! Once these creamy popsicles with banana and yogurt are frozen all the way through, feel free to remove them from the mold, then place them in a zip-top bag or freezer-safe container. I recommend using parchment or plastic wrap to keep them separate from one another.

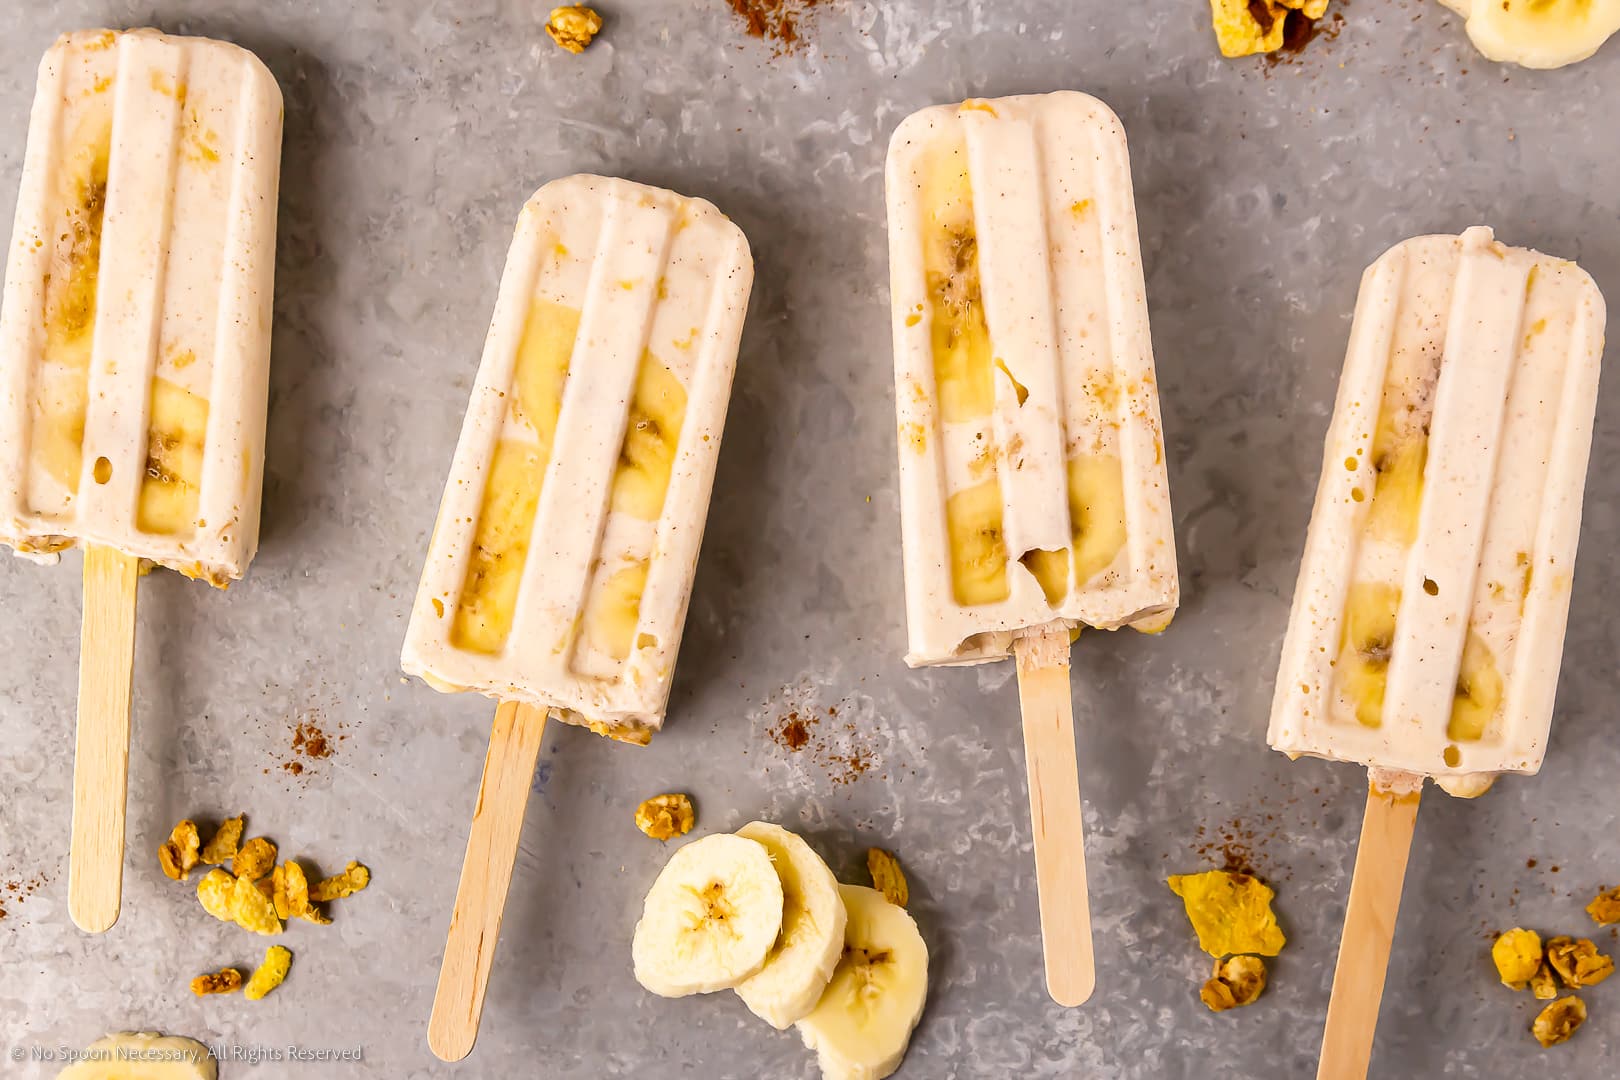
I hope you love these t-oat-ally delicious frozen yogurt treats! Cheers to easy mornings, because anything is popsicle when you’re prepared.
Until next time, I hope you know you’re cereal-ously the coolest readers around and I’m absolutely bananas about you!
Cheyanne
Craving MORE? Follow all the deliciousness on Facebook, Pinterest and Instagram!
More cold breakfast treats with fruit!
Do you love these Greek yogurt popsicles? Try these family favorite breakfast recipes:

Banana Popsicles with Yogurt
Equipment
- 1 Large Bowl, Food Processor or Blender
- 1 Silicone Popsicle Mold
Ingredients
- 1 Cup Full-Fat Greek Yogurt (SEE NOTES)
- 1 Cup Whole Milk (substitute almond milk or coconut milk)
- 2 TBS Honey (SEE NOTES)
- ½ tsp Ground Cinnamon
- 1 Cup Granola OR Honey Bunches of Oats Cereal
- 2 small Bananas – thinly sliced
Instructions
- Make creamy popsicle base: To a large bowl, blender or food processor, add the yogurt, milk, honey, and cinnamon. Mix or blend until combined. Add the cereal to the bowl and stir until just combined.
- Layer popsicles in molds: Fill each mold 1/3 of the way up with the cereal milk mixture. Then, drop a few slices of bananas into the molds. Repeat, layering the cereal milk and bananas into the molds until they are full. Gently tap the molds on the counter to help the popsicle mixture settle.
- Freeze: Transfer the popsicle molds in the freezer. Freeze for 1 hour. Add sticks, then freeze again: Remove the popsicles from the freezer. Insert a wooden stick into the center of each popsicle. Place back in the freezer and freeze overnight.
- Remove from mold and enjoy! Carefully remove the banana popsicles from their mold by pulling on the wooden stick. If you have a hard time releasing the popsicles from their mold, lightly run the mold under warm water for 10 seconds or so. Enjoy!
Notes
- Yogurt: You can use any flavor of Greek yogurt you love in these popsicles – just make sure you are using full-fat. Plain, vanilla and honey are my personal favorites if you’re looking for inspiration.
- Honey: I recommend using the honey to taste. However, be careful adding TOO much honey or your popsicles will be sticky!
- Cereal: I recommend using a very crunchy cereal with clusters or your favorite granola in these pops. Honey bunches of oats is typically what I use. Avoid delicate cereals or they will turn to mush in your Greek yogurt popsicles.
Nutrition
Did you make this recipe?
Mention @nospoonnecessary on Instagram and tag it #nospoonnecessary!
©No Spoon Necessary. All images and content are under copyright protection. Please do not use any images without prior permission. Please do not republish this recipe without prior consent. To reference this recipe, please link directly to this post.
Freya
Hi this was a totally new breakfast idea for me but I love any variations on a classic… and something I can make ahead, freeze, and grab when needed!!
I just wanted to let you know that I included this in my roundup of my favorite healthy breakfast recipes.
This is the link if you want to have a look: https://www.happierwithtea.com/easy-healthy-breakfast-recipes/
Thanks for sharing your recipe!
Andrea
Can Cashew or almond milk be used instead of regular milk?
Cheyanne Bany
Hi Andrea,
While I have only made these popsicles with regular milk, I don’t see why almond milk wouldn’t work! Cheers!
Andrea Bils
Thanks
GiGi Eats
These pops are above and beyond perfection!
anna @ annamayeveryday
These look so great, my children would love an ice lolly for breakfast!
Beeta @ Mon Petit Four
Oh my! This recipe made me want to run out and buy popsicle molds immediately! 😀 This is definitely the COOLEST breakfast ever (pun intended!). Seriously, I love all the ingredients in this, especially because I’m a big Honey Bunches cereal fan! <3
karrie @ Tasty Ever After
Hahaha! That’s too damn funny and thanks for reminding me for it 😉 Thanks for the little rundown on some personal 411 because I learned some stuff I didn’t know about you. Absolutely brilliant idea on these breakfast popsicles. LOVE! I would eat these everyday, if I could, and dip them in chocolate. heeheehee 🙂
Adina
Funnily enough Cheyanne has been quite a popular name in Germany during the past years, I know several little girls with this name… I say funny because it is such an un-German, untypicall name for Europe (no Indians and no Wyoming here), but people love it. And that song is my best friend’s favorite song, I have to hear it at least 3 times every time we drive in her car together… I kind of can’t hear it anymore… 🙂 🙂 Lovely popsicles, I would love one (or two) right now, it is really hot!
natalia20041989
I love homemade popsicles, simple yet delicious, great photos:)
Mir
I am SO proud of myself because I was already pronouncing your name correctly in my head. So I just want you to give me some props for that.
And as someone whose name is mispronounced always, I feel ya.
So thanks for your backstory! I love learning more about people. I’m greedy for intel.
And thanks for these. I love this as a breakfast option!
Ben Maclain|Havocinthekitchen
Hi, Shy-Anne, nice to meet you (Well, having read all these facts, I feel like it’s the first time ever I’ve stumbled across your blog post). Definitely, the most shocking fact is that the name Boy of your Boy turned out not to be the real name. Sounds really complicated. And intriguing. Also, there’s another fun fact you should mention about yourself – you seem to be incompatible with the post office and mailing. You’ve trying to send (or just saying) me food parcels for a year now…and you know what? I haven’t got any. So, I am not even hinting you at sending some of these delicious popsicles (Besides, ice cream isn’t the best food for shipping). I am only saying you’ve done a fantastic job to have created this beautiful dessert pretending to be a healthy breakfast:)
mira
I love your popsicles! Such a cool combination! Love reading about yourself! Didn’t know you had a degree in psycology!
Thao @ In Good Flavor
With a name like mine, it has been butchered countless times. I have even been called “Toe”! I love your random facts, Chey. Hey!…from a person who has an occasional ice cream dinner, popcorn dinners are perfectly acceptable! These breakfast popsicles are a fantastic idea…and a deliciously wonderful way to start a hot summer morning! <3
Cailee
Cereal breakfast pops!! What a fun idea! Love this recipe! Thanks so much for sharing Cheyanne! Hope you have a wonderful weekend!
xoxo Cailee!
Bianca @ Confessions of a Chocoholic
These breakfast pops looks absolutely perfect! Love the combo!
Natasha
This is totally my kind of breakfast. I am not a morning or breakfast person at all, but these look fun. Why should the kiddies be the only ones to enjoy these?! 😉 I am also glad I know how to pronounce your name now. I always said it in my head wrong lol. I now just need to actually remember how to say it.
Anu – My Ginger Garlic Kitchen
Shy-Anne, love it. Popsicles for breakfast? I wouldn’t mind having these dreamy creamy treats for all my meals! 😉 Bananas +cereal+ honey+greek yogurt+mil = these stunning popsicles? I am in for this super perfect morning meal. Have a wonderful weekend. 🙂
Annie
These look fresh and fantastic!! And so easy too. My husband has been on a major honey bunches of oats kick lately, I’m sure he’d flip for these!
Shelby @ Go Eat and Repeat
“Boy has a real name, and it’s not boy” You are too cute Cheyanne! I love your random facts! And popcorn is my go to dinner half the time too!
Shashi @ RunninSrilankan
Wait – why is this considered a “fun, easy breakfast treat for all the little kiddos out there” What about ME????? Whyowhy is it all about the kiddos – whyyyyyyyyy?!?!?!
I’m so joshing!
This is so wonderful – it’s like a frozen bowl of milk and yogurt and cereal! Loving the ideas of chunks of cereal in these! Brilliant idea Shy-Anne! 🙂
I love chewing gum too though I’m so trying to quit – and in the process of trying to quit I picked up chompin on ice! Grrrr! One bad habit for another!
And – you have a degree in psychology AND culinary arts? Now that there is a whole blog post in itself – did you get them at the same time? went back for one? I have a degree in Graphic design and Teaching – and am having the time of my life food blogging! Crazy eh!
Happy Thursday Cheyanne – hope your week and weekend are lovely! XOXO
Demeter | Beaming Baker
Ya know what? The day was going just fine… probably have even been described as mediocre. That is, until I saw these!!!! LOVE that you made breakfast popsicles!!! GF, you’re the best. If I had these to wake up to when I was a kid, I woulda been WAY more motivated to get up for school. Haha. Karrie butchered your name??!? NO way. I’m totally gonna have to rib her for it when we meet up. Haha.
Wait a minute, you have a thing for constantly chewing? Color me not surprised. I am your bestie, after all!! 😉 I love how you didn’t end up saying what Boy’s name actually is. Haha. That’s my Chey! <3 I love how beautiful and spectacular these popsicles look. I mean, those banana slices peeking out… just GORGEOUS. Can't wait to learn more about ya, chicka! Muah! Pinning, of course. xoxo
marcie
OK “Shy” — I like that name! These popsicles are so much fun and are a great way to get the kids to eat a good breakfast before they’re off to school. These are so loaded with goodness and are such a clever idea!
Kevin | Keviniscooking
OK, now that my internet is back up… where were we my virtual real life bestie?
I kinda figure Boy wasn’t just Boy, but I did know of a lady who named her son that, so you never know. My favorite Jolly Rancher has got to be the Cherry, then the Watermelon, you?
These look most appetizing and refreshing with this heat and I’m loving the textures in the popsicles. Have a great weekend out there and I sent you an email, too. Cheers Chey!
Gayle @ Pumpkin ‘N Spice
Oh this definitely looks like the perfect breakfast treat for kids AND adults! I love that you used cereal in the pops, Cheyanne! Bananas seem like the perfect combo for the frozen treat, too. Kids in my area started school last week, still can’t believe it! Pinning these beauties. Hope you have a wonderful weekend!
Amanda
What a great story about how you got your name. Mine is so boring in comparison. My parents decided there weren’t too many Amandas around, but then all other parents must have thought the same thing, because now there’s tons of us.
I can’t tell you how much I like he idea of cereal in my Popsicles. How unique and delicious!
Stacey @ The Sugar Coated Cotted
Thanks for sharing a little bit more about yourself. I love these popsicles and my daughter will go nuts for them especially when I tell her she can have them for breakfast! She’ll thinks its a joke, lol. Very cool idea and the bananas and cinnamon are so yummy. Take care.
Rachelle @ Beer Girl Cooks
Dude. I was just thinking this morning that I need to make some more popsicles before summer is over. I totally wish my mom had made me some breakfast popsicles. Maybe if I had some of these in my freezer I would want to get out of bed in the morning instead of hitting snooze 42.173 times. P.S. I’m proud to say that I’ve always pronounced your name correctly and I love the story behind it. Cheers! XOXO
Geraldine | Green Valley Kitchen
Oh my, Cheyanne – you should see how people butcher my name. They have no idea how to spell it or I have to repeat it over an over. Sometimes, if I call in an order to pick up, I just use my last name! And yes please to breakfast pops – what an inspired idea! A perfect weekend morning treat!
annie@ciaochowbambina.com
I imagine that kids all over the land who are treated to this pop for breakfast will head off to school happier than they ever have! Such a fun idea! And I really love the look of them! You know I love learning all the things about you! So so fun!! Have a great day, my friend! xoxo
Mary Ann | The Beach House Kitchen
Ok, I’m so glad we got all that cleared up Shy-Anne because I’ve been mispronouncing your name in my head for almost two years now!! Yikes!! This is absolutely the perfect back to school breakfast for the kiddos! It’s every kid’s dream, I’m sure, to hear…”come down and grab your popsicle for breakfast!” What an awesome mom you’re going to be!! Have a fabulous weekend Shy!!
Cathy | whatshouldimakefor.com
what a great idea to rally the troops for school (though i’m still in denial about it starting). serving these popsicles for breakfast will definitely make me mom of the year. thanks for the fab idea and inspiration Shy 😉
allie @ Through Her Looking Glass
Hey girl – I love this kind of schooling and I learned a ton. About you. Awesome. Especially the breathe right strips. I need to get me some of those. Not necessarily as a fashion statement, but oxygen is a good thing. Maybe you’ll get a real trend going up and down the coast!! Ha. Here’s my factoid. I wear ski goggles when I chop onions. Yep, I do it. Even when my kids’ friends are over. Mom (me) is an embarrassment. Ha ha. It doesn’t stop them all from chowing down on the food! Ha ha. Popsicles are awesome and what a great way to start the day. Cheers to the coming weekend and popsicles for breakfast. And YOU! And your Breathe-Right strips. XOXO
Marsha | Marsha’s Baking Addiction
Wow, these popsicles look incredibly delicious Cheyanne! I could totally devour these for breakfast! 😉
Jennifer @ Seasons and Suppers
Great popsicles! And I am addicted to gum, too – Juicy Fruit to be exact 🙂
Dawn @ Girl Heart Food
Now, I’m picturing you cooking away with your little Breathe Right nose strip on, lol 😀 And maybe singing that Banana song…hehehe. Popcorn for dinner…I’m down with that 😉 Don’t forget the butter! Gots to have ma butta!! Love all those fun facts! Want to hear more!
Love these breakfast pops. Perfect for those kiddos out there, but who am I kidding? I know that they would all be for moi 😀 And these might just be acceptable for dinner too. There’s lots of good things in there, so why not, right? Pinned, of course!
Have a great weekend, my friend. xoxo
Kathryn @ Family Food on the Table
I know two little munchkins about to go back to school who are going to LOVE these popsicles! Definitely getting the cool mom award – breakfast popsicles are gonna be a hit 🙂
Love the fun facts, too! I’m totally with you on popcorn = meal and that doesn’t surprise me one bit but gum and jolly ranchers – never would have guessed! Have a wonderful weekend girl! XO
Angie@Angie’s Recipes
Wonderful to know you more, Shy-Anne :-))
Ice pops for the breakfast…count me in, Cheyanne. I love Greek yoghurt, actually just bought 2 kg of plain one :-))
Miriam – londonkitchendiaries.com
Popsicles for breakfast – yessss, please! Pinned! Lovely to learn more about you and how to pronounce your name. You should definitely keep it for life 🙂 I think I will keep mine too. Love your degree choices – I have degree in Psychology as well. Studying culinary arts must have been great!