This post may include affiliate links. Thank you for your support.
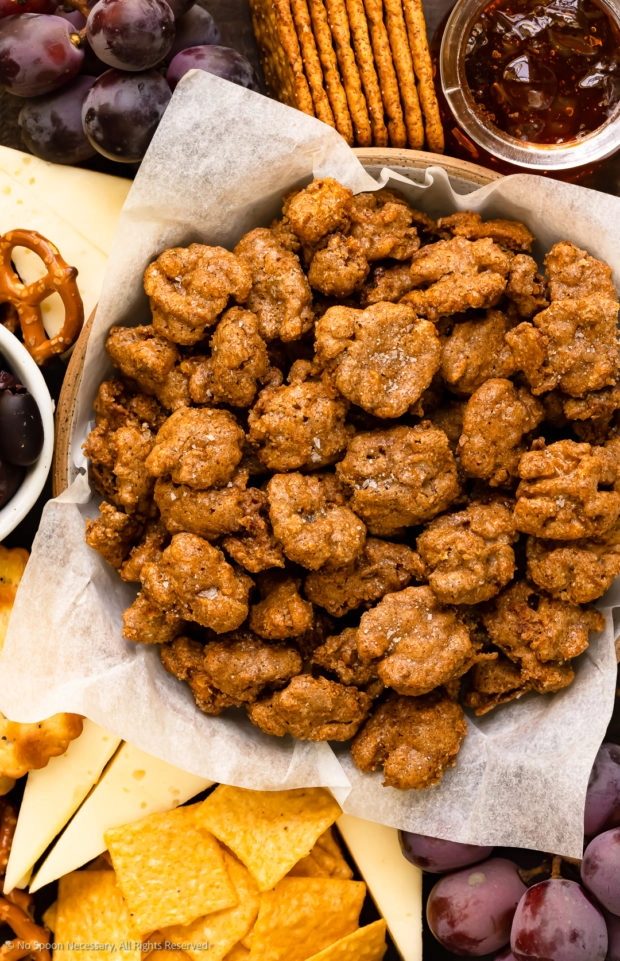
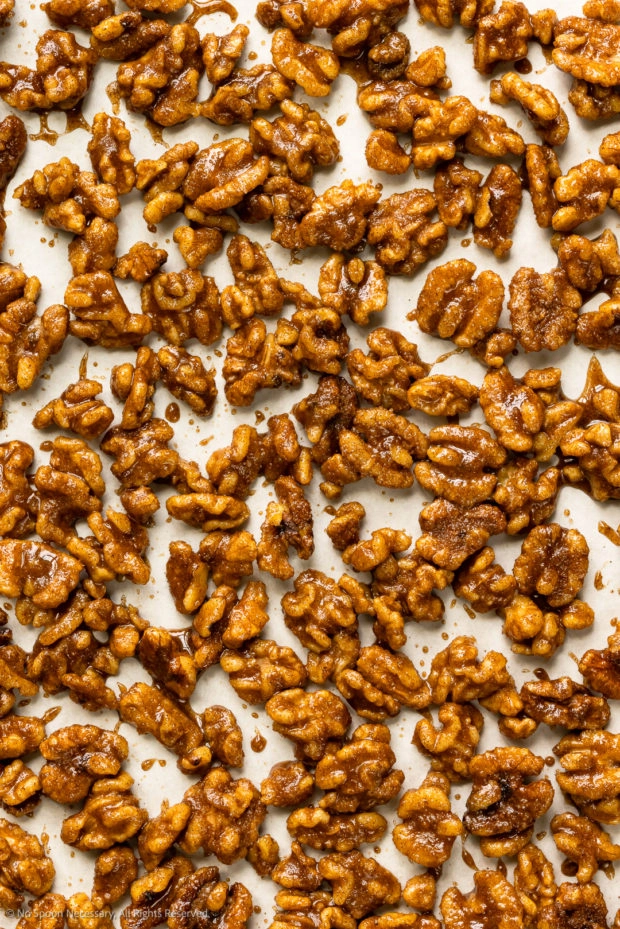
Once you’ve tried these candied walnuts, you’ll want to have a batch handy at all times! Featuring maple candied walnuts with brown sugar, warming cinnamon, inviting vanilla, and a touch of salt, this candy walnuts recipe is so easy to make – no constant stirring over the stove! These sweet, crunchy flavored nuts taste good on just about anything – add them to salads, charcuterie boards, pancakes, parfaits, waffles, and more!
Update: This post was originally published in July 2014. I’ve updated the post below to include more information about candying walnuts at home. Plus, I added step-by-step photos to show you just how easy this candy walnuts recipe is to make!
Table of Contents
About This Candied Walnuts Recipe
I originally included the recipe for these delectable candied walnuts in my Blackened Scallop Salad post. However, I removed that portion of the recipe, because I felt they deserved their own dedicated post!
These are easy-peasy to make, however, they do require you to move a little quickly at the end. Simply toss shelled walnut pieces (or any nut, really) in flavored egg whites and cinnamon sugar, then pop them in the oven to bake! The candy-coating will caramelize and harden, leaving you with the most incredible maple candied walnuts.
Need a hand? Grab a friend, spouse, neighbor, frenemy, your maintenance man, or a stranger off the street (you can offer him your candy… walnuts that is) and have them help you. Although, if you do get help, I highly recommend you double the batch. Or else these will only see the light of day for approximately .2 nanoseconds.
Why you’ll love this easy candied walnuts recipe
- Simple ingredients! In fact, there’s a good chance you already have everything you need in your kitchen.
- Make as much as you need! Double to have extra on hand, or make several pans for holidays and homemade gifts.
- Use your favorite nuts! While this is clearly a candied walnuts recipe, it works just as well with almonds, cashews, peanuts, and pecans.
- Just 10 minutes of prep! The rest of the time is spent in the oven. You’ll need to give the candied walnuts a stir, then transfer them to cooling racks once cooked.
What are candied walnuts?
They are exactly what they sound like: walnuts that have been candied! Each nut is coated in an egg white mixture and cinnamon sugar, which hardens into a magical, sweet coating when baked.
Even better, making these easy candied walnuts at home is so much less expensive than buying them from the store. And, in my opinion, they taste better too.
Today, we’re making maple candied walnuts by adding a little bit of pure maple syrup to the egg white mixture. The natural flavor of the syrup really comes through, making these tiny treasures extra sweet!
Ingredients needed for maple candied walnuts
There are dozens and dozens of recipes for candied walnuts out there, but the addition of maple syrup is what makes it so special!
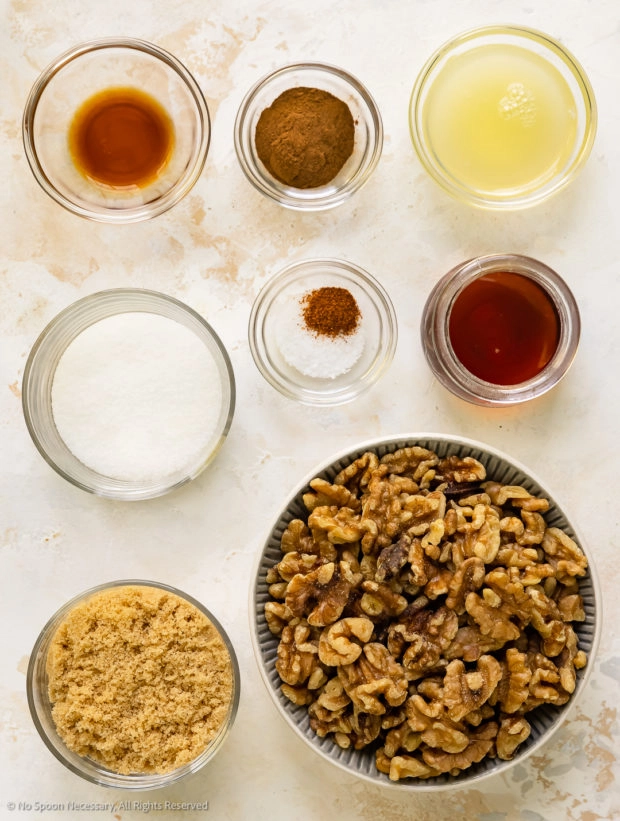
- Egg Whites: Start here! It’s easier to separate the yolk from the whites when eggs are cold and straight from the fridge. However, they should be room temperature when it’s time to whip. Separate the whites (don’t let even a drop of yolk in the bowl!) and set them aside while you preheat the oven and prep the other ingredients. For an egg-free replacement, use an equal amount of aquafaba (the liquid found in canned chickpeas).
- Raw Walnuts: You’ll want to use halves and/or pieces for this recipe, and be sure they are unsalted. Find these most often in the baking aisle. You can also use other nuts like pecans, almonds, peanuts, and even cashew (smaller nuts can be left whole).
- Maple Syrup: The (second) star of the show! Don’t try to substitute with fake pancake syrup — they won’t come out the same.
- Vanilla Extract: Quality really makes a difference in flavor, so use the highest quality extract you can buy.
- Sugar: Make these candied walnuts with brown sugar and granulated sugar for an extra boost of caramel flavor.
- Ground Cinnamon: Adds warmth and aroma to the candy coating.
- Spicy Seasoning: Use ground cayenne or chipotle chili powder to add just a touch of heat to your candied walnuts. You can leave it out if you prefer, but I promise it won’t make them spicy!
- Salt: Kosher salt gets mixed with the sugar and spice coating to balance the sweetness. You can also sprinkle flaky sea salt over the nuts as they cool if you’d like.
How to make candied walnuts with brown sugar?
Prep everything in just 10 minutes, then get them in the oven! You’ll only need to stir once before taking them out to cool, leaving you plenty of time to tackle something else.
- Preheat oven to 300-degrees F (conventional) or 275-degrees F (convectional).
Line a large baking sheet with parchment paper and grease the paper.
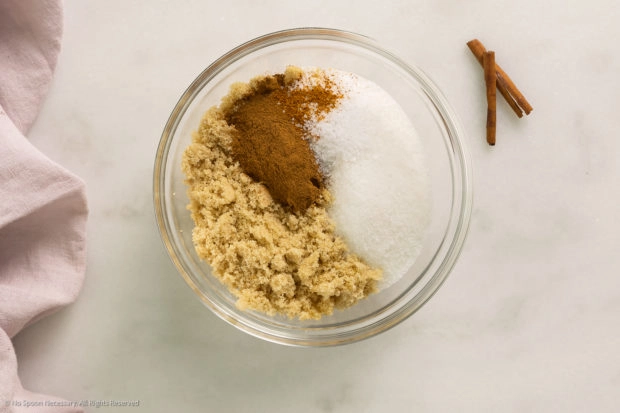
- Mix cinnamon sugar: In a small bowl, add both sugars, cinnamon, salt, and cayenne. Whisk together and then set aside.
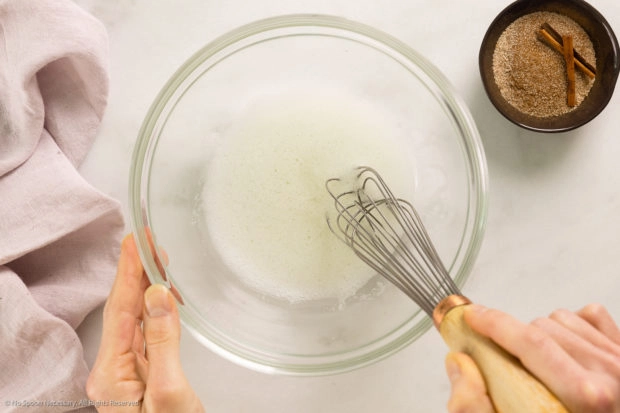
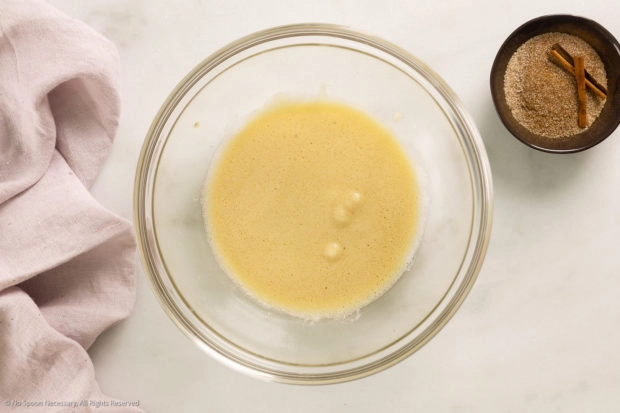
- Whisk egg white: In a large bowl, vigorously whisk the egg white until frothy.
- Add flavor: Add the maple syrup and vanilla to the bowl. Whisk again until frothy.
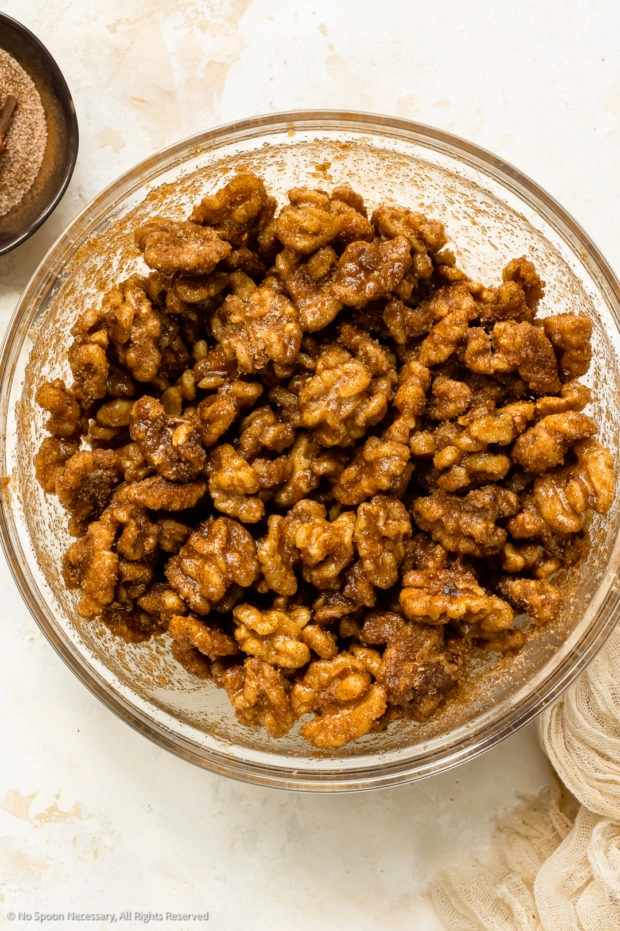
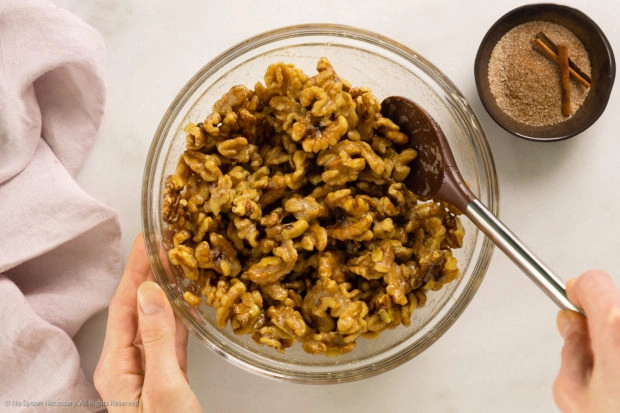
- Add nuts: Add the nuts to the bowl and gently toss until the walnuts are evenly coated.
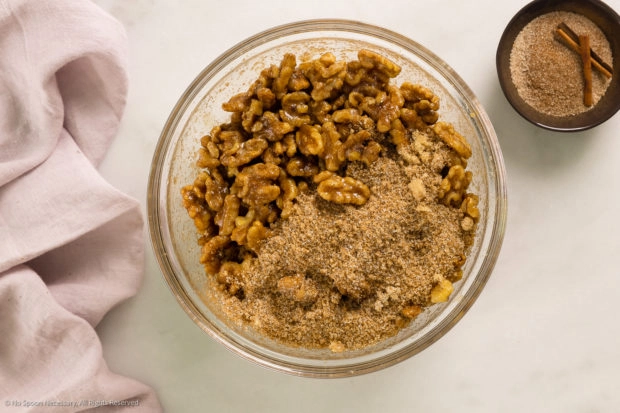
- Add cinnamon sugar: Sprinkle the cinnamon sugar over the nuts. Gently toss until evenly and thoroughly coated.
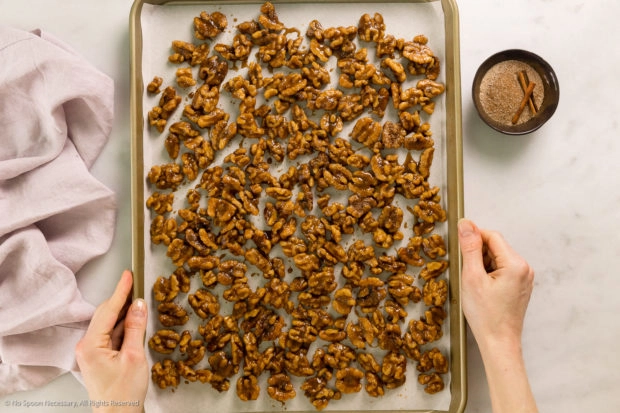
- Arrange on pan: Transfer the nuts to the prepared baking sheet, arranging them in an even, single layer.
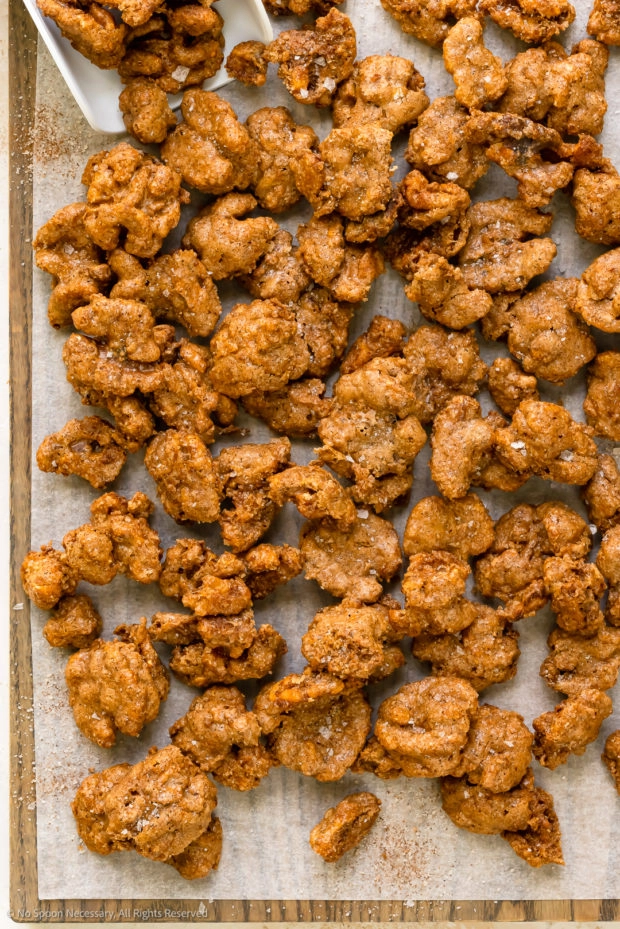
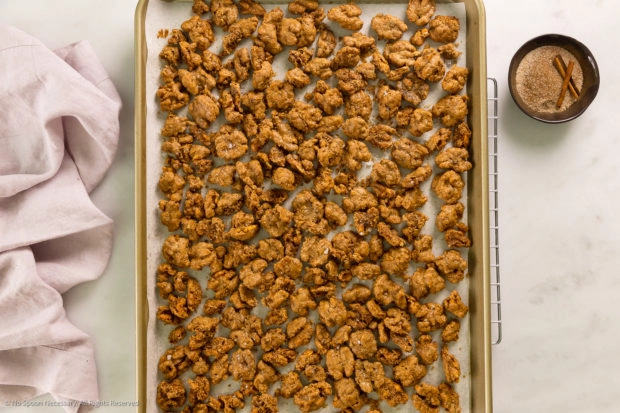
- Bake. Stir. Bake: Place nuts in the oven on the middle shelf and bake for 20 minutes. Remove nuts and use a flat spatula to lift the nuts from the pan and gently stir. Return to the oven and bake for an additional 16-20 minutes, or until nuts are very fragrant and mostly dry to the touch. (Note: The candy-coating will continue to harden as the nuts cool!)
- Cool: Transfer the baking sheet to a wire rack and sprinkle with flaky sea salt and sanding sugar if using. Let the candied nuts cool to room temperature.
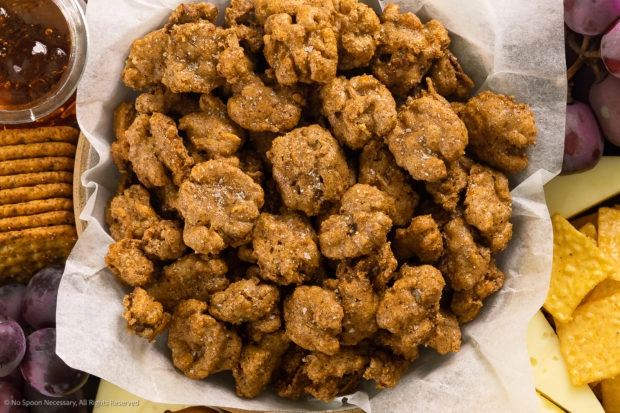
- Serve or Store! Serve and enjoy immediately with crudité, cheese boards, salads, pancakes, waffles and more! Or store in an airtight container at room temperature for up to 2 weeks.
Tips for making the best candied walnuts
- Use room temperature egg whites. They will whip up so much better and faster if you let them warm on the counter after separating. And be sure there isn’t any trace of yolk in the bowl, or they won’t whip up at all!
- Stir halfway. About halfway through baking, use a spatula to thoroughly stir the nuts. This help break apart any clumps, prevents them from sticking to the pan, and ensures that they are crispy on all sides.
- Don’t overcook! Pull the candy coated walnuts from the oven as soon as they are browned, fragrant, and almost dry. The coating will continue to harden as they cool. If you leave them in until they are completely dry, they’ll end up hard as rocks and likely burnt.
Frequently Asked Questions
Why are my candied walnuts sticky?
One of two things could cause this: not whisking the egg whites long enough or pulling them from the oven too soon.
Make sure the whites are nice and frothy before adding the maple syrup and vanilla. Then whisk again until frothy before adding the nuts. Doing this makes it easier to coat candied walnuts with brown sugar and spices but keeps the coating crispy instead of rock hard.
It’s also important to bake the nuts in a single layer so they cook on all sides. If they still seem pretty wet when the timer goes off, add another minute or two to be safe.
What kind of maple syrup should you use?
To really bring out that caramel flavor, opt for a bottle labeled Amber or Dark. Golden or Light varieties will also work fine — the flavor just won’t be as deep and developed.
Serving Suggestions
There are so many uses for this candied walnuts recipe! Trust me, you’ll want to keep some on hand for every occasion.
- Munch on a few (or more!) as an easy snack.
- Sprinkle over breakfast favorites like French toast, pancakes, cinnamon sugar toast, or waffles.
- Swap the bread croutons out and add them to salads, like this butternut salad, for extra sweetness and texture.
- Swap marshmallows for these on top of sweet potato casserole (or use both!).
- Mix them into your favorite trail mix or white trash recipes to make it extra tasty.
- Include on a charcuterie board with crackers, fruit, and your favorite cheese. Try my recipe for brie en croute or camembert in oven and macerating fruits which are especially perfect for the holidays.
- Add them to a brunch board with brown sugar donuts with pecans, banana walnut muffins, cinnamon sugar donut muffins, and mimosa cocktail.
- Crush them up and sprinkle them as a garnish on your favorite desserts, like snickerdoodle cupcakes, pumpkin pie cakes, maple donuts, and even cream cheese strawberry cakes.
Storing maple candied walnuts
Once the nuts are completely cooled to room temperature, transfer them to an airtight container. They are best kept in the pantry for easy snacking, but you can freeze them as well if needed.
How long will candied walnuts keep?
Kept at room temperature, maple candied walnuts will last for up to 2 weeks.
You can also freeze them for up to 2 months. Just be sure to thaw them in a single layer, or they may become soft and sticky.
Sweet and crunchy with a touch of heat and salt, these easy candied walnuts are sure to become a pantry staple! Whether you include them in a salad, side dish, or entrée, or if you just munch on a handful for an afternoon snack, I promise you’ll never crave store-bought versions again!
Until next time, cheers!
Craving MORE? Follow all the deliciousness on Facebook, Pinterest and Ins
More homemade candies!
How to make candied walnuts with brown sugar👇
Candied Nuts
Equipment
- Non-Stick Cooking Spray
- Large Baking Sheet
Ingredients
- 1/2 Cup Light Brown Sugar - packed
- 1/4 Cup White Granulated Sugar - level
- 1 TBS Ground Cinnamon
- 1 tsp Kosher Salt
- 1/8 tsp Ground Cayenne or Chipotle Chili Powder
- 1 large Egg White (SEE NOTES) (30 grams)
- 1 tsp Pure Vanilla Extract
- 3 TB Pure Maple Syrup
- 12 oz Raw Walnut Pieces and halves - or 3 1/2 cups Nuts of Choice! (SEE NOTES)
Instructions
- Preheat oven to 300-degrees F (conventional) or 275-degrees F (convectional).Line a large baking sheet with parchment paper and grease the paper with non-stick cooking spray.
- Mix cinnamon sugar: In a small bowl, add both sugars, cinnamon, salt and cayenne. Whisk, breaking up any large clumps of sugar, until thoroughly combined. Set aside.
- Whisk egg white: In a large bowl, vigorously whisk the egg white until frothy, about 1-2 minutes.
- Add flavor: Add the maple syrup and vanilla to the bowl. Whisk again until frothy.
- Add nuts: Add the nuts to the bowl and gently toss until the walnuts are evenly coated.
- Add cinnamon sugar: Sprinkle the cinnamon sugar over the nuts. Gently toss until evenly and thoroughly coated.
- Arrange on pan: Transfer the nuts to the prepared baking sheet, arranging them in an even, single layer.
- Bake. Stir. Bake: Place nuts in the oven on the middle shelf and bake for 20 minutes. Remove nuts and use a flat spatula to lift the nuts off the pan and gently stir. Return to the oven and bake for an additional 16-20 minutes, or until nuts are very fragrant and mostly dry to the touch. (Note: The candy-coating will continue to harden as the nuts cool!)
- Cool: Transfer the baking sheet to a wire rack and sprinkle with flaky sea salt and sanding sugar if using. Let the candied nuts cool to room temperature.
- Serve or Store! Serve and enjoy immediately with crudité, cheese boards, salads, pancakes, waffles and more! Or store in an airtight container at room temperature for up to 2 weeks.
Notes
- Egg White: Egg temperature matters! It’s easiest to cleanly separate egg yolks from whites when they are refrigerator cold. However, your egg whites will whip up easier at room temperature. So, separate your white straight from the fridge and set it aside for later.
- Tip: It’s important there isn’t any egg yolk in your white or the mixture won’t properly froth-up!
- Nuts: You can swap the walnuts for any raw nuts (whole or halves) you love. I’ve used cashews, peanuts (unsalted), pecans and almonds with delicious success!
Nutrition
Did you make this recipe?
Mention @nospoonnecessary on Instagram and tag it #nospoonnecessary!
©No Spoon Necessary. All images and content are under copyright protection. Please do not use any images without prior permission. Please do not publish this recipe without prior consent. If you want to reference this recipe, please do so by linking directly to this post.


angie
They are a HUGE favourite in our house!
Eric Linthicum
Looks awesome