This post may include affiliate links. Thank you for your support.
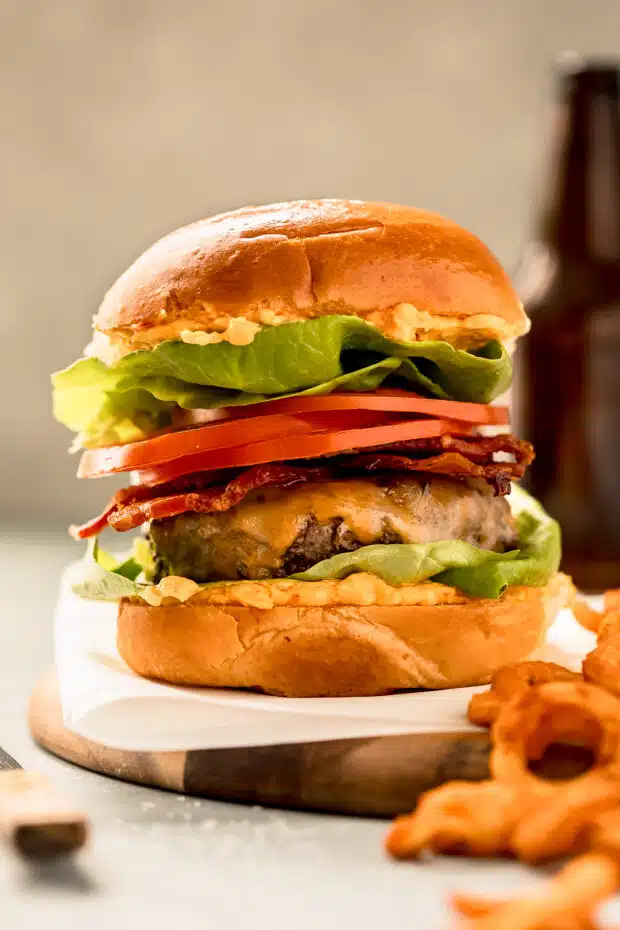
Learn how to grind your own burger meat! Making your own ground beef blend at home is incredibly simple and will take your hamburgers (meatball, sausages, and more) to the next level of delicious flavor! Easy tips and tricks for the best burger patties included! Plus, there’s also a different method for those of you who don’t own a grinder!
“Tried the grind burger recipe and it was delicious. First time to grind meat and it was an awesome exp. Thank you for the meat suggests. Juiciest burgers ever. Wife and kids loved them. This probably will become a staple in our house. No more store bought ground meat.”
Brian
Update: This post was originally published in September 2014. I took new photos and updated the post below to include more information about how to grind your own meat!
Why purchase pre-ground, overly packed burger meat, which will surely lead to a dried out burger, when you can grind your own? AND you can give it the all-star, V.I.P, ritzy treatment complete with love and a delicate touch?
Grinding your own hamburger meat is an extraordinarily simple process and with grilling season right around the corner, you should totally to be DIY-ing your burgers!
Grinding your own meat only requires a knife, cutting board, ice cubes, two mixing bowls, meat grinder (totally worth the few bucks it costs for the attachment if you already have a stand mixer) or a food processor, and a few minutes of your time. The pay off, hands down, exceeds the minuscule amount of effort.
Ever wonder why your favorite restaurant has an unbelievably juicy burger you just cannot seem to replicate at home? Especially, when you took the time to purchase all the special toppings and make the copy-cat sauces? Yet the burger as a whole is just missing a little something?
What your burger is missing is homemade ground beef! It’s the secret ingredient to an epic burger!
Table of Contents
Why grind your own beef?
When you grind your own burger meat, you know where the beef is coming from, plus you are in control of the fat content and can customize the cuts of beef used. While these may seem like small factors, they make all the difference in the world. Basically, grinding your own beef ensures the freshest meat possible with the perfect fat ratio!
Another added bonus, your wallet will thank you! Because, it is a heck of a lot cheaper to grind your own meat versus purchasing prepackaged ground beef or beef patties.
Oh, and how could I forget, if you grind it yourself you can also safely enjoy your burger cooked rare. High five!
Essentially, grinding your own beef (or chicken, or pork) takes your average ho-hum burger and transforms it into something spectacular and next level!
Be prepared for people to ask you “what is your secret ingredient”? When you tell them all you did was take a few minutes to grind the meat yourself, they might not believe something that simple could possibly make THAT much of a difference. But trust me, it does!!
The simplicity of achieving an outrageously good burger is literally mind blowing. Once you grind your own hamburger meat, you will never be picking up a package of the prepared beef ever again. Mark my words!
Expert tips for grinding your own meat for burgers
But, before you go running off to use your meat grinder, or ordering one online, let’s go over a few very imperative rules to follow.
- Make sure your grinder is cold. You want your grinder attachment (all of it: shaft, tube, plate, die and screw) to be extremely COLD. You need to place it in the freezer at LEAST 1 hour before you plan on using it. I will put mine in the freezer the night before I am going to use it, or sometimes well before that, if I know I want to use it sometime during the week to come.
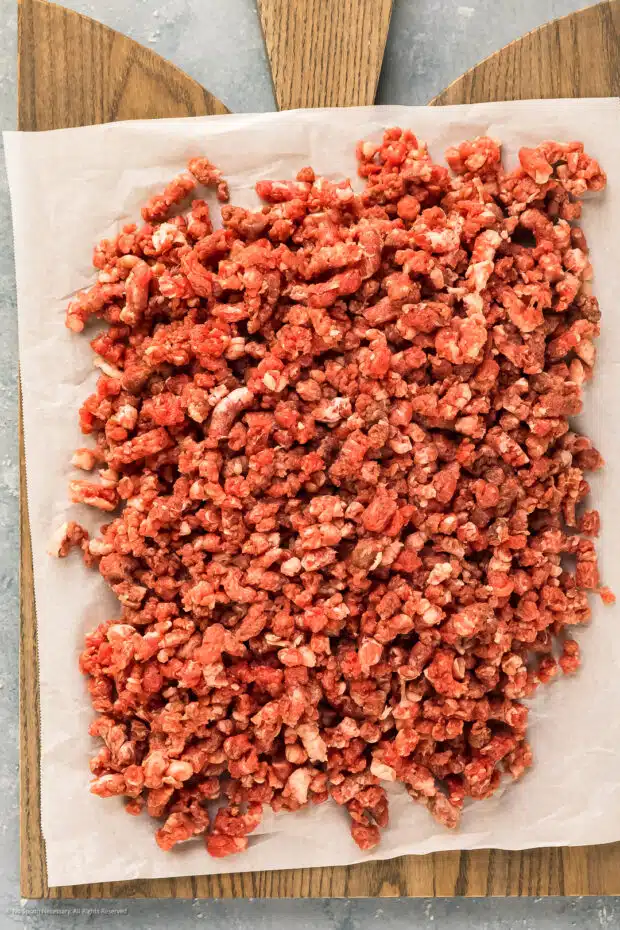
- Make sure your meat is cold. After you cut the meat into 1’’ cubes, spread them evenly on a baking sheet and place in the freezer until the meat starts to get firm, but not frozen throughout, about 20-30 minutes. (Do you see the theme here? Cold = a must! )
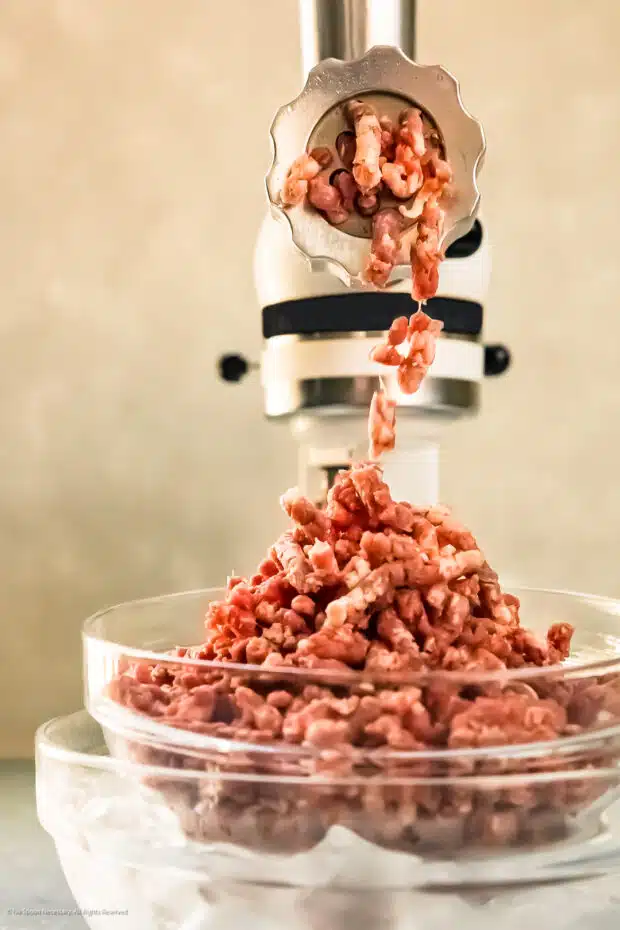
- Make sure you have a cold bowl to catch the ground beef. To ensure your meat remains out of the temperature “danger zone” while you are grinding, fill a large mixing bowl with ice and a little water. Place another large mixing bowl inside the bowl of ice. Place this underneath the attachment to catch the meat as it falls from the grinder. Also, you will want to work quickly here, so don’t plan on taking any business calls or dilly-dally-ing about. However, I understand life happens. Worst case scenario, if your meat or grinder become too warm, simply place the meat and attachment back into the freezer for another 10-15 minutes. Then proceed to grind the meat again.
- Run the meat through the grinder twice. Running the cubes of steak through the meat grinder twice, first with a coarser disk and then a slightly finer disk, will give your burger blend the perfect texture, especially if you are making smashed burgers or burgers on a griddle!
- Shape burger patties gently. When forming your burgers DO NOT compact the patties too tightly, use a delicate touch. And, make sure you make a small dimple, using your finger or thumb, in the center of each burger to prevent burger bulge.
- Keep your burger patties cold. To be on the safe side, I like to transfer my formed burgers onto a sheet pan and place them in the freezer for 10 minutes.
What is the best meat to grind for hamburgers?
While there are endless blends of different cuts of beef to make your own burger, all great hamburgers have a few things in common – texture, flavor and fat.
Regardless of what meat you choose to use in your burger blend, make sure you have 25% to 30% fat. When tailoring your burgers to taste, keep in mind that the 25% to 30% fat percentage applies to burgers being cooked from medium-rare to medium, respectively. Burgers being cooked to medium-well will need more fat (about 40%), while a rare burger will need less fat (20%).
The best cuts of beef for burgers
- Chuck steak. Chuck is the most commonly used cut of beef in burger blends. Marbled throughout and well-balanced in flavor with a decent lean-to-fat ratio, chuck steak is generally the primary cut used in burger blends and is supplemented with one or two other cuts of meat.
- Sirloin or Tri-Tip. Sirloin is a relatively lean cut of steak, but has a good amount of flavor. You will need to supplement sirloin with another cut of meat that has a higher fat content, such as chuck, brisket, or short rib.
- Round. Round is extremely lean and very cheap. If you are looking to adjust your protein-to-fat ratio or lean out your burger, round is a great choice.
- Brisket. With a distinct beefy flavor and high fat content, adding brisket to your burger will yield a beautifully rich burger.
- Boneless Short Rib. With a high fat content and rich flavor, adding short rib to your burger blend will produce an incredibly moist burger.
- Plate (Skirt and Hanger Steak). A tougher cut of beef with a tart and tangy flavor, this cut is a good choice if you feel like getting a little fancy with your burger.
How to make your own burger meat without a grinder?
Don’t have a meat grinder? That’s totally okay! There are two ways to make ground beef without a meat grinder:
- Food processor. To grind your own burger meat using a food processor, you still need to cube the beef and place it in the freezer for 15-30 minutes before proceeding. Then, working in batches, pulse the meat until it is finely chopped, about 20 pulses. Transfer each batch of pulsed meat into the mixing bowl inserted into the ice bowl.
- Hand chop. To hand chop your own burger meat, you still need to the meat to be nice and cold, so place your steaks in the freezer for 15 minutes before proceeding. Use a cleaver to chop the meat as finely or coarsely as desired.
How to make burger meat patties?
Forming ground beef into patties is simple and easy to do! For perfect burger patties, follow the steps below!
Before you begin form your hamburger patties, make sure your ground beef is as cold as possible and has been properly refrigerated. As well, make sure you are working on a clean work surface lined with a large sheet of wax paper (to help prevent the meat from sticking to your surface).
- Divide the ground beef. When dividing the beef, keep in mind that the higher the fat content of the mixture, the more the patties will shrink as they cook. The exact size of your patties should be determined by the size of the bun you will be using. To be precise, I like to use a scale. Raw burger patties should typically range from 4 ounces (for a quarter pounder) to 6 ounces. Try to divide the meat into even sized portions, this will ensure every burger is done cooking at the same time.
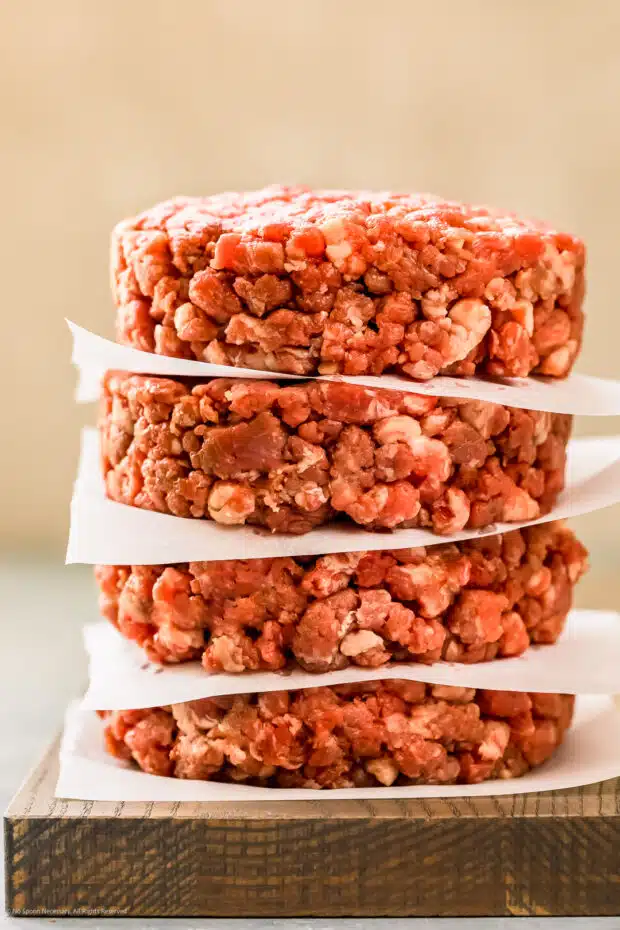
- Form meat into a loose patty. Once you have the meat divided into useable portions, use your hands to gently form the ground beef into a very loose patty. If you have a cookie cutter, even better! For exact precision, fill a cookie cutter loosely with ground beef.
- Shape the patty. Take the loosely formed patty of ground meat and very gently shape it into a burger patty using your hands. Take care to not overwork the meat. You want a solid disk of meat that is compact, but not too tightly compacted.
- Make an indentation. Use your thumb to make a small indentation or well in the center of your patty. Since the burger patties will swell while they cook, the indentation will ensure that the burger patty holds its proper shape once cooked.
- Refrigerate. Transfer the shaped burger patties to the refrigerator and allow to chill for 30 minutes before using! Cold patties will hold their shape and stay together better while cooking.
How to make burger meat stick together?
There is nothing more frustrating than a burger patty breaking apart and falling between the grates of your grill! Follow these tips to help your burger meat stick together.
- Keep your burger meat cold. The colder your burger patties are, the more likely they are to hold their shape and stay together. After forming your ground beef into patties, place the burger patties onto a sheet pan lined with wax paper and place them into the refrigerator for 30 minutes before using.
- Handle your raw patties as little as possible. When forming your ground beef into patties, make sure you use a gentle touch and avoid overworking the meat.
- Avoid adding liquid to the raw patties. Liquid flavoring agents, such as Worcestershire sauce or marinades will cause the burger patties to be loose and fall apart. If you want to add a sauce or liquid flavoring, do so once the burger is done cooking.
- Do not over-flip your burger! When the burger meat is cold and placed on the grill it will hold its shape well. As well, when it’s cooked, the burger will be solid. It is the in between stage that makes the burger susceptible to falling apart. This is why it is essential you fully cook the bottom of your burger before flipping it over! A burger fully cooked on the bottom will help the burger hold together when flipping!
- Add an egg, but only if absolutely necessary. While I personally do not advocate adding egg to your raw burger patties, you can if needed. To me, the addition of an egg takes a ground beef patty from a burger to a mini meatloaf, but if you are paranoid the burger is going to fall apart, adding an egg as a binding agent will make the ground beef stickier.

Storing ground beef
How long is burger meat good in the fridge?
Ground beef should be stored in an airtight, zip-closure bag. Properly stored, burger meat will keep for up to 2 days in the refrigerator.
Can you freeze home ground meat?
You can absolutely freeze ground beef as well as formed ground beef burger patties for longer storage!
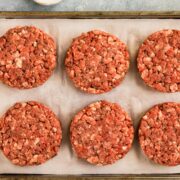
To freeze burger patties, place the formed patties in a single layer on a wax paper lined sheet pan. Transfer the sheet pan to the freezer and allow the patties to freeze solid before transferring to a zip-closure storage bag. Freezing them solid in a single layer will help them keep their shape.
Once fully frozen, stack the patties with a square of parchment paper layered in between to prevent sticking. Transfer the stacked patties to a heavy-duty, zip-closure bag and remove as much air as possible when sealing to prevent freezer burn.
To freeze loose ground burger meat, portion it out into useable portions first (half a pound, 1 pound or 2 pounds), and then transfer to a heavy-duty zip-closure bag.
Properly stored, burger meat and burger patties will keep in the freezer for up to 3-4 months. Make sure you label your bags with the date they were placed in the freezer so you can keep track of storage times.
How to thaw burger meat?
The best way to safely thaw ground beef or burger patties is to place the meat in the refrigerator and allow it to defrost overnight.
To defrost burger meat more rapidly, you can defrost it using cold water. To do so, keep the meat in an airtight, zip-closure bag and submerge under COLD water. Be sure to change the water every 25-30 minutes and use the meat immediately.
While you can use a microwave to defrost the ground beef, I do not recommend it. Using a microwave will cause some areas of the raw beef to cook, which results in unappetizing, tough cooked ground beef.
Using your ground beef
How and when to season burger meat?
You should season your burger meat after forming it into patties and as close to the actual cooking time as possible.
Since salt draws the moisture out of meat it will affect the texture of the cooked burger. Seasoning your burger meat too early will result in a tougher, denser burger patty. So, make sure you preheat your grill first and season the patties right before you cook them!
How much burger meat per person?
When making your own patties, you can assume between 4 to 6 ounces of ground beef per patty.
While there are a number of factors to consider when feeding a crown, such as – age and gender of your guests, the number of sides at your party and so on – you can safely assume each person will consume 1 to 1.5 burgers.
To be on the easy and safe side when estimating how much burger meat per person, assume you are making 6 ounce burgers and each person will consume 1 burger:
- 4 people = 24 ounces (1 ½ pound)
- 6 people = 36 ounces (2 ¼ pounds)
- 8 people = 48 ounces (3 pounds)
- 10 people = 60 ounces (3 ¾ pounds)
- 12 people = 68 ounces (4 ¼ pounds)
Recipes using ground meat
- Chinese Beef Stir Fry
- Yaki Udon Stir Fry
- Chinese Chicken with Stir Fry Vegetables (Swap out the ground chicken for ground meat instead.)
- Honey Lemon Garlic Chicken Stir-Fry (See the note above.)
- Dirty Rice Cajun (Swap out the pork and use your burger grind instead.)
- Ground Meatball Bake (Swap out the chicken and use homemade ground beef for the most unbelievably delish meatballs.)
So, what are you waiting for?! Let’s do the dang thing, grind some beef and make the best burgers EVER!
Until next week, friends, cheers – to bodacious burgers!
Cheyanne
Craving MORE? Follow all the deliciousness on Facebook, Pinterest and Instagram!
More burger recipes!
How To Grind Your Own Burger Meat
Equipment
- 1 Stand Mixer (SEE NOTES)
- 1 Food Grinder Attachment (SEE NOTES)
Ingredients
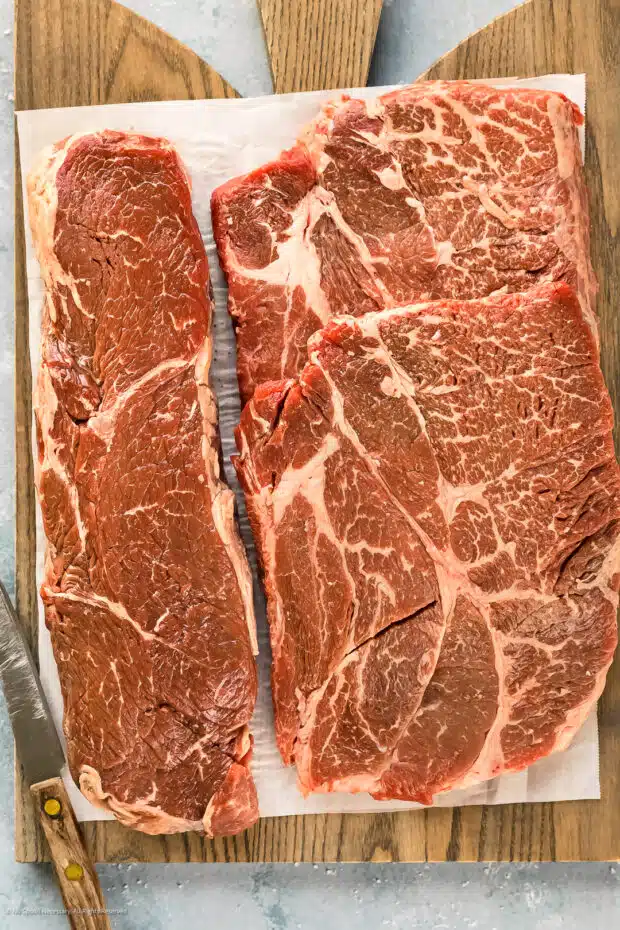
- 2.5 Pounds Boneless Chuck Steak – COLD (See Notes)
- .75 Pounds Top Sirloin Steak – COLD (See Notes)
Instructions
- Prepare the grinder attachment: Place the meat grinder attachment in the freezer at least 1 hour (or up to overnight) in advance of using. I have found the 3 hour mark to be perfect. Line a baking sheet with freezer paper or plastic wrap for easy clean up. (SEE NOTES)
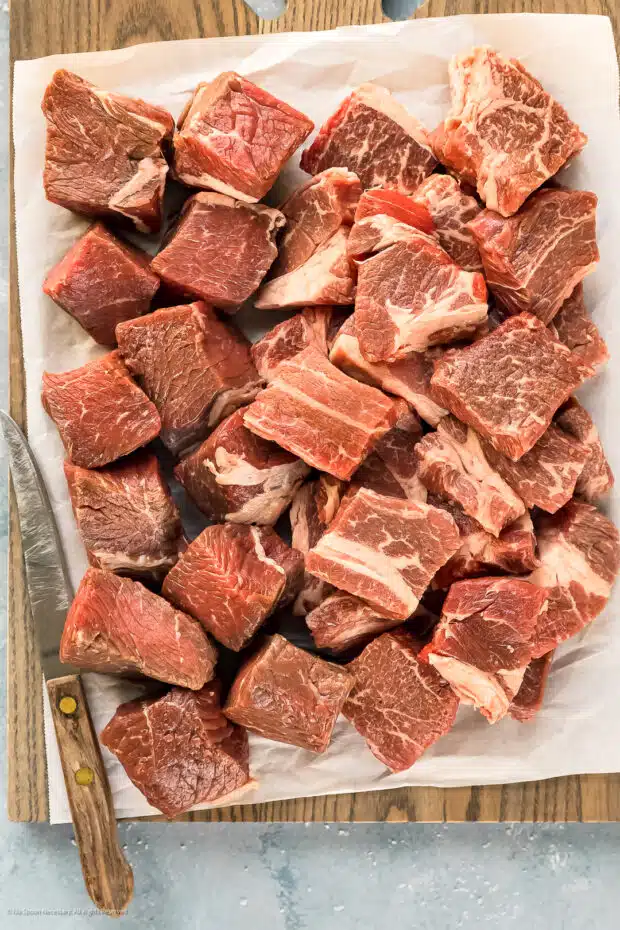
- Cut the steaks into cubes: Cut the steaks into roughly 1 ½’’ cubes. Spread the cubes of beef in an evenly distributed, single layer on the parchment-lined baking sheet. Place the tray of beef in the freezer for 20-30 minutes. (SEE NOTES)
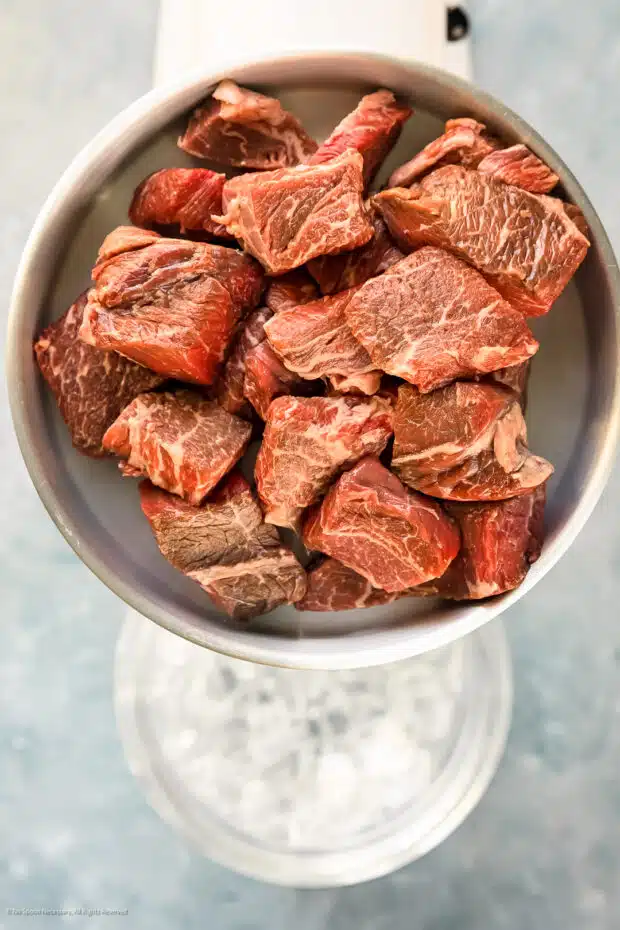
- While the beef is chilling, prepare a bowl to hold the ground beef: Fill a large bowl with ice and add a little bit of water. Insert a smaller bowl on top of the ice to catch the meat as it comes out of the grinder. (Why? THIS STEP IS IMPERATIVE for food safety. You need to keep your meat cold!)
- Attach the meat grinder, affixed with 3/8’’ plate, to your stand mixer. (If you have a different grinder, follow their provided instructions).
- Grind steaks: Grind meat by running it once through the grinder, with your make shift ‘double meat chiller’ placed underneath to catch your ground beef. Do not separate different cuts of beef when grinding, you want them mixed together.
- OPTIONAL: Switch to the ¼’’ plate and run the meat again through grinder attachment once. (I highly recommend running the meat through the grinder twice if you are making smashed burgers! For a regular burger this step is completely optional and depends on the texture of the burger desired.)
- Chill ground beef before using: Cover the bowl of ground beef and place it in the refrigerator for at least 30 minutes to chill or store it until you are ready to use. The ground beef will keep in the refrigerator for 2 days or you can transfer ground beef to a freezer bag and store in the freezer for up to 3 months.
Notes
1. Follow Steps 2 and 3, you do not need to place the bowl of the food processor in the freezer.
2. Working in batches, pulse cubes of steak until finely chopped, about 20 pulses. After each batch, transfer the chopped meat to the ‘double meat chiller’. RECIPE NOTES:
- Meat: You aren’t limited to beef steaks here! You can choose your own ground meat adventure and use different cuts. Chicken, turkey, lamb (shoulder in particular), and pork (shoulder in particular) all grind well. Make sure you remove any skin before proceeding.
- COLD: You’ll notice a theme here. Make sure everything you use is cold – cold meat, cold grinding plate, chilled bowl, etc. Not only is firm, cold meat easier to work with, it’s also safer as far as food safety goes. Just don’t leave the cubed meat in the freezer longer than 30 minutes, you want cold meat, not frozen meat.
- Steaks: There is no way to gauge the beef-to-fat ratio other than eye-balling your mix. If you want to be precise, ask your butcher for help. But, just look at the fat in your steaks. For a juicy, flavorful burger, look for about 25 percent fat. For a leaner burger, look for leaner, less fatty steaks.
- Steaks: If you want an even juicier burger, ask your butcher if he has beef trimmings available and add those to the mix!
- Grinding Steaks: When grinding the cubes of steak, do NOT separate the cuts of beef! You want to grind the steaks together.
- Forming burgers: When forming the burger meat into patties, take care to NOT overwork the meat! And, do NOT pack the meat together, you want to use a light touch! The slight separation of the meat will allow the juices to run through the patty to create a super juicy and moist burger!
- Indent burger patties: After you have formed the beef into patties, take your thumb and make a small indentation or well in the center of your patty. Since the burger patties will swell while they cook, the indentation will ensure that the burger patty holds its proper shape once cooked.
- Seasoning burgers: For the most flavorful burger, make sure you season the patties liberally on both sides with kosher salt and freshly ground black pepper.
- When grilling your burgers: DO NOT use a spatula to press down on the burger!! If you have used your finger to create an indentation, there will be no need to press down. Flattening the burger with a spatula causes the patty to lose all its moisture and juices resulting in a dry burger.
Nutrition
Did you make this recipe?
Mention @nospoonnecessary on Instagram and tag it #nospoonnecessary!
©No Spoon Necessary. All images and content are copyright protected. Please do not use any images without prior permission. Please do not republish this recipe without prior consent. If you want to reference this recipe, please do so by linking directly to this post.
Barbara Lighthill
Your recipe on grinding my own Sirloin Burger gave me the confidence to break out my manual meat grinder and try it myself. Wasn’t nearly as difficult as I thought. Now a question. My grinder says after washing the unit to oil it with food grade oil to prevent rust. Is cooking oil sufficient or is there a special food grade oil that I should use instead. I’m ready to grind my own ground beef and ditch the store bought. Thank you so much for your wonderful instructions.
Chenica
This is an exceptionally thorough article, thank you!
Cheyanne
Hi Chenica,
I’m thrilled to hear you found this article helpful! Thank you for leaving a review. Cheers and warm wishes for a wonderful weekend! 🙂
Lucas
Which beef do you use,grass or corn
Cheyanne
Hi Lucas,
Great question. Personally, I prefer corn-fed beef as it has higher levels of saturated fat (which means more marbling) and results in juicier, more flavorful ground beef. However, I always recommend using what YOU love.
Please let me know if you have any other questions as I’m always happy to help. Cheers and warm wishes for a wonderful holiday season! 🙂
sally
Wonderful article and comments! Do Restaurant s grind their own ,eat? You would think after reding this article that at least some would!
Cheyanne
Hi Sally! Thank you so much for the kind words! While I have not worked at any restaurants that were grinding their own meat in house, I’m sure some exist! The restaurants where I was employed didn’t specialize in burgers, so instead we did meat “fabrication” in house, meaning we butchered and portioned whole tenderloins, chickens, etc. I’d certainly hope high end burger joints are grinding their own beef. 😉
Judy
“2.5 Pounds Boneless Chuck Steak *
.75 Pounds Top Sirloin Steak *”
Why are there stars next to the ingredients?
Cheyanne
Hi Judy!
It’s an asterisk (*). It’s to indicate that there is further information about the ingredient in the notes portion of the recipe card. Cheers!! 🙂
Brandon Lee Mann
Unfortunately there is nothing connected to those 2 ingredients.
Cheyanne
Literally ALL the notes in the recipe card are about those two ingredients.
alvis
Hi Cheyenne ,
i was thinking about grinding ribey. should i supplement it with chuck?
my first thought is i don’t need to but thought i should ask an expert.
Thanks
Cheyanne
Hi Alvis,
Using ribeye is very subjective. Technically, it will depend upon the grade of your ribeye and how much fat has been trimmed (or left untrimmed). However, generally speaking, I would say most ribeyes have plenty of marbling and should make a great burger – without the need to supplement it! I would just take a look at your ribeye first and make sure it hasn’t been overly trimmed of its fat… obviously that fat is what’s going to give your ground meat plenty of flavor and moisture! If you try grinding ribeyes, I’d love to hear how it turns out for you!
All the best,
Cheyanne
St. John from Des Moines
Hey Cheyenne!
Thanks for posting this! I’ve long been curious to try my hand at homemade ground beef (or pork, etc), and I stumbled upon your blog while trying to do a little crack research!
While you didn’t mention it directly, a thing or two you said indicates this may be a bad idea (further bolstered by the absence of any mention of it in the affirmative, either here or anywhere else), but what about marinating the steak pre-grind? It seems like an extraordinary opportunity to infuse flavor into the meat without the risk to structural integrity you get by pouring liquid on the patties, plus it would infuse the flavor all the way through, rather than just on the surface.
I can see the pros to doing this, obviously….but what would be the potential cons? Is it that it’d gunk up the grinder? Or would it cause its own patty integrity issues? Not come out the way I would expect flavor-wise? Textural problems? Would I just end up with a big red pile of sadness? Could it cause food borne illness? Lemme know!
The other idea I had would be to mix meats, like pork and beef, or turkey or chicken, etc. I can see a risk to inconsistent cooking rates and risks to undercooked meat other than beef. But this too seems like a wonderful way to complexity and deepen flavors. And doing it in the grinder would lead, it would seem, to more even, consistent combination.
When mixing pre-ground meats by hand, you either end up with pockets of different meats (inconsistent blend), or you end up mashing it all way too much and ruining the texture. It seems that putting a cube of beef and a cube of pork in at the same time would go a great distance to avoiding each pitfall. Can you tell me why this might be a bad idea, or, if a theoretically potentially good idea, what extra steps / precautions I might need to consider?
The idea of a multi-animal, pre-marinated patty that only requires just a sprinkle of salt and pepper (and maybe sugar) on the surface before applying smoke and flame to it sounds like an absolutely incredible, life-changing experience! But I thought I should check before I pitch off the proverbial cliff and end up with wasted time, wasted money, wasted meat, a potentially ruined grinder and/or potentially life-threatening bacterial problems. 🙂
Thank you so much for taking the time to read and reply! 🙂
Cheers!
Cheyanne
Hi there,
Great questions! I really appreciate your enthusiasm for grinding your own meat!!!
Marinating: Honestly, I think marinating should be reserved for lower quality cuts of meat (such as flank steak). Marinating mainly serves to tenderize and slightly flavor meats, so I don’t really see any need for that here. Plus, I would think it’d make a mess when you try to grind it – I can’t be sure since I’ve never tried it, but seems like a bad idea.
Mixing Meats: Aside from stellar flavor, one of the main points of grinding your own beef is so you can enjoy a burger rare (safely). If you start adding pork to your mix you will need to cook your burger to medium, so I’ve never tried adding pork to my mix. As far as mixing chicken and turkey, if that sounds good to you, by all means, try it!! I’d love to hear how it turns out!
I hope I’ve answered your questions!! Cheers and warm wishes for a wonderful day!! 🙂
St. John from Des Moines
That is a very helpful reply, Cheyenne! Thank you! 🙂
I think what I should probably do is for my first outing, just follow your recipe and not get too experimental. Then, after I’ve experienced a good baseline, THEN start adventuring with the more crazy concepts on subsequent sessions to see if they make the experience better or worse, or just different.
If I ever get to that stage, I’ll be sure to report back with my findings! 🙂
Cheers!
Denny
For another flavor of beef that makes a delicious flavor burger is shoulder clod. it is just above the brisket on the steer. I primarily grind just brisket and do a double grind on it. A additive I like to add is a fat is bone marrow . One heaping table spoon of chopped bone marrow. Per pound. Your butcher can split a bone for you . you just scoop it out with a spoon. the chop it up on a cutting board. To a texture of chopped cheese 1/4 chunks. Do not run through a grinder as it just whips the marrow and makes it creamy. The flavor is a mild nutty flavor it adds to the burger and juicy. Serve to your guest and tell them later when they praise the flavor.
Djea3
If you use brisket it is best to SLOW COOK your hamburgers (i.e. smoke them slowly) to about 180 degrees (well done). This will help break down the collagens in the brisket. This is what makes pastrami and corned beef so good.
Ulli Pietsch
I was wondering why everyone recommends cubing the meat. I have always cut long strips. It is so much easier as they are pretty much self feeding with my grinder.
Cheyanne
Hi Ulli,
You can do either – cut the meat into cubes or cut the meat into long strips. Honestly, it depends on your grinder and personal preference. I have found that cubing the meat results in a smoother process and reduces the likelihood of clogging your grinder. As well, I personally don’t like long, stringy ground beef – I prefer the uniform, coarse texture that results from running cubes of beef through the grinder (versus strips). But again, you can most definitely cut the meat either which way!! Cheers and thank you so much for stopping by!
Abby
Would be interested in your thoughts on adding bacon to the ground meat (grinding it into the mix??) . Cheers
Cheyanne
Hi Abby,
Great question! Unfortunately, I’ve never tried adding bacon to the mix, so I’m not 100% sure how it would turn out. I would probably partially cook and finely chop the bacon, and then gently stir or fold it into the ground meat (versus grinding the bacon into the mix) to avoid any chewy pieces of bacon in the burger meat. If you try adding bacon I’d love to hear how it works out for you! Cheers! 🙂
Clarence Harmon
Hi, thanks for sharing this awesome piece. I am having trouble in measuring salt in my recipes. Can you guide me what to do?
Cheyanne
Hi Clarence,
I’m not sure if I understand exactly what you’re asking. But, to properly measure salt, you add it to your measuring cup or spoon and then level it off. If you are asking about what type of salt to use, you should always follow a recipes ingredient list; however, kosher salt or flaky Maldon salt is typically used in cooking. If you are asking when to add salt to a dish, you should follow the recipes instructions. I hope that helps answer your question!
If you are looking for more specifics on salt (the science of salt, common ratios used, etc.), a google search should be able to return a good amount of information.
Cheers and thank you so much for stopping by!
Parrish
What an inspirational article!!!! Thank you! Very informative.
Don H. Smith
Been grinding my own hamburger for years. I have alway been the one that uses less fat and more Tricks-tip. after reading this i will try the 80/20 mixture. i have also seasoned my hamburger before i have made patties to go into the freezer. i have noice the taste is not what i have wanted. Which made me find this site. Thanks for the the excellent writing and suggestions on seasoning. What is your iron of putting garlic in the meat before freezing?
Cheyanne
Hi Don,
I’m thrilled you found this post helpful! As far as seasoning the meat prior to freezing, I don’t tend to recommend it. Not all spices and seasonings freeze well and a lot of them can change flavor once frozen. For example, garlic can become bitter once frozen and salt loses its flavor. Your best bet would be to season the ground beef or hamburgers right before you cook them. I hope that helps!! Cheers and happy cooking!
SeanNY2
Five stars for good writing. Thank you. I will try it.
Adrian Jefferson
I’ve been wanting to make my own steak burgers for a while now and this article was very helpful. I feel I have the confidence and knowledge now to do so, Thank you so much for the great tips
Cheyanne
Hi Adrian,
I’m so happy to hear you found this post helpful!! Cheers and warm wishes for a wonderful New Year!
Keith
I ground my own hamburger instead of buying it already done last time I needed it. I swore I would never buy pre made again. I forgot the percentage of the two meats and what kind of meat to use. I came across this article and and really appreciated the explanation of the different kinds of meat and the depth of prep needed. Great article! Thank you.
Cheyanne
Hi Keith,
I’m thrilled you found the information in this post useful! Cheers and happy cooking!
Matt Jones
What a great article! I’ve ground my own meat frequently over the years using the attachment to my mixer. I’ve been missing out since it broke and I hadn’t gotten around to replacing. Now I have no excuse and plan to put the alternate approaches to use this weekend. Thanks!
angiesrecipes
Thumbs up for you, Chey! I know I should grind my own burger meat, but I am just too lazy…my grinder sits somewhere in the kitchen…I think last time I saw it was about 10 years ago…LOL
Kelly | Foodtasia
Chey, I am a burger fanatic. Many mornings I have one for breakfast. I haven’t been satisfied with my meat for years. I can’t wait to try grinding my own meat. I never knew it would make such a difference. Thanks so much for the useful information!
Kevin
So much wonderful hints and tips you´ve shared with us! Just in time for grilling season!
Jennifer @ Seasons and Suppers
This is just so timely! I got the meat grinder attachment for my KA for Christmas and have just been thinking I need to make my own burger mix this Summer. And then I see this. Thanks for all the tips. Can’t wait to try this 🙂
Marissa
This is such a great resource, Cheyanne. Thank you! We grind our own lamb all the time, but haven’t dabbled with grinding our own beef. With your advice, we’ll do it with confidence!
Mary Ann | The Beach House Kitchen
Such a great post Chey! Love all the great tips and info. Way to go above and beyond for all the upcoming summer BBQs! Believe it or not Tom has always wanted to make homemade burgers and sausages! I can’t wait to show him your post!
Kelsie | the itsy-bitsy kitchen
This is so interesting! I would never have guessed grinding your own meat would make such a difference! I’ll be visiting my parents this summer and they have a meat grinder so I’m definitely going to be playing around with it. Have a great weekend, Chey!
Brian
Tried the grind burger recipe and it was delicious. First time to grind meat and it was an awesome exp. Thank you for the meat suggests. Juiciest burgers ever. Wife and kids loved them. This probably will become a staple in our house 🙂 No more store bought ground meat.
Tim
Wow, I can finally safely eat a medium-rare burger.
Ward
Thanks for thee great tips. My first attempt was a success, and the freezing tip was definitely key. I don’t know my fat to meat ratio, but I think it was too high. Strings of fat got tangled in the plate, and I had to clean out everything once. I’m excited for the cost savings and to add ingredients next time.
Cindy
Hi Cheyanne, and thank you for doing this. My husband got me the kitchen aid grinder and I’m will be grinding my own meats in large batches. (We are a family of 6). With the hamburger, how long does it keep in the refrigerator and freezer? Also when freezing is it better to keep/wrap in butcher paper vs freezer bags?
Thank you so very much. Love your blog
Cheyanne Bany
Hi Cindy!
The raw ground hamburger meat will keep in the refrigerator for up to 2 days or in the freezer for up to 3 months. If you are freezing I would separate the patties with freezer paper (so they don’t stick together) and then store them in freezer-safe zip-closure bags. I hope I’ve answered your questions!! Congrats on the new grinder!! I hope you have so much fun using it! Cheers!
John
What type of steaks should I grind for the best burgers?
Cheyanne Bany
Hi John,
This recipe uses 2 Pounds Boneless Chuck Steaks and 1 ½ Pounds Top Sirloin Steaks. While you can use top round, tri-tip, brisket or boneless short rib instead of the top sirloin, I recommend keeping the 2 pounds of chuck steak because it has a deep beefy flavor with a good amount of marbling. Cheers!
Chuck
Thank you for the tips, I am thinking about using short rib meat, if you think that would work what could I grind it with?
Cheyanne Bany
Hi Chuck,
If you have a meat grinder, that is obviously the best option. If not, you can use a food processor. You will still want to follow the instructions and freeze the cubes of meat for 30 minutes. Then, use the food processor, and in batches, pulse them until they resemble ground meat. Hope that helps! Cheers.
Kip Sears
Nice reading and pictures. I just got my Kitchen Aid and am ordering the grinder on Amazon. I have a friend who gets his meet from a cash n carry store where they sell the trimmings from select cuts. and he adds bacon to his beef.
Tasty. You do a great blog. thank you,
Kip
Bradley
I’m preparing to make this but im curious for future reference what the meat to fat ratio would be?
Cheyanne Bany
Hi Bradley,
I can’t really give you an actual percentage of meat to fat ratio. It will vary greatly depending on the actual steaks you use in this recipe. If you choose steaks with a lot of fat and marbling the fat ratio will obviously be higher. If you are really curious, you could weigh your steaks, trim the fat off, then weigh the fat separately from the meat and find the percentage from the total weight. However, I don’t recommend doing that as you would have to grind the meat separately from the fat and it wouldn’t get evenly distributed… meaning, you would be left with fat pockets in your burgers. Sorry I couldn’t give you an exact ratio! Cheers and thank you so much for stopping by!
Allie
I feel so accomplished now! Only question is: I didn’t see that I was supposed to run it through with the smaller plate again, will it still work? I’ll be using it in tacos, meatloaf, soups and other things that I’d use ground beef in…
Cheyanne Bany
Hi Allie,
Happy New Year! You should be okay! Your meat just won’t be as finely chopped as if you ran it through the grinder twice over. Let me know if you have any other questions! Thank you so much for stopping by! 🙂
Kelly
Hi, I like your blog and this particular article is great. I didn’t know about keeping everything super cold- great tip! One thing though- please change the spelling of je ne sais quoi. It’s killing me ! Lol
Cheyanne Bany
Hey Kelly! Thank you so much for stopping by! I fixed the spelling. Lol. That post was one of my first, and I guess I didn’t know how to use spell check or google search back then! 😉 Cheers!
Trap
does anyone put any types of seasoning in the mixture? would it be ok to put in seasonings?
Cheyanne Bany
Hi Trap,
You can use whatever seasonings you would like! Let me know if you have any other questions. Thank you for stopping by! 🙂
Adam
Perfect timing, just bought a meat grinder a few days ago. Making turkey sausage tonight. Turkey is on sale – woot woot!
Adam
Cheyanne Bany
Adam, Yummy Turkey Sausage… send me some! 😉