This post may include affiliate links. Thank you for your support.
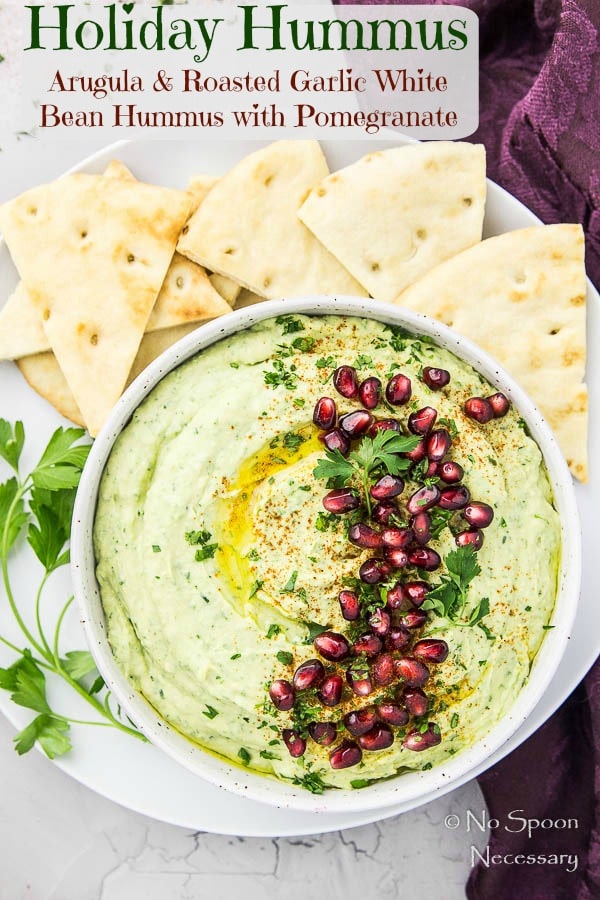
Creamy, dreamy, and festively fabulous, this recipe for green goddess hummus with herbs is the perfect way to kick off all your holiday parties. Featuring white beans, roasted garlic, peppery arugula, and plenty of fresh herbs this dip proves your holidays don’t have to be filled with just fattening foods!
Update: This recipe was originally published in December 2016. I made edits to the photos below to include more information about making green chickpea hummus at home. Plus there’s now a step-by-step recipe video showing you just how easy it is to make this dip at home.
Hi, friends! If you have followed this website for any length of time you know that hummus is kind of my forte. In case you are new here – Hi and WELCOME! Feel free to peep my baby arsenal of hummus recipes on my recipe index. I’ll wait…
Did you check them out?! I told you, I really REALLY like eating and creating delicious hummus recipes. Which brings me to todays recipe – green chickpea hummus.

Table of Contents
About this green goddess hummus
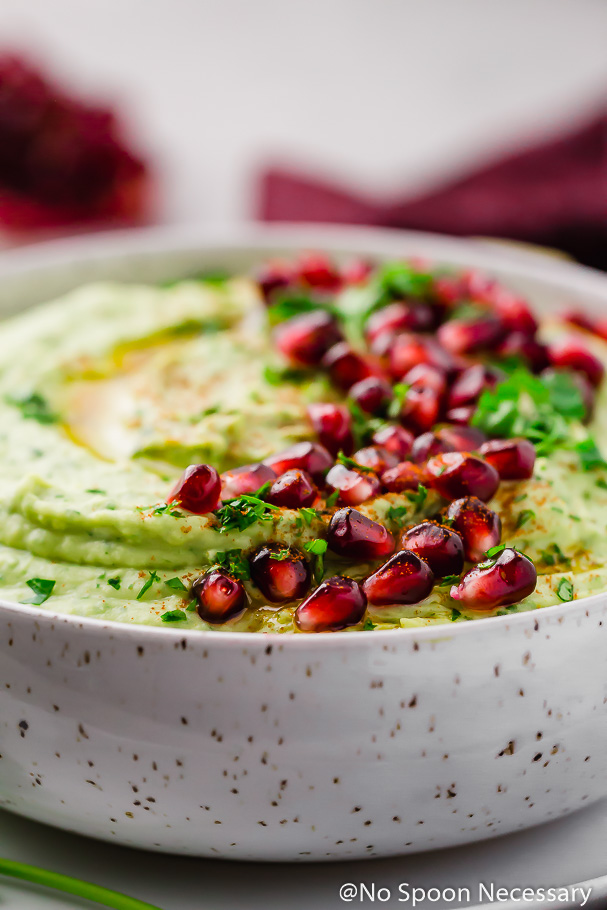
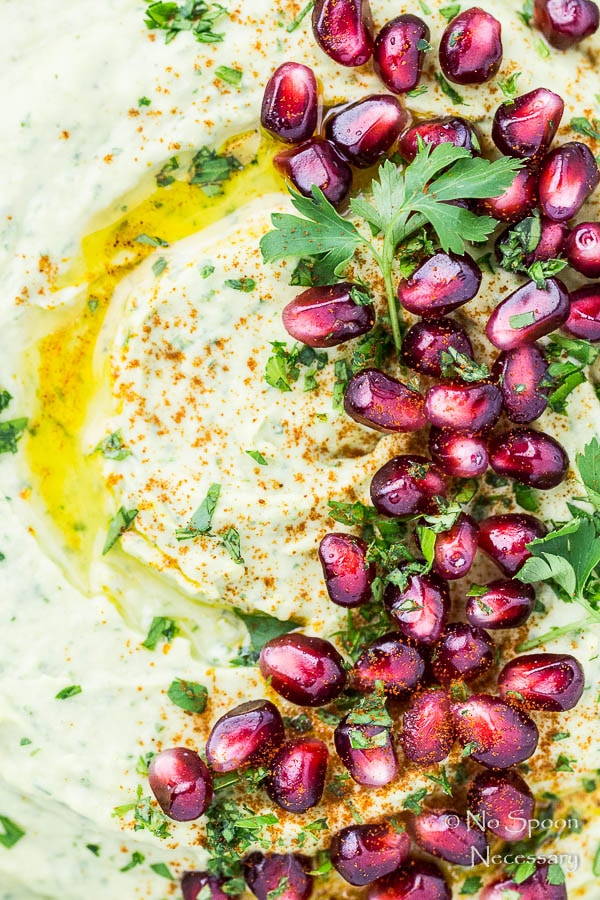
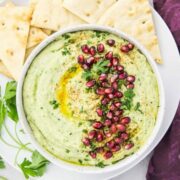
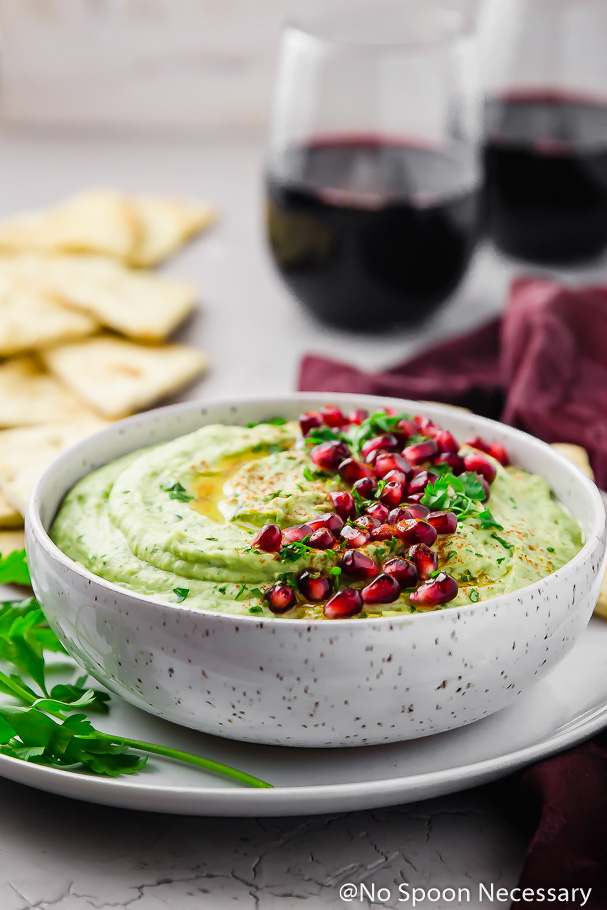
Super creamy and sublimely smooth this greed goddess hummus recipe features tender white beans blended with slightly sweet roasted garlic cloves, peppery arugula, herbaceous parsley, fresh chives, and a hint of acidic fresh lemon juice. If you’re looking to make things holiday festive, top your bowl of green hummus with sweet, tart pomegranate arils for a beautiful red and green dip you and your guests are sure to love.
Overall, this hummus is a mellow melody of flavors that play together oh-so well. Especially when you serve it with soft, warm naan bread or crispy, toasty pita chips.
While I DID put the word ‘holiday’ in front of this hummus, this dip should NOT be restricted to JUST your holiday parties. I highly encourage you to make a double batch, cozy on up in front of the TV and eat this chickpea dip on repeat. Just dip, baby, dip.
Why you’ll love hummus recipe
This creamy and herbaceous green hummus dip is bold and fresh with vibrant color and super-smooth texture. Here’s why you’ll love this arugula dip:
- Healthy: This green hummus is loaded with healthy and fresh ingredients with a much higher nutritional value than any commercial hummus you’ll buy.
- Enjoy anytime: This smooth and creamy green goddess hummus is made with readily available ingredients so that you can enjoy it any time of the year for any kind of occasion.
- Perfect for those who dislike chickpeas: Although it may be hard to understand, not everyone enjoys chickpeas! Hummus made with creamy cannellini beans is the answer to your prayers!
- Stunning party appetizer: Easily impress your family, friends, and party guests with this beautiful herbed hummus.
Ingredients for green hummus
Calling all the chickpea haters – this creamy green goddess hummus with cannellini beans has your name on it! Here’s everything you need:
- Garlic. Feel free to add more garlic to this herb hummus if you love roasted garlic flavor in your food. Use the leftover roasted garlic cloves from the head of garlic in other dishes during the week.
- Olive oil. Add more olive oil to the parsley hummus for a thinner consistency.
- Cannellini beans. Drain the beans well to prevent excess liquid affecting the consistency of this green hummus. Substitution: Chickpeas are great for those who enjoy chickpea-based hummus.
- Tahini. This is a key ingredient in most hummus recipes. It adds a smooth texture to the hummus and incredible flavor.
- Juiced lemon. Use freshly squeezed lemon juice for the best flavor. It helps to cut through the rich and creamy flavors of this green goddess hummus.
- Green herbs. This green hummus recipe calls for a mixture of baby arugula, fresh parsley leaves, and chives. Increase the arugula for a bolder peppery flavor. Substitution: Green onions, basil, and fresh tarragon are great alternatives.
- Ice cold water. Add more water to the hummus mixture for a thinner consistency.
Recipe variations
- Beans: This green goddess hummus with herbs and arugula is made intentionally with cannellini beans as an alternative for the chickpea haters! Feel free to use canned and drained chickpeas instead if you prefer.
- Herbs: This green goddess hummus recipe calls for baby arugula, parsley, and chives. Easily adjust the measurements of these herbs to suit your flavor preferences. For a more peppery flavor, increase the baby arugula. Experiment with fresh tarragon, basil, green onion, and other green herbs.
How to make hummus with green herbs
This recipe for green goddess hummus with fresh herbs is pretty straightforward to make. Here’s how:
- Soften Beans: Empty the can of beans along with their liquid into a microwave-safe bowl. Then cover the bowl with a lid and microwave on high power for 4-6 minutes, or until beans are very soft. Drain the beans, reserving all the liquid and then set everything aside. (Tip: This step is optional; however, it is one of the keys to creating a super smooth hummus.)
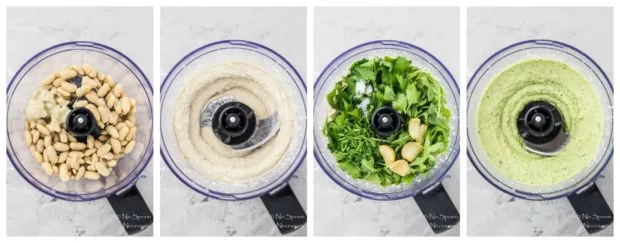
- Start Green Goddess Hummus: Pour 7 TBS of aquafaba (reserved liquid from the can of beans) into the bowl of a food processor or high-speed blender. Add the roasted garlic cloves, tahini, and fresh lemon juice. Season with salt and pepper, then process for 1 minute. Stop and use a rubber spatula to scrape down the sides and the bottom of the bowl. Then continue to process for an additional minute, or until the mixture is smooth in consistency.
- Add the Beans: Add the softened white beans or chickpeas to the food processor and process the hummus again until it’s very smooth, about 3 minutes. Then scrape the sides and bottom of the bowl.
- Add Arugula and Fresh Herbs: Add the arugula, fresh parsley and fresh chives to the food processor and pulse until roughly chopped.
- Stream in Oil and Adjust for Taste and Consistency: With the food processor running, slowly stream in a tablespoon of olive oil. Use a spoon to taste the green hummus and adjust for taste and consistency.
- Garnish and Serve: Transfer the herbed green hummus to a large serving bowl and top with more fresh herbs and pomegranate arils, if using. Serve and enjoy!
Tips for the herbed hummus
- Customize it! The measurements of arugula, cloves of garlic, and fresh herbs in the recipe below are mere suggestions. Like a lot of peppery bite from arugula? Use more. Does roasted garlic make your heart go pitter patter? Increase the amount of cloves. If you are nervous about going off recipe, make the hummus as directed below, and then add more of whatever pleases you. Just make sure you give it a really good buzz in the food processor after the addition.
- Roasted Garlic: The recipe below calls for roasting a whole head of garlic, but you will only use 4 cloves in the hummus. Keep the remaining cloves in an airtight container and store them in the refrigerator. Use them in place of raw garlic for added flavor… mashed potatoes, rub them on toasted bread, spruce up spaghetti sauce, the options are limitless.
- If you want hummus with a thinner consistency, slowly stream in more ICE COLD water, 1 tablespoon at a time, until the desired consistency is achieved.
FAQs: frequently asked questions
Got questions? I’ve got answers! If you ever run into an issue, have a question, or need any clarification – please feel free to drop them in the comments section. I’m happy to help when I can!
What does ice cold water do to hummus?
Ice cold water makes hummus creamy and light with a fluffy texture.
Is this green goddess hummus healthy?
While I am not a nutritionist, I do believe this herb hummus is nutritionally delicious! It’s loaded with fresh herbs, plant-based protein, energy-boosting carbs, healthy fat, and fiber. Hummus is a good source of vitamins and minerals – the ideal dip to add to your meal rotations or to enjoy at parties with zero guilt!
How do I know if my chickpea hummus has gone bad?
Hummus has a mellow flavor with nutty notes from the tahini. It will start to smell and taste sour when it begins to go bad.
Why is it called “green goddess” hummus?
This green goddess hummus recipe is inspired by the green goddess salad dressing that is made with a combination of fresh herbs, such as chives and tarragon.
The holidays don’t have to be all about fattening foods. Add this healthy, festive and fabulous holiday green hummus dip to your hors d’oeuvres line up!
Until Thursday friends, cheers – to healthy holiday eats!
Cheyanne
Craving MORE? Follow all the deliciousness on Facebook, Pinterest and Instagram!
More hummus recipes!
If you love this green and red holiday dip, try one of these delicious, ultra-creamy hummus recipes next:
And don’t forget the homemade pita chips for dipping!
How to make Holiday Hummus recipe and video👇
Green Goddess Hummus with Herbs
Equipment
- 1 Microwave-Safe Bowl (for softening the white beans or chickpeas)
- 1 Food Processor or High-Speed Blender (for making hummus)
Ingredients
- 1 (15 oz) can Cannellini Beans or Garbanzo Beans – DO NOT DRAIN
- 6-8 Cloves Roasted Garlic
- 3 TBS Tahini – well stirred
- 2 TBS Fresh Lemon Juice (from 1 small lemon)
- 1 Cup Baby Arugula – packed
- ¼ Cup Fresh Parsley Leaves – gently packed
- 2 TBS Freshly Snipped Chives – packed
- ½ tsp Kosher Salt and Ground Black Pepper – to taste
- 1-2 TBS Extra Virgin Olive Oil – to taste (use a good brand!)
- Optional Garnishes Chopped Fresh Herbs and Pomegranate Arils
- Serving Suggestions Pita Chips Garlic Bread, Crostinis
Instructions
- Soften Beans: Empty the can of beans along with their liquid into a microwave-safe bowl. Then cover the bowl with a lid, leaving the lid slightly cracked open on the side to form a vent. Place the bowl in the microwave and heat on high power for 4-6 minutes, or until beans are very soft. Drain the beans, reserving all the liquid and then set everything aside. (Tip: This step is optional; however, it is one of the keys to creating a super smooth hummus.) (Note: Cook time will depend upon the strength of your microwave. You can also do this on the stove-top in a small saucepan if you prefer.)
- Start Green Goddess Hummus: Pour 7 TBS of aquafaba (reserved liquid from the can of beans) into the bowl of a food processor or high-speed blender. Add the roasted garlic cloves, tahini, and fresh lemon juice. Season with 1 teaspoon salt and scant ¼ teaspoon of black pepper. Process for 1 minute. Stop and use a rubber spatula to scrape down the sides and the bottom of the bowl. Then continue to process for an additional minute, or until the mixture is smooth in consistency. Scrape the sides and bottom of the bowl again before proceeding.
- Add the Beans: Add the softened white beans or chickpeas to the food processor and process the hummus again until it’s very smooth, about 3 minutes. Then scrape the sides and bottom of the bowl.
- Add Arugula and Fresh Herbs: Add the baby arugula, fresh parsley leaves, and fresh chives to the food processor and pulse until roughly chopped.
- Stream in Oil and Adjust for Taste and Consistency: With the food processor running, slowly stream in a tablespoon of olive oil. Once combined, stop the motor. Use a spoon to taste the green hummus and adjust for taste and consistency by adding more seasonings for flavor, oil for richness, and more aquafaba or ice-cold water (one tablespoon at a time) for a thinner dip.
- Garnish and Serve Green Hummus: Transfer the herbed green hummus to a large serving bowl and top with more fresh herbs and pomegranate arils, if using. Serve with crostini, pita chips, roasted garlic toasts, or your favorite dippers and enjoy!
Video
Notes
- This recipe calls for roasted garlic cloves as they’re much milder, yet richer in flavor than raw garlic. Good news? Roasted garlic tastes good almost everywhere (hello toast, mashed potatoes, baked potatoes, roasted veggies, spaghetti sauce, etc. Store leftover roasted cloves in an airtight container, cover with oil, and store them in the refrigerator.
- I encourage customization! The best part of cooking at home is making recipes to your specific taste. Please think of the measurements of arugula, cloves of garlic, and fresh herbs in this hummus recipe as a mere suggestion. If you like a lot of peppery bite from arugula, use more. If roasted garlic make your heart go pitter patter (it does mine), increase the amount of cloves (I use 8). If you are nervous about taking a recipe off course and making it your own, simply try making the recipe as directed, then taste it and be sure to adjust it to suit YOUR tastebuds. Just make sure you give the hummus a good blitz in the food processor after any additions or adjustments.
- Storage: Hummus will keep, covered in the refrigerator, for up to one week.
- Got questions? I’ve got answers! If you ever run into an issue, have a question, or need any clarification – please feel free to drop them in the comments section. I’m happy to help when I can!
- Recipe Yield – Roughly 3 cups
Nutrition
Did you make this recipe?
Mention @nospoonnecessary on Instagram and tag it #nospoonnecessary!
©No Spoon Necessary. All images and content are under copyright protection. Please do not use any images without prior permission. If you want to reference this recipe please link directly back to this post.
Katherine | Love In My Oven
Hey hummus queen!! 😉 I am soaking some white beans as we speak and now I know exactly where they’re headed. This looks SO good!!!
Mary
I’m totally down for some holiday hummus, yes yes and heck yes! I probably eat hummus every day, at first I hated the texture but now I can’t get enough. The only time I tried to make hummus it was horrible, pasty and gummy. I’m going to try this Christmas hummus this weekend, fingers crossed it turns out better than last time.
Keri | Fashionable Foods
Cheyanne, I’m so happy you decided to update this post to remind me I need to make it! I loved it the first time you posted it and now I know I need to make it ASAP. I just happen to have arugula and a pomegranate in the fridge.. what are the odds?! 😉
Liz @ Floating Kitchen
Bring on all the hummus! You do have a little arsenal going here on your site. Lol. Love the new video. This is the perfect festive dip!
Paul
If you’re looking for delicious hummus recipes this is the place to be! I didn’t even consider there were such many different ways to make hummus. Those pictures got me drooling for sure. Nice recipe for holidays!! (Any holiday to be honest). Thanks for sharing
Cheyanne Bany
Thank you so much for the kind comment, Paul! 🙂
Mary Ann | The Beach House Kitchen
I fondly remember this one Chey! You are the QUEEN of hummus! All your versions are amazing. This one looks perfectly festive for the holidays! Well done!
annie@ciaochowbambina
I know I commented the first time but it just has to be said – THIS IS THE PRETTIEST HUMMUS I HAVE EVER SEEN!!!! Okay, I’ll stop yelling now! Brava, lady! xo
Kelsie | the itsy-bitsy kitchen
Words cannot describe how much I want to dive into a bowl of this right now. Whether it’s made with chickpeas or white beans or whatever I just want to eat ALLLLLL the hummus. All of it. I love the gorgeous color of this one! Adding it to my Christmas dinner menu 🙂
Dawn – Girl Heart Food
I literally have everything at home to make this, especially considering that I bought a big box of pomegranate from Costco!! I loves me some hummus and this one is stunning! Your original pics were gorgeous and these are no exception. Great job on the video too! We are having a party in a couple weeks and this one needs to make an appearance – I’m sure it’ll disappear fast 😉 Have a great week! XO
Geraldine | Green Valley Kitchen
I’m glad you updated these photos, Cheyenne – cause they looks stunning! Love dips like this – especially during the holiday season when everyone tends to over do it – I don’t feel so guilty eating it since I feel it’s on the healthy side especially if you eat with fresh veggies.
Kathy @ Beyond the Chicken Coop
I love the holiday colors of this hummus! It looks and sounds so amazing! Plus there’s nothing better than something that tastes amazing and is good for you!
Kathleen | Hapa Nom Nom
Wow! Seriously stunning! I love the vibrant green with the ruby red pomegranate seeds – so Christmasy! And the peppery arugula and roasted garlic combo sounds amazing!!!
karrie @ Tasty Ever After
This must be the most gorgeous hummus in the world! Almost too gorgous to eat. Nah, just kidding 😉 I’d eat all this hummus up before it even had a chance to hit the holiday table too. My J loves hummus so I may just have to make this for him for the holidays.
Kelly
You make the prettiest hummus! My hubs is not crazy about hummus either (what??) but that just means more for me! I will gladly help with any that boy does not want 🙂 Love how gorgeous this is and the pomegranates are the perfect festive touch!
Adina
Gorgeous pictures! And not to mention the recipe, it’s so great when I am craving healthy things! 🙂 🙂
Mary
Holiday Hummus?? Yes, please. I’m going to my Mothers for Christmas and want to bring a few things to spice up the meal. I’m already planning on making those delicious looking Orange and Pomegranate Prosecco Holiday Cocktails; I know she will love them. We are both huge fans of hummus, and we both complain we’ve never made it successfully. Your recipe inspires me to take another shot at it.
Stephanie Czako
You always make THE most beautiful hummus recipes, Chey! This would be so gorgeous on the appetizer table for Christmas, such a show-stopper! Great idea to give the chickpea haters some hummus love 🙂 I think we might make one of your amazing hummus recipes for our New Year’s Eve spread! Not sure which one yet, though, they all sound SO GOOD! Actually, your Caramelized Onion and Pear Tarts are in the running as well! How’s a girl to choose?? Hope you’re having a great holiday season, girl! Pinning!! XO
Shashi at RunninSrilankan
“The holidays don’t have to be filled with fattening, heavy foods” YAAASSSSS! Great minds so think alike eh?! 😉 I’m ALL about healthier eats and treats this – especially around the holidays! And that bowl looks killer! How about you pass it onto me – I’ll let you hold onto the chips and dippable’s, cos all I need is ma finger! Loving the twist on this from traditional chickpea hummus – besides, the coloring is so darn festive! But wait – there’s such a thing as “chickpea haters?” No way!!!!
Happy Wednesday to ya! xoxo – OOh guess what – 10 more days to Christmas YIKES!!!! I have so much to do – though I’d rather sit in a corner with my finger in a bowl of this! 🙂
Cindy
This looks amazing. I like hummus too, but I think your here, here, here, here commentary has me convinced you might like it a bit more. Lucky me, as I am always looking for great recipes! This one is incredible. Love your side by side shots of the ingredients in the food processor. YUM with the beans. Nice work!
mira
Love hummus! This looks so festive! Great idea to add pomegranate!
Shelby @ Go Eat and Repeat
Wow, you do love hummus! I don’t think I could get my fiance to eat hummus either, boys 😉 I love that you tried hummus with a different bean though. That is seriously genius! And those pomegranate seeds on top are gorgeous!
Kevin | Keviniscooking
I’m a hummus and pita eating machine. 🙂
This is beautiful and I bet that peppery arugula is delicious in this. Fantastic flavor combination here, love it!
Anu – My Ginger Garlic Kitchen
What a beauty, Chey. These pretty photos are making me drool. Those pomegranate arils look so adorable and divine. I can eat hummus any day and that hummus is speaking to me. Arugula, garlic and white bean? Wow! Perfect for this holiday season. Have a lovely week ahead.
Izzy @ She Likes Food
I LOVE hummus!!! I pretty much eat it every single day and could probably live off of it haha! I’m loving the flavors you added in here and those pomegranate seeds on top are gorgeous!
annie
Arugula is my favorite bitter green. I love these happy holiday colors!
Manali@CookWithManali
What a pretty hummus, love the festive touch!
Phi @ The Sweetphi Blog
Oh my goodness, this does look super holiday-y, I love that you made hummus out of white beans and the topping – and the photos – stunning!
Natasha @ Salt & Lavender
I love white bean dips.. in fact, I eat some variation of it on a weekly basis! This looks really tasty, and I’m with you… the holidays don’t just need to be about fatty foods or sweets.
marcie
I’ll eat your husband’s share of hummus if you’ll let me — I’m CRAZY about it! This is one of the most festive hummus creations I’ve ever seen — I’m in love with it! This is so creative Cheyanne and I can’t wait to try it!
Keri @ Fashionable Foods
Cheyanne, I’m starting to think our husbands are long lost brothers because their food preferences are SUPER similar! 😉 I can eat hummus all day every day. In fact, I frequently eat it for lunch! I’m absolutely LOVING this holiday hummus. I’m obsessed with arugula! I also love that you used cannellini beans, which never crossed my mind either.. and I’m not blonde 😉 Also, I’ve clicked every single one of your hummus links and now I want each and every one!
Demeter | Beaming Baker
Wait a minute… did you say hummus is your jaaa-yum or your jaaah-UM??? 😉 You know I have a soft, like hummus-level soft, fondness for your hummus recipes. They’re all ridiculously creative, scrumptious and oh-so beautiful. That’s my Chey–creative, sassy and beautiful! <3 Haha on Boy being crazy. As long as he takes good care of ya, and pretends to not like hummus so you can have more (ahem), then he's cool by me. 😉 LOVE that you made hummus with a different type of bean, and just… blessed up with these gorgeous photos. That closeup with the pomegranate arils on top is just spectacular. Will ya hand me two gallons, please? Muah! xoxoxo
Ashley@CookNourishBliss
haha oh gosh we go through hummus SOOOO fast at our house! Both the husband and I loveeeee it! I usually do chickpeas but this is so fun with the white beans! And um roasted garlic??? Pass me the spoon!
Stacey @ The Sugar Coated Cottage
Beautiful and yummy!! Love the colors, so Christmas ready. I love white beans they take on the other flavors so nicely. My hubby won’t touch hummus, he’s missing out!! Take care!
Stephanie@ApplesforCJ
I love hummus also and this looks sooo good Cheyanne. And just for the record you can never have enough hummus recipes. This one definitely looks worthy of all the upcoming holiday gatherings. Pinning!
Ben Maclain
Oh I do love hummus. I can literally eat it just straight from the bowl/container with a spoon. No bread needed. And I love this version with garlic, arugula, and pomegranate (which makes this festive too). And you’re right about holiday food which doesn’t need to be heavy. I always prefer to have a lighter meal and leave a good room for all the cookies and other good things:)
annie@ciaochowbambina
We’re having the troops over for Christmas Eve and you’re making it very easy for me on the appetizer front! The colors, the flavors… STUNNING! You may know, I’m a huge hummus fan – so this is a present! (And before Christmas?) So sweet of you! 😉 Cheers, my dear! Pinned!
Nicole @ Young, Broke and Hungry
I can’t get enough hummus and this recipe looks so magically creamy!
Cathy | whatshouldimakefor.com
this is an awesome twist! loving the white beans and that festive sprinkling of pomegranate!
Sonali- The Foodie Physician
Hummus is awesome! The pomegranate gives it a wonderful festive flare! And by the way, this is hands down the most beautiful hummus dish I’ve ever seen.
Gaila
I have never swithed the beans when it comes to hummus, but your verion have flavors that I like, so maybe I must try changing the beans! Cheers
Angie@Angie’s Recipes
p.s my husband doesn’t eat any dip, but he will eat chickpea or any legumes I put in his salad or chili.
Angie@Angie’s Recipes
One of the best hummus I have ever seen! Love the add of herbs in it…simply stunning paired with pom seeds.
Geraldine | Green Valley Kitchen
I love, love, love hummus, Cheyanne. Never thought of adding arugula – that’s a great idea – love it’s peppery taste. Looking forward to trying this! So festive with the green and red!
Rachelle @ Beer Girl Cooks
I love all your hummus recipes and if boy doesn’t want them send them my way! This one is so festive and pretty with all that green and red! White beans is a nice change up and garlic is always a win in my book! Cheers!
Mary Ann | The Beach House Kitchen
You are the Queen of Hummus Chey! I LOVE this one too. Perfect colors for the holiday! Your creativity in the hummus department always astounds me. I love that you used white beans because they’re a favorite of mine. Getting this one on my holiday appetizer list! Happy Monday!
Miriam – londonkitchendiaries.com
I just love hummus – can’t ever get enough of it! Great idea to use white beans instead of chickpeas – it is always good to have an alternative and so good to have a healthy recipe for the festive season. I think I have already gained 2 kg and it is still two weeks until Christmas 🙂
Kathy @ Beyond the Chicken Coop
I need more hummus right now. I’ve been baking and eating way too many cookies! I love that you’ve mixed this up with a different kind of bean! I too have only eaten hummus with chickpeas. I love how you’ve switched this up. Looks yummy! 🙂
Megan – The Emotional Baker
Hummus is the best!! I usually stick to the same recipe, but for the holidays I’ll have to try this extra festive version – yum!
Gayle @ Pumpkin ‘N Spice
Your husband and my husband sound like they would get along great because of their food preferences! I think you said yours doesn’t like stuffing (mine either) and he definitely doesn’t like hummus! My husband will try a bite, but that’s about it. Me, on the other hand, I could eat it by the GALLON, it’s just so good. I seriously lose all self-control around it, and I know I would around this holiday version, too! Love the festive twist, Cheyanne! Garlic and white beans sounds perfect, and the touch of pomegranate is just gorgeous. Pinned, of course! Hope your week is off to a great start!
Dawn @ Girl Heart Food
Chey, I am LOVING this hummus! Great switch up with the beans, plus it looks so freakin’ festive and the pops of pomegranate is a deliciously beautiful touch! And I love the peppery bite of arugula. So many good flavours going on here. You may have started something now ’cause if boy is not normally a huge fan of hummus, he might change his mind not this one. That means, you may have to share a little more ;)….or make extra! Pinned! Have a great week, girlie! XO
Jennifer @ Seasons and Suppers
You are the queen of hummus and my go-to for hummus inspiration 🙂 This one is holiday perfection! So pretty and beautiful photographs.
Kathryn @ Family Food on the Table
You know I’m with you in an absolute LOVE of hummus! And even though I adore the chickpeas versions, I’m always up for switching out my beans and adding all kinds of flavors and toppings. This looks seriously divine – perfectly festive, oh so creamy and smooth, and full of flavor! You know I’m gonna curl up with this and hope no one wants to share 😉 Pinned! Hope this makes a hummus lover out of your crazy husband! XO