This post may include affiliate links. Thank you for your support.
Learn how to easily caramelize onions in the oven with this easy kitchen hack! This recipe produces rich, deeply-flavorful and perfectly caramelized onions that just melt-in-your-mouth! These jammy onions are so versatile and take a dish from ordinary to extraordinary – try them on salads, burgers, pizzas, steak and MORE!
Update: This recipe was originally published in February 2019. I’ve updated the post below to include more information caramelizing onions in the oven.
Table of Contents
About this kitchen hack for caramelizing onions in the oven
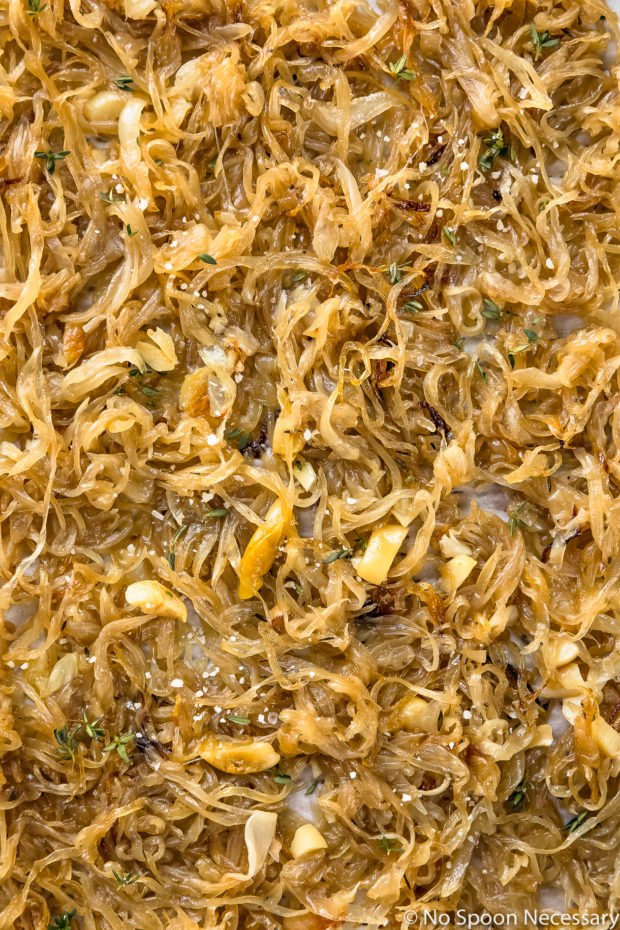
Melt in your mouth tender, savory yet candy-sweet, highly addictive caramelized onions.
Honestly, these oven caramelized onions are so exceptionally delicious I was eating them right off the sheet pan in heaping spoonfuls. (Yes my breath was kicking. No shame.)
However, these caramelized onions are not just legit amazing in the taste department, they are also easier than pie to make. The technique of caramelizing onions in the oven, versus on the stove, significantly cuts down on time and the need for constant stirring!
Basically, these onions have the same big, bold flavor, just without all the effort!
What are caramelized onions?
Caramelization is the cooking process in which sugar browns.
Since onions are naturally sweet, caramelized onions come from the simple process of slowly cooking the natural sugar in onions over an extended period of time until they brake down to a deep brown color and are extremely soft and jam-like in texture.
Caramelizing an onion results in a magically sweet, intense onion flavor.
FAQs: frequently asked questions
What kinds of onions are best for caramelizing?
You can caramelize any type of onion, even in the oven, so feel free to try any variety in this oven caramelized onion recipe!
With that said, here are a few tips on types of onions and caramelization:
- Yellow Onions – Yellow onions are the most versatile, caramelize the fastest and yield the most flavor.
- Red Onions – With their beautiful purple color, they make a visually exciting addition to a variety of dishes such as salads and pizzas. Just be careful, because over caramelizing can turn them into an off-putting greenish-brown color.
- White onions – White onions caramelize similarly to yellow onions, however they will be slightly less complex in flavor.
- Sweet Onions (such as Vidalia or Walla Walla) – Sweet onions will yield a slightly sweeter flavor, however they tend to lack flavor complexity.
When are onions caramelized?
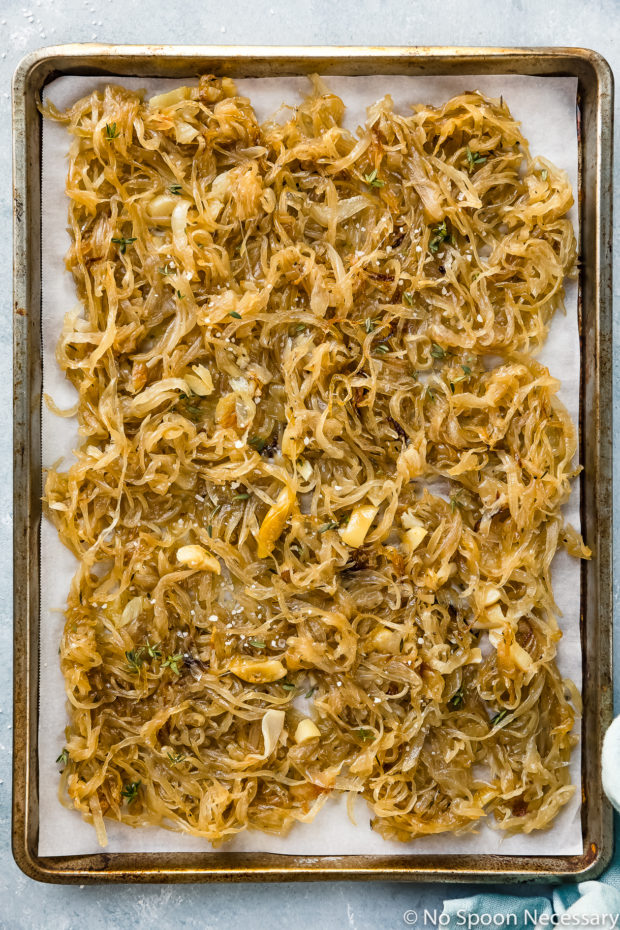
Caramelized onions definitely require patience! You can tell when caramelized onions are done because they will have a deep, rich golden brown color and be extremely soft to the touch.
What are oven caramelized onions good with?
These caramelized onions are incredibly delicious and so versatile! Sweet onions make a wonderful sweet and savory addition to many dishes. Plus, they make a fantastic base of mouthwatering flavor in dips, soups and casseroles! Let’s face it, everything’s better when caramelized onions are involved!
How to use caramelized onions
- Dips – Finely chop caramelized onions and add them to your favorite creamy dips! Or, simply use them to quickly make onion dip!
- Soup – Stir caramelized onions into your soups and stews to add a deep, interesting flavor. I love adding it to apple soups, sausage zitis, and this pasta with ground sausage.
- Steak – Dress up your steaks by adding a healthy spoonful of onions on top!
- Chicken – Same as steak, caramelized onions are a delicious way to jazz up chicken!
- Pasta – Add a small amount to creamy or tomato based pastas for a sweet complement of flavor!
- Pizza – Drop caramelized onions on top of pizza to add a touch of umami and sweetness!
- Eggs – Mix caramelized onions into frittatas, use them as a filling for omelettes or use them as a topping for scrambled eggs!
- Burgers or sandwiches – Add a heaping dollop on top of homemade burgers and sandwiches! Or, finely chop caramelized onions and mix them with mayonnaise to make a homemade sandwich spread!
- Risottos – Garnish your favorite risotto recipes, like this risotto with butternut squash or risotto scallops, with some easy oven onions for extra buttery richness.
- Quesadillas – Add a couple tablespoons to your quesadilla filling to make things more interesting!
How long are caramelized onions good for?
Leftover caramelized onions should be stored in an air-tight container or zip-closure bag in the refrigerator. Properly stored, they will last up to a week in the fridge.
Can I freeze caramelized onions?
Since caramelized onions take a bit of time to make, freezing them to have on hand is a great idea!
Caramelized onions freeze beautifully and will keep in the freezer for up to 3 months.
To freeze caramelized onions, allow them to cool completely after cooking. Transfer them to a zip-closure, freezer safe bag and gently press down and around on the bag to flatten them out. Label the bag and transfer it to the freezer.
How to reheat them?
Frozen caramelized onions do not need to be thawed! You can simply use them in a recipe as is.
Tips for caramelizing onions in the oven
- While yellow onions are my preferred onion to use, you can use whatever variety of onion you prefer – red, sweet or white works as well!
- Four whole onions will seem like a lot on the baking sheet, but do not be alarmed. Onions will cook down by a ton (they will shrink to about a 6th of the amount).
- The brown sugar is optional. I used 1 ½ tablespoons because I like the extra depth of sweetness it gives the caramelized onions.
- I tossed my onions 4 times during baking. Please note, the more you toss the onions, the less likely the edges are to burn and the more evenly they will caramelize.
- If you don’t like roasted garlic, feel free to discard the cloves when you discard the thyme sprigs or you can keep them whole, mince or slice them. I removed the cloves, thinly sliced them and then tossed them back in the onions before serving.
With the same delicious flavor and half the effort and mess, these oven caramelized onions are a game changer!!
Until next time, friends – to cooking hacks!
Cheyanne
Craving MORE? Follow all the deliciousness on Facebook, Pinterest and Instagram!
More onion recipes!
- Quick Pickled Red Onion
- Sauteed Onions with Peppers
- Hot Dog Onions
- Caramelized Onion Tarts
- Chinese Pepper Steak with Onions
The best Caramelized Onions – in the oven! (Kitchen hack!)👇

Oven Caramelized Onions Recipe
Equipment
- 1 Large Sheet Pan (Baking Sheet)
- Aluminum Foil (as needed)
Ingredients
- 4 large Yellow Onions – thickly sliced (SEE NOTES)
- 4 cloves Garlic – smashed & peeled
- 4 fresh Thyme Sprigs
- 1-2 TBS Light Brown Sugar (SEE NOTES)
- 5 TBS Olive Oil
- Kosher Salt & Ground Black Pepper
- 1 tsp Worcestershire Sauce – optional
- 1 TBS Balsamic Vinegar – optional
Instructions
- Preheat oven to 375 degrees F.
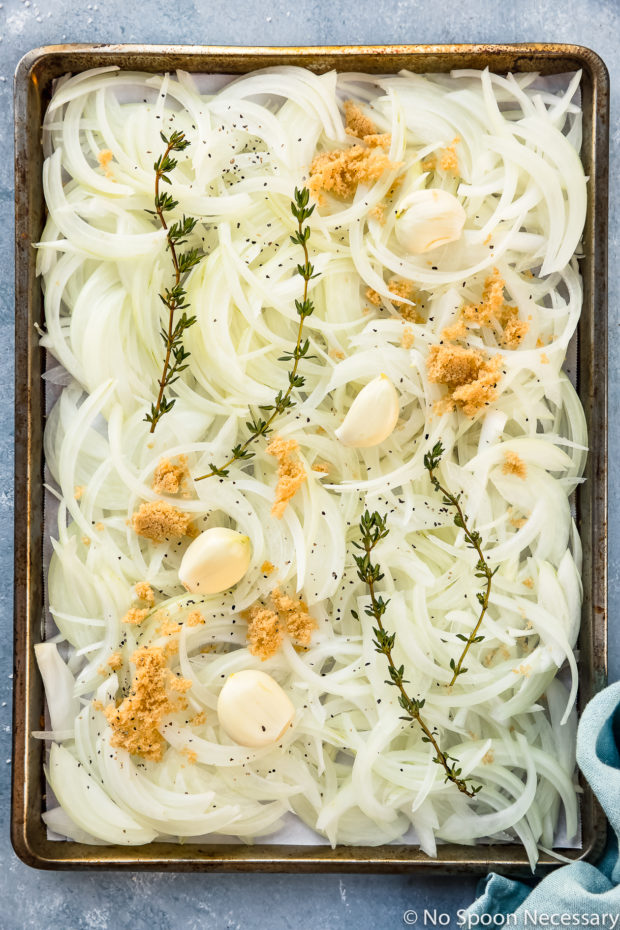
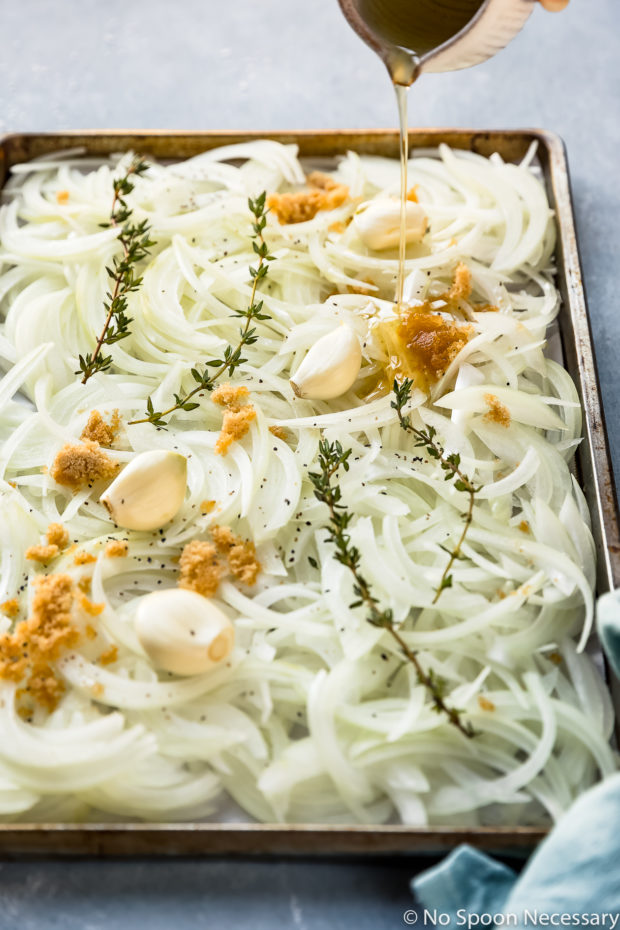
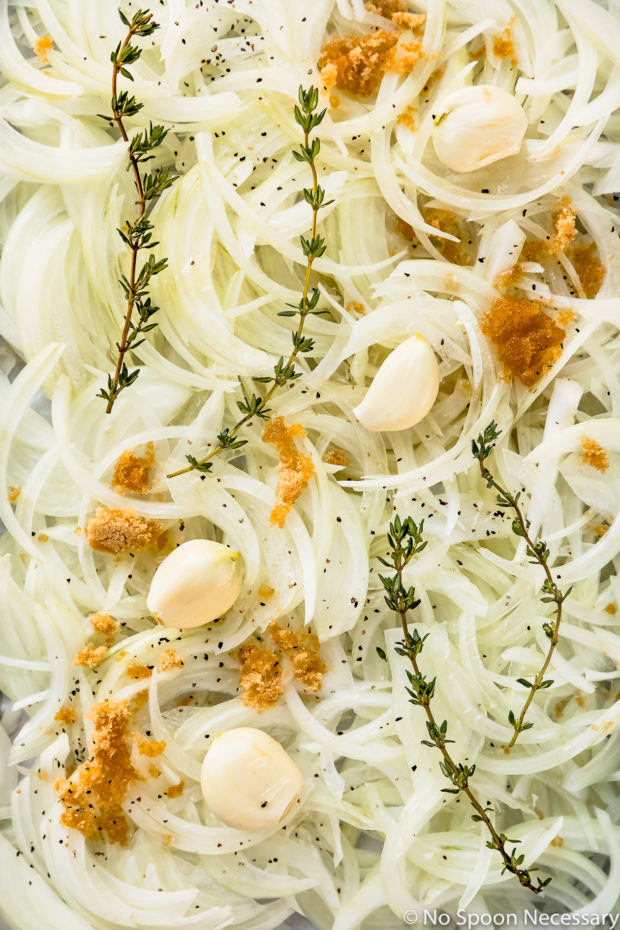
- Toss onions: Place onions, garlic and thyme on a large, rimmed sheet pan. Sprinkle with brown sugar, drizzle with 5 tablespoons of oil and season generously with salt and pepper. Toss everything together until evenly coated.
- Cover the pan with foil and roast in the oven for 25 minutes, tossing once halfway through cooking. Remove foil and continue to cook for an additional 25-35 minutes, or until softened and golden in color, removing onions from the oven and tossing the onions 2-3 during cooking. If you prefer a darker color, switch the oven to broil and broil for 5 minutes – watch the onions carefully as they can easily burn!!
- Remove the pan from the oven and discard thyme sprigs (SEE NOTES). Drizzle onions with Worcestershire sauce and/or Balsamic if using. Toss to combine.
- Serve: Taste and adjust for seasoning with salt and pepper. Serve and enjoy!
Notes
- While yellow onions are my preferred onion to use, you can use whatever variety of onion you prefer – red, sweet or white works as well!
- 4 onions will seem like a lot on the baking sheet, but do not be alarmed. Onions will cook down by a ton (they will shrink to about a 6th of the amount).
- The brown sugar is optional. I used 1 ½ tablespoons because I like the extra depth of sweetness it gives the caramelized onions.
- I tossed my onions 4 times during baking. Please note, the more you toss the onions, the less likely the edges are to burn and the more evenly they will caramelize.
- If you don’t like roasted garlic, feel free to discard the cloves when you discard the thyme sprigs or you can keep them whole, mince or slice them. I removed the cloves, thinly sliced them and then tossed them back in the onions before serving.
Nutrition
Did you make this recipe?
Mention @nospoonnecessary on Instagram and tag it #nospoonnecessary!
©No Spoon Necessary. All images and content are copyright protected. Please do not use any images without prior permission. Please do not republish this recipe without prior consent. If you want to reference this recipe, please do so by linking directly to this post.
Matt E
What a beautiful recipe – super simple and the onions turn out AMAZING. I omit the brown sugar and instead use a light dusting of regular sugar, along with a tablespoon of cumin and chili powder. They are absolutely delicious on top of pasta dishes and pizza! Thanks so much for the recipe 🙂
Cheyanne
Hi Matt,
I’m honored you decided to give this caramelized onion recipe a try and absolutely thrilled you enjoyed it! Thank you so much for coming back and leaving a review! 🙂
Cheers and warm wishes for a wonderful week,
Cheyanne
E Jacobs
Can you sub dried thyme?
Cheyanne
Hi! Great question. While I have only made the recipe as directed, I see no reason why you can’t use dried thyme leaves here. I’d recommend using between 3/4 to 1 3/4 teaspoons, depending upon your personal taste. If you try it, I would love to hear how it turns out. Cheers and warm wishes for a wonderful day. 🙂
Kathy McEnaney
Since I found this recipe = Game Changer for doing large batches of caramelized onions. They always come out perfectly and the house smells divine! Thank you for posting this amazing recipe.
Cheyanne
Hi Kathy,
I’m so thrilled you love this recipe!! Thank you so much for coming back and leaving a review. 🙂 Cheers to a wonderful day!
ELIZABETH
Made this today with 2 sweet onions, diced. I wondered if the cook time would be different but it worked perfectly. I’m going to scoop it into ice cube trays, freeze and then store in vacuum bags for future recipes. Thanks for the recipe!
Raymond C
Wonderful idea to caramelize in the oven.
I prefer to caramelize mine in (Lurpak) unsalted butter for flavour rather than olive oil.
But at the recommended 190 C* temperature the butter burns.
So, I reduced the temperature to 150C and in my (wonderful) Anova Steam Oven, cooked with only the lower heat source and 50% steam which reduces the chance of burning. Took about 15 minutes longer but wonderful result.
Thanks for the recipe. Hope this helps someone wanting to caramelize in butter.
Lisa Wommack
This was so easy! I just finished pulling them from the oven. They are perfectly caramelized and delicious. No one would ever know I didn’t stand in front of a skillet sweating them down for 50 minutes. I reduced the brown sugar to 1 T and because I wasn’t paying close enough attention, I included the balsamic and Worcestershire in onion mix before putting them in the oven. I’m glad I did because it was perfection!
Cheyanne
Hi Lisa,
I’m so thrilled to hear you found the recipe easy and that your onions came out perfect!! Thank you so much for coming back and letting me know how everything went over! Cheers! 🙂
Kathy
What a great way to make carmelized onions! Thank you for a great recipe!
Cheyanne
Hi Kathy,
It’s my pleasure!! Cheers and warm wishes for a wonderful 2021!! 🙂
Debra Fjeld
Just the recipe I was looking for! Thanks! I will make a large batch with green peppers and have them on hand for brats or to add to meatloaf. The uses are endless!
Cheyanne
Hi Debra,
I’m happy to provide recipes and so thrilled this is exactly what you were looking for!! I’d love to hear how it turns out with peppers! Cheers!!
Lynn D’Al
This recipe WORKS. I made a big batch today, and will do a couple tomorrow to use up my overstock of onions. SO much easier than the stove top method! Thanks
Cheyanne
Hi Lynn,
I’m SO thrilled you enjoyed the recipe and found it easier than caramelizing onions on the stove!!! Thank you for coming back and letting me know how everything went over! Cheers! 🙂
Reir
I stumbled upon this recipe while doing a Google search to see if I can caramelize onions a day ahead of time. This is so wonderful – most important use for me would be in french onion soup! Thank you!
Eliska Adema
You forgot the best use of all for them. Side dish. I loves me some caramelized onions
Geraldine | Green Valley Kitchen
This is a GREAT idea, Cheyanne! I love carmelized onions but never make them but this looks so easy – can’t wait to try it! Xo
Marissa
This method is a game changer!! We love caramelized onions in so many things, but I don’t always have time to make them. So excited to try this!
angiesrecipes
You can use caramelized onions in almost anything! Love this oven version…fuss free and quick!