This post may include affiliate links. Thank you for your support.
This easy Pumpkin Fudge recipe is made with pantry staples and only requires 15 minutes of preparation! This fool-proof microwave fudge with pumpkin puree features swirls of creamy, decadent white chocolate, and plenty of warming pumpkin pie spice.
This super-simple condensed milk fudge recipe turns out perfect every single time – without a candy thermometer! It’s the perfect pumpkin candy to celebrate the holidays or simply have on hand when you want an indulgent treat!
Update: This post was originally published in October 2017. I made updates to include more information about pumpkin fudge. Plus, I added a recipe video to show you how easy this recipe is to make!
Hi, friends! We are just 12 days away from Halloween! Twelve!! You know what that means – time to bust out ALL the candy, confections, spooky cocktails and FUDGE!
Okay, so fudge may not technically be a requisite to celebrate Halloween. However, this year I’m declaring it a MUST! Because really, shouldn’t we be celebrating all the things with mass quantities of fudge?!
Table of Contents
Pumpkin fudge recipe: overview
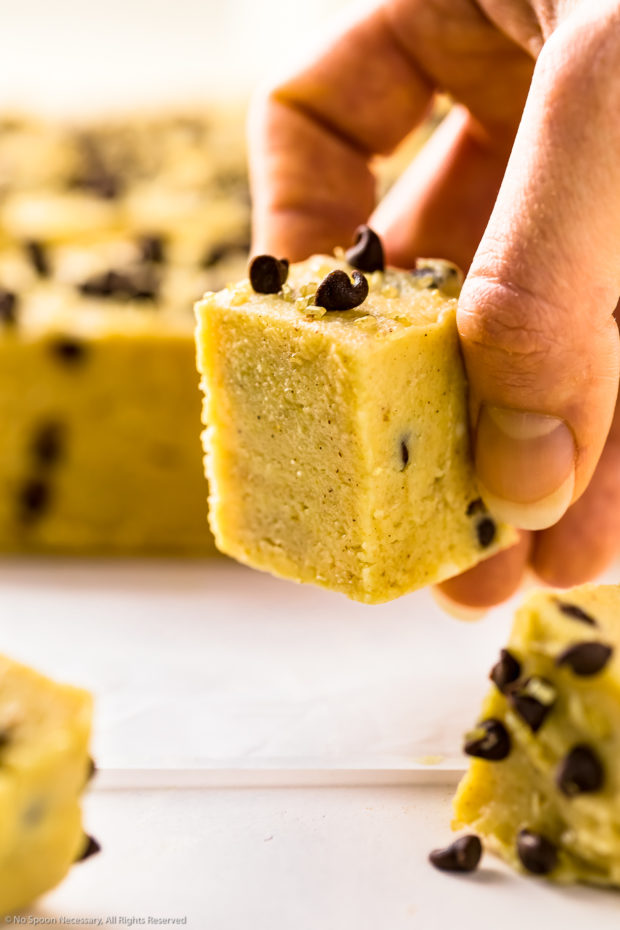
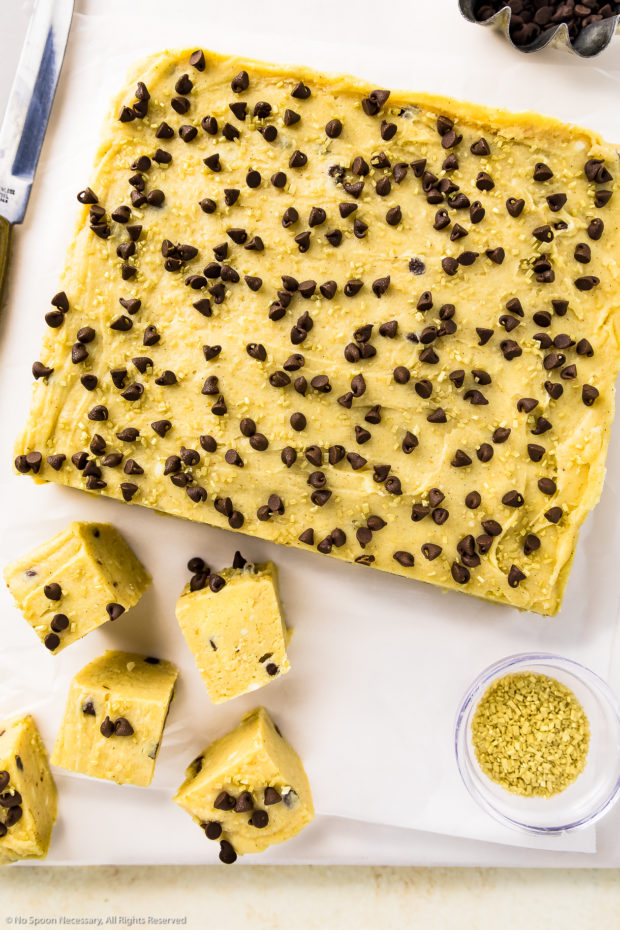
These little squares of fudge are edible bites of fall flavored bliss! Featuring soft, smooth, creamy, decadent white chocolate fudge swirled with rich cookie dough and kissed with subtly sweet pumpkin puree along with warming pumpkin pie spice! The texture is thick, ultra-creamy and insanely dreamy, with a magical, melt-in-your-mouth consistency!
Do you know the movie “When Harry Met Sally”?! And, do you remember the restaurant deli scene???! For those of you who know what I’m referring to, YOU will be a non-faking Sally when you eat this fudge! Because, this fudge plus your mouth equals straight nirvana!
I’m not trying to over-exaggerate, but I swear this fudge is SO sinfully delicious it will make you forget most (or possibly ALL) of life’s trials, troubles and tribulations. You got 99 problems? Trust me, this fudge ain’t one!
Well, I take that back. Not eating ALL this fudge in one sitting will probably prove to be a rather large problem. But, isn’t that what elastic waistbands were made for?
Why you’ll love this recipe
- Undeniably delicious: This fudge is unapologetically rich and undeniably tasty! Featuring a trifecta of pumpkin, white chocolate and cookie dough, this fudge is decadent and delicious!!
- Amazing texture: Smooth, creamy and thick, this fudge magically melts in your mouth! =
- Affordable staple ingredients: This recipe is made with budget-friendly, simple ingredients you probably already have handing around your kitchen!
- Amazingly easy: This recipe is simple and fuss free! There’s no cooking, no baking and absolutely zero hassle!
- 15-minute recipe: This pumpkin fudge require just about 15 minutes to prepare!
- Make ahead: If you are serving this fudge at a party, you can easily make it ahead and stash it in the refrigerator or freezer!
- Perfect to make with kids: This recipe comes together in a snap and is made in the microwave, so it’s a great recipe to make with kids or little ones!
- Great for every occasion: Fudge is perfect for any and every occasion, because who doesn’t want to end every meal with a little square of fudgy heaven?!
- Edible gift: Fudge is a wonderful edible gift to give your friends and family for the holidays!
- Everyone loves it: Everyone always oohs and aahs over this pumpkin confection!
What is fudge?
Fudge is a type of soft candy made by heating a mixture of sugar, butter, milk, and usually chocolate, along with other flavoring ingredients, to a “soft-ball stage” (a point at which sugar holds a ball-like shape). After cooking, the fudge mixture must “set” in the refrigerator until it holds its shape. This cooking and cooling process gives fudge a dense but flexible, soft texture.
Traditional fudge versus condensed milk fudge
While traditional fudge requires a bit of science, a candy thermometer and constant stirring, condensed milk fudge is much easier to prepare!
Traditional fudge: Old-fashioned fudge is made by heating a mixture of sugar, butter, milk and cocoa (chocolate) over low heat. This cooking method requires cooking the fudge to a specific temperature (236–238 degrees F) while constantly stirring to prevent the mixture from crystallizing. This type of fudge is fussy and requires constant babysitting or your fudge can turn out grainy, crumbly or too soft.
Condensed milk fudge: Quick condensed milk fudge is much simpler to prepare and doesn’t require using a candy thermometer! This fudge can be made in a microwave or a double boiler on the stove. Quick fudge typically uses condensed milk (or marshmallow fluff) instead of milk, as it’s more stable and less prone to curdling! Quick fudge is perfect for any type of cook and baker – from novice to experienced – as it’s foolproof and near impossible to mess up!
What’s in pumpkin fudge?
This luscious, easy canned pumpkin fudge is made with super simple lineup of staple ingredients!
Ingredients in this recipe
- Butter: You need 1 stick of unsalted butter to make the edible cookie dough portion of this fudge. Make sure your butter is at room temperature to aid in the mixing process!
- Sugars: A combination of granulated sugar and brown sugar add a robust sweetness!
- Vanilla: Pure vanilla extract adds a subtle hint of flavor while also enhancing the flavor of the other ingredients. Be sure to use real vanilla extract for the best flavor!
- Flour: To kill bacteria and avoid any risk of food-born illness, you need to heat-treat your all-purpose flour by cooking it. You can cook your flour in the oven or in the microwave, just make sure you allow it to cool completely before using it in the recipe.
- Spices: Salt enhances all the flavors while pumpkin pie spice contributes a ton of cozy flavor!
- Chocolate: You’ll need a total of 4 1/2 cups of chocolate chips for this recipe. I like to use a combination of white chocolate and mini chocolate chips; however, you can swap them for a variety you prefer!
- Condensed Milk: You will need one (14-ounce) can of sweetened condensed milk for this recipe. I recommend using the full-fat variety for the best results. Also, make sure you do not use evaporated milk as it is not the same thing! Evaporated milk is much thinner and using it will prevent your fudge from setting!
- Pumpkin Puree: Make sure you use plain 100% natural pumpkin puree, and not pumpkin pie filling, to make this fudge. Canned pumpkin puree is simply cooked and pureed pumpkin, while pumpkin pie filling is sweetened which will alter the recipe!
Substitutions and variations
This easy fudge recipe is somewhat flexible! While I don’t recommend messing with the ratio of ingredients, you can make a few substitutions and swaps!
- Butter: You can salted butter if you prefer, simply omit the kosher salt from the recipe!
- Extract: Try swapping out the vanilla extract for maple or pumpkin pie extract for added flavor!
- Flour: If you don’t want to heat treat your flour, you can substitute the all-purpose flour for and equal amount almond flour which doesn’t require any heating!
- Chocolate: You can swap out the mini chocolate chips for your favorite candy mix-in! (See below for a list of delicious substitutions!)
- Pumpkin Pie Seasoning Substitution: If you don’t have pumpkin pie spice mix, you can use a combination of cinnamon, ginger, nutmeg, and allspice instead!
What can I add to fudge?
Feel free to get creative with this fudge recipe! You can easily substitute the chocolate chips for your favorite ingredient! Before you start getting creative, be sure to use a mix-in ingredient(s) that complements and goes well with pumpkin! Also, be careful to not add any ingredient that has a high water content, as it will affect the consistency of the fudge! Below are a few delicious ideas to help get your creative culinary juices flowing!
- Nuts
- Mini Marshmallows
- Rasins
- Crushed Pretzels
- Caramel Bits or Chips
- Chopped Candy Bars
- Chopped Oreo Cookies
- Toasted Coconut Flakes
Five delicious pumpkin fudge flavors
Try a combination of ingredients to really make your easy fudge unique! You can add your favorite mix-in ingredient(s) to the fudge itself, as a top layer (add it before the fudge sets), or both! Below are 5 different flavor combinations for you to try!
- Turtle Pumpkin Fudge: Add chopped pecans and Rolo candies to your fudge!
- Oreo Pumpkin Fudge: Use semi-sweet chocolate instead of white chocolate chips and add chopped Oreo cookies to your fudge!
- Hot Chocolate Pumpkin Fudge: Swap out the white chocolate chips for semi-sweet chocolate chips and use a combination or mini marshmallows and chocolate chips as your mix-in/topping!
- Rum Raisin Pumpkin Fudge: Substitute rum extract for vanilla extract and add raisins to your fudge!
- Cake Batter Pumpkin Fudge: Replace the vanilla extract with cake batter extract and use a mix of as your mix-in/topping!
How to make quick fudge
This quick pumpkin candy only requires 15 minutes of hands on preparation! This fudge recipe is so incredibly easy to make and comes out perfectly every single time!
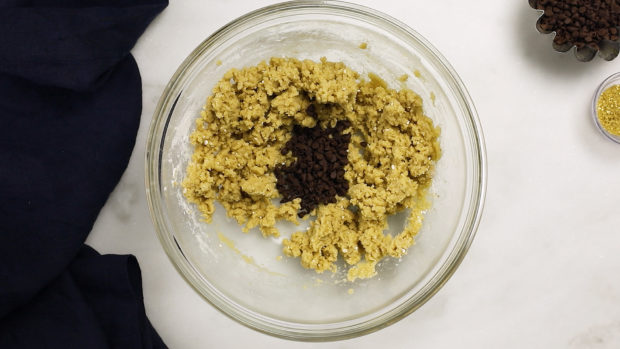
- Make the edible cookie dough: In a large bowl using a hand-held mixer, beat the butter and both sugars until smooth. Add in vanilla and beat again. Add in the flour and salt and then beat until combined. Stir in a ¼ cup of the chocolate chips. Set aside the cookie dough.
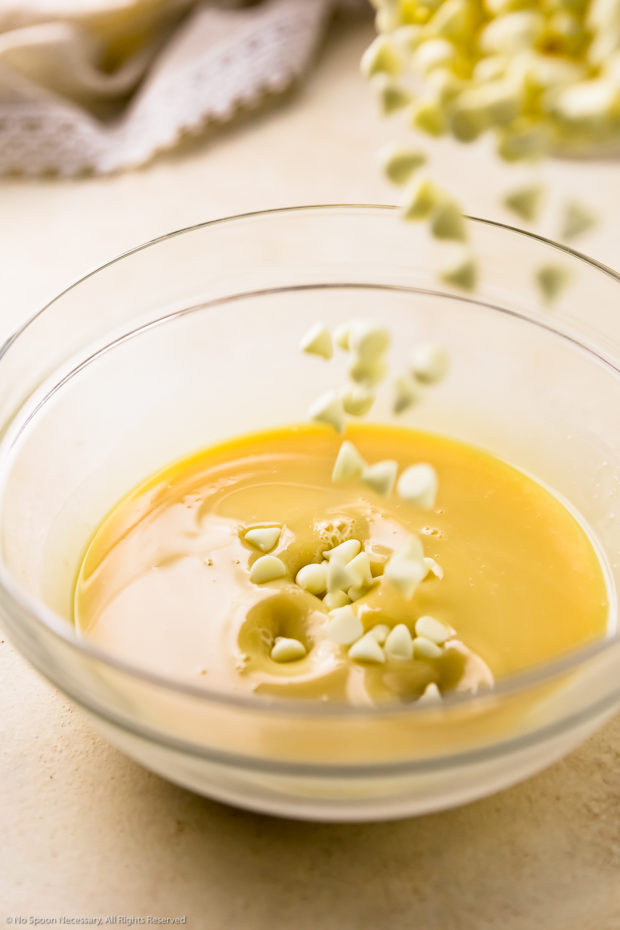
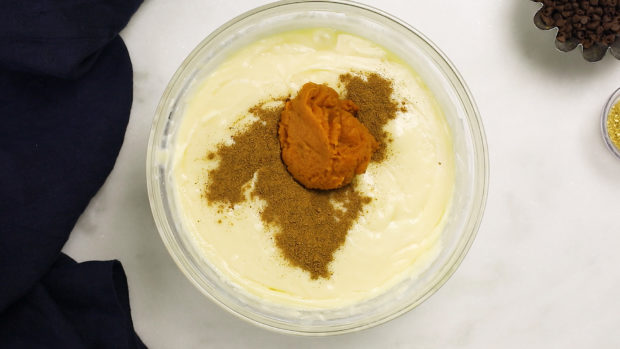
- Make the pumpkin fudge base: In a separate large (microwave safe) bowl add the condensed milk and white chocolate chips. Microwave in increments until the chocolate is melted. Add in the pumpkin puree and pumpkin pie spice. Stir until completely smooth.
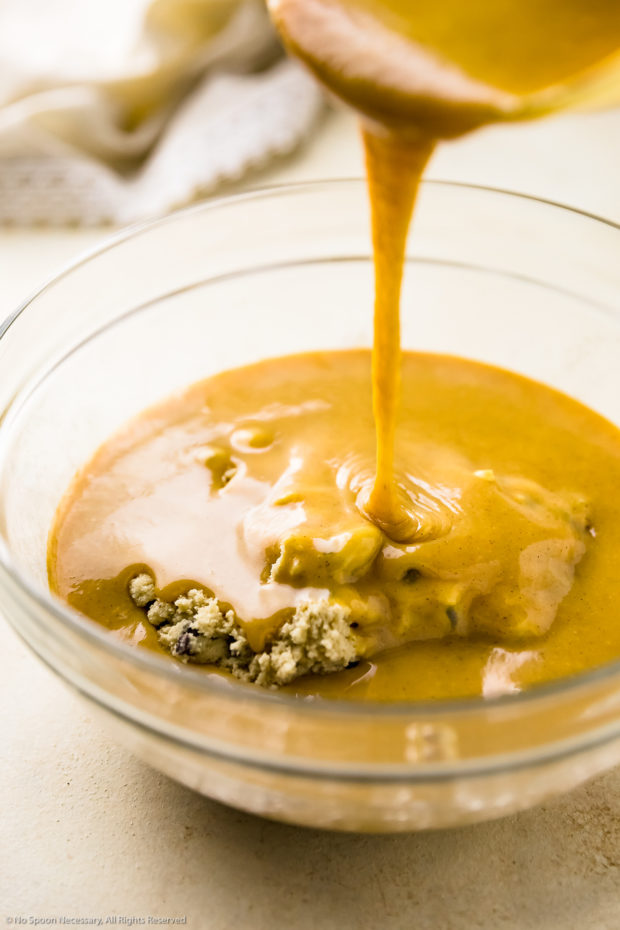
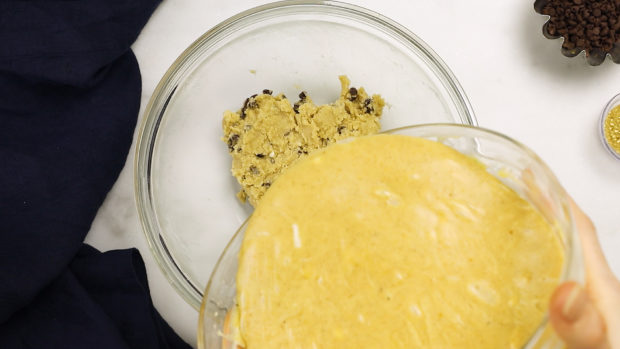
- Add pumpkin fudge base to the cookie dough: Pour the pumpkin mixture into the bowl containing the cookie dough. Gently fold the two together, be careful not to stir or over-fold the fudge.
-
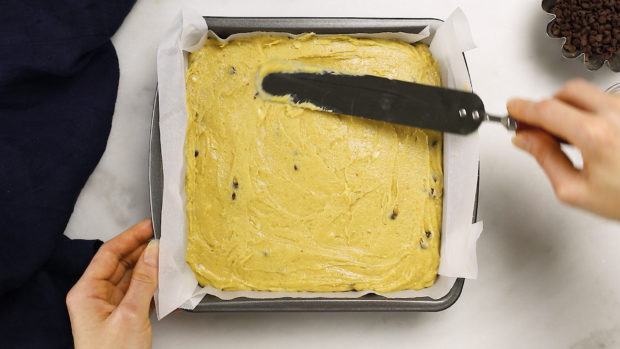
Add fudge to pan: Pour the fudge into a pan lined with parchment paper and use an offset spatula to smooth the top.
-
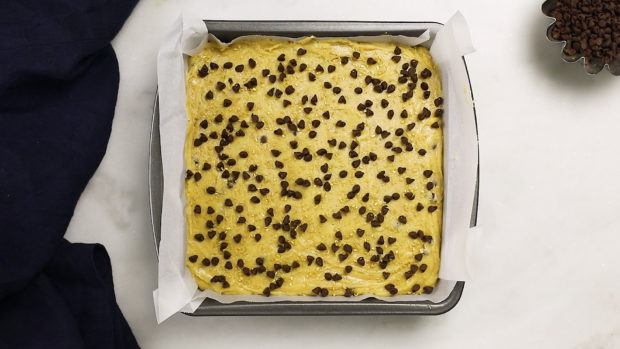
Add toppings: Sprinkle the top of the fudge with the remaining chocolate chips (or whatever mix-in you love).
-
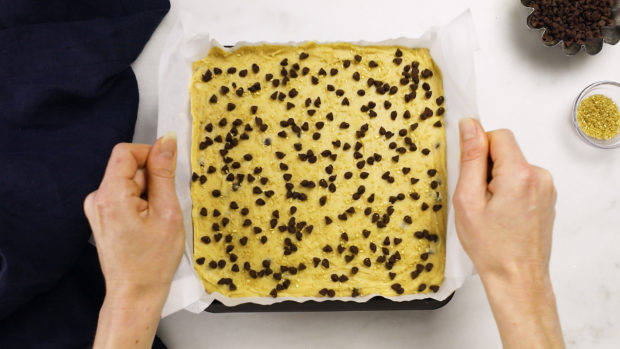
Chill: Refrigerate for 2 hours or until the fudge is firm and set.
-
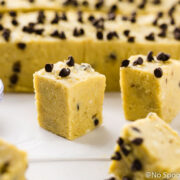
Serve: Remove from the pan by lifting the edges of parchment paper. Cut into squares and serve immediately.
What kitchen tools do I need?
This easy fudge recipe requires very minimal, basic kitchen equipment!
- Square pan: Ideally, an 8×8-inch or 9×9-inch pan.
- Two large mixing bowls: You need two large mixing bowls. Please make sure one of them is microwave-safe!
- Hand-held mixer: A hand-held mixer makes quick and easy work out of beating together the ingredients for the edible cookie dough!
- Rubber spatulas: You will need a rubber spatula for folding the fudge mixture. While you can use the same spatula, an offset spatula works best to smooth the top of the fudge before refrigerating.
Tips to ensure your success with this recipe
- Chocolate: You can substitute the white chocolate chips for regular milk or semi-sweet chocolate chips instead!
- Melting chocolate: Patience is key when melting chocolate! Make sure you microwave the chocolate in 30 second increments, because white chocolate will quickly seize on you! If you can adjust the power level on your microwave, I recommend microwaving it at 50% power. If microwaving chocolate makes you nervous, you can microwave just the condensed milk (in a bowl) for 1 ½ – 2 minutes and then add the chocolate to the condensed milk. Next, give it a good stir and allow the heat of the milk to melt the chocolate.
- Flour: The recipe below calls for COOKED flour. Raw flour can contain strains of E.Coli., so make sure you heat your flour to 160 degrees F. You can either do this by baking or microwaving the flour. There are instructions for both in the recipe below.
- Pumpkin puree: You can either make your own pumpkin puree or buy a can or puree. If purchasing canned puree, make sure you do NOT buy pumpkin pie filling as it is not the same thing!
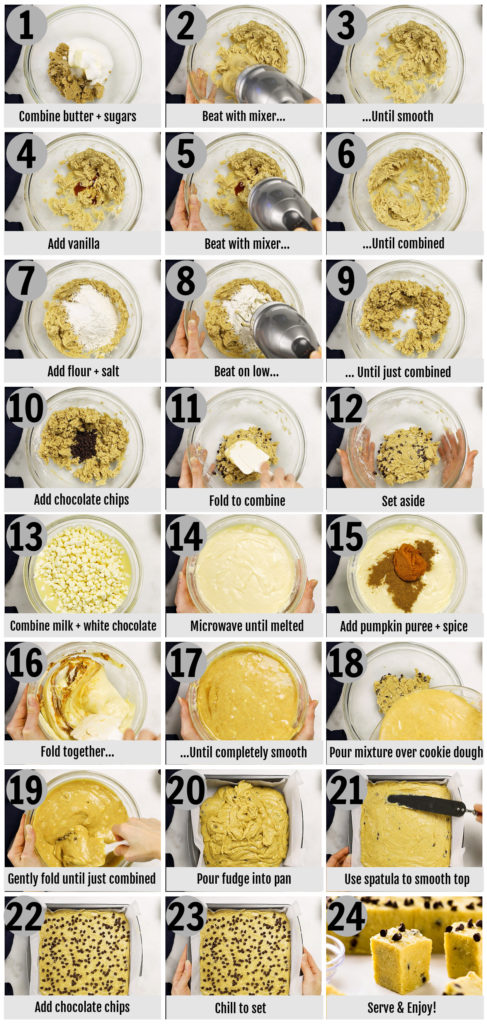
How to make fool-proof fudge with pumpkin step by step photos
(Scroll down for the detailed measurements and instructions in the printable recipe card at the bottom of the page.)
Expert tips for making perfect fudge every time
Follow the below tried and true techniques to ensure your quick pumpkin fudge turns out perfect!
Line your pan to ensure your fudge releases easily!
Once you have made your pumpkin fudge and it has set, you will want to be able to remove it easily from the pan. While you can grease the pan, I found the best way to easily remove fudge is to line your pan with parchment paper. When lining your pan, make sure the parchment paper extends up the sides of the pan to create “handles”. When your fudge is set you can simply grab the paper “handles” and lift the fudge easily right out of the pan!
Use the correct ingredients!
It’s imperative you use the correct ingredients when making pumpkin fudge! This no-fail fudge recipe uses sweetened condensed milk, not evaporated milk, regular milk or heavy cream. The condensed milk ensures that this fudge sets perfectly every single time! Also, make sure you double check to ensure you are using 100% pumpkin puree, and not pumpkin pie filling. Lastly, do not substitute the butter with margarine as the latter contains more water which will prevent your fudge from properly setting.
Use good-quality ingredients!
Good-quality ingredients made a huge difference in the taste and texture of your fudge! Make sure you use high-quality chocolate, pure vanilla extract (not the imitation flavor) and full cream butter.
Use a sharp knife to cut fudge!
If you want individual servings of fudge with perfectly shaped edges, make sure your fudge is completely set before cutting! It’s helpful to lightly “score” the top of the fudge with a knife before you begin cutting to ensure you get even squares. Also, make sure you use a sharp knife and clean the knife in between cuts.
How to serve fudge?
There are so many economical, festive ways to spruce up your batch of fudge! Below are few fun ways to dress up and serve your fudge!
- Fudge Pop: Much like a cake pop, you can serve fudge on a stick! Insert a lollipop stick into individual squares of fudge to create a cute treat on a stick! If you want turn them into gifts, try wrapping each “pop” in clear cellophane cake pop bags!
- Festive Shapes: Fudge doesn’t have to be square! Try using small cookie cutters to transform your fudge into fun shapes! If using cookie cutters, make sure your fudge is completely set and use a thin cookie cutter (you don’t want the fudge to be thicker than your cutter!).
- Icing: For an elevated look, try decorating the top of your fudge with icing! Simply mix up your favorite icing, transfer it to a piping bag and drizzle it on top of your set fudge!
- Fudge Gift Boxes: If you are looking to give the gift of homemade fudge this holiday season, consider using a box! Find a pretty chocolate box and line the bottom with parchment or wax paper before adding the fudge. Wrap the box in beautiful ribbon or add a bow to create a delicious, yet easy holiday present!
How to store homemade pumpkin fudge?
For best results, store fudge in an airtight container in the refrigerator. This quick fudge will keep for up to two weeks when properly stored.
Expert tip: Unlike hard candies, fudge can dry out and get hard when it is exposed to air. To help keep pumpkin fudge soft and fresh, make sure you wrap your fudge in plastic wrap after it sets, before placing it in an airtight container!
Alternatively, you can freeze fudge to extend its shelf life! Store fudge in an airtight, freezer-safe container for up to 3 months.
Expert tip: Cut the fudge into serving size pieces and place a sheet of wax paper or parchment between the layers of fudge to prevent them from sticking together during freezing!
Bust out your stretchy waist pants and indulge in ALL the fudge, my friends. I pinkie promise this easy fudge is fantastical and worth every single calorie.
Until next week, friends, cheers!
Cheyanne
Craving MORE? Follow all the deliciousness on Facebook, Pinterest and Instagram!
More no-bake desserts!
Are you looking for more easy treats? Try these family favorites:
More recipes with pumpkin!
How to make Quick Pumpkin Fudge recipe and video👇
Pumpkin Fudge
Equipment
- Square Pan (8x8-inch or 9x9-inch)
- Two large mixing bowls
- Hand-held mixer
- Rubber Spatula
Ingredients
- 1 Stick Unsalted Butter softened to room temperature (1/2 cup)
- ½ Cup Granulated Sugar
- ¼ Cup Light Brown Sugar packed
- 1 tsp Pure Vanilla Extract
- 1 Cup All Purpose Flour – cooked (SEE NOTES)
- ¾ tsp Kosher Salt
- ½ Cup Mini Chocolate Chips DIVIDED
- 4 Cups White Chocolate Chips Two (12-ounce) Bags
- 1 (14 ounce) Can Sweetened Condensed Milk
- ¼ Cup Pumpkin Puree (SEE NOTES)
- 1 TBS Pumpkin Pie Spice
- Optional toppings: Gold Sprinkles, Crushed Toasted Walnuts
Instructions
- Line an 8x8’’ or a 9x9’’ pan with parchment paper and set aside.
- Make the edible cookie dough: In a large bowl using a hand-held mixer, beat the butter and both sugars until smooth. Add in vanilla and beat again. Add in the flour and salt and beat until combined. Stir in ¼ cup of the chocolate chips. Set aside.

- Make the pumpkin fudge base: In a separate large (microwave safe) bowl add the condensed milk and white chocolate chips. Microwave for 1 minute*; stir and put it back in the microwave, stirring every 30 seconds until melted. Add in the pumpkin puree and pumpkin pie spice. Stir until completely smooth.
- Add pumpkin fudge base to the cookie dough: Pour the pumpkin mixture into the bowl containing the cookie dough. Gently fold the two together, be careful not to stir or over-fold the fudge.
- Add fudge to pan: Pour the fudge into the prepared pan and use an offset spatula to spread the top evenly. Sprinkle with remaining chocolate chips (and sprinkles or crushed walnuts if using).
- Chill: Refrigerate for 2 hours or until the fudge is firm.
- Serve: Remove from the pan by lifting the edges of parchment paper. Cut into squares and serve immediately.
Video
Notes
- Chocolate: While I used white chocolate, you can absolutely substitute regular milk chocolate chips instead!
- When melting your chocolate in the microwave, patience is key. You need to make sure you microwave the chocolate in 30 second increments, because white chocolate will quickly seize on you! If you have a microwave that lets you adjust the power level, that’s even better. I recommend microwaving it at 50% power if possible. If you are nervous about the white chocolate seizing, you can always microwave just the condensed milk (in a bowl) for 1 ½ - 2 minutes and THEN add the chocolate to the condensed milk. Give it a good stir and allow the heat of the milk to melt the chocolate.
- Heat Treating Flour: The recipe below calls for COOKED flour. Raw flour can contain strains of E.Coli., so make sure you heat your flour to 160 degrees F. You can either do this by baking the flour (in a single layer on a baking sheet) in a 350 degree F oven for 8 - 10 minutes (stir it halfway through), or by microwaving it on high for 1 ½ - 2 ½ minutes, stirring every 20 seconds. Make sure you allow the flour to cool completely before using it in the recipe as instructed.
- Pumpkin Puree: You can either make your own pumpkin puree or buy the canned variety. If purchasing canned puree, make sure you do NOT buy pumpkin pie filling! It is not the same thing!
- Storage: Fudge will keep stored in an airtight container in the fridge for 2 weeks, or you can store it in the freezer for 3 months.
Nutrition
Did you make this recipe?
Mention @nospoonnecessary on Instagram and tag it #nospoonnecessary!
©No Spoon Necessary. All images and content are under copyright protection. Please do not use any images without prior permission. If you want to republish this recipe please do not list instructions, instead link directly back to this post.
Rate and Comment!
Did you make this recipe? WONDERFUL! I would love if you would rate the recipe and leave a comment below!
MaryAnn | The Beach House Kitchen
I remember this tasty little number Chey! I’ve got a girl’s weekend coming up in a few weeks and I’m thinking I need to bring some of this for everyone! Such a delicious fall treat!
Rachelle @ Beer Girl Cooks
Bring on the expando pants because I need all of this fudge! This white chocolate pumpkin business is the best flavor combo! I’m going to whip up some of this and go all Sally in the deli – Yes! Yes! Yes!
Geraldine | Green Valley Kitchen
I saw the video you made on Instagram and it look so good, Cheyanne! I like to make treats for my coworkers so I am definitely making this before Halloween gets here!
Adina
I’ve never eaten fudge, but always admire the beautiful pieces I see on other blogs. I really have to do it one day and this pumpkin and white chocolate version sounds really good.
Megan – The Emotional Baker
Three of my favorite flavors in one treat = dangerous! This fudge looks awesome 🙂
Ashley@CookNourishBliss
Oh Halloween!! I tend to not care about it but I realllly need to remember to buy candy for the kiddos in our neighborhood!! haha We got SO MANY last year and completely ran out and I felt kinda sorta terrible. lol ANYWAY. Store-bought for the kids and this delicious looking fudge for me! I think that sounds like a plan 🙂
Ben|Havocinthekitchen
You’re completely right, Chey. The key word to describe this fudge is “dangerously delicious”. That’s why I’m not making it so you should send me just a few pieces, please:) I’m looking for perfect old-fashioned fudge (Do you have any good reipes cause all my attempts have failed?) In a meanwhile, I don’t mind a version features chocolate and condensed milk so let’s eat some:)
marcie
You’ve combined SO many delicious ingredients in this fudge and it does look like nirvana! And that scene from Harry Met Sally would be the perfect reaction after eating this — it looks so good!
Karen @ Seasonal Cravings
Microwave? I’m in! This looks like the perfect quick treat when I deserve a treat… which is every day of course.
Kelsie | the itsy-bitsy kitchen
I just did the math (always dangerous) and WHAT? I thought for sure we were more than 12 days away. Next stop Christmas parties. . .I want to drown my sorrows in 2017’s impending end with this freaking unbelievable fudge. Cookie dough and pumpkin spice? AND WHITE CHOCOLATE? You’re killing me, Chey! (In a good way. Don’t worry.) Have a great weekend, my dear!
Thao @ In Good Flavor
Oh yum! I need to make these! They are going to be great little treats for the group at work. I love Meg Ryan’s romantic comedies—”When Harry Met Sally” ranks right up there with “Sleepless in Seattle” and “You’ve Got Mail”. If this fudge is going to make me feel the way she felt at the deli, I need to make it pronto! Haha!
Jennifer @ Seasons and Suppers
Wowsa! I want this 🙂 What a great Fall sweet treat and so pretty.
annie@ciaochowbambina
Ohhh, I love this! Last year I started getting into making fudge and I’m always on the lookout for creative flavors. You have nailed it with this one, Milady!! I can imagine that yummy creamy goodness! Pinned! Have a great weekend, my friend! XO
Mary Ann | The Beach House Kitchen
Totally looks dangerously delicious Chey! My son Casey loves cookie dough anything so I’ll need to send some of this off in a little care package to him at college! His roommates will love him! Live the video too!
Gayle @ Pumpkin ‘N Spice
Yay for Halloween! I seriously can’t believe how fast this month is going. This fudge looks incredible, Cheyanne! I’m a sucker for fudge, and this pumpkin cookie dough version is calling my name. Forget the store-bought candy and just give me this ALL! I want to be munching on this all season. Pinned! And I love your video, too! Have a great weekend, friend!
Kathryn @ Family Food on the Table
I’m so excited for Halloween and so on board with making fudge a requirement this year! This fudge has ALL the flavor going on and I love how tall and thick these pieces are! Restraint is definitely going to be an issue! Pinned! Have a fun weekend my friend! XO
Angie@Angie’s Recipes
Not eating them all at one go would be a PROBLEM for me!! And I am not even a white chocolate fan. An excellent and tempting recipe, Chey.