This post may include affiliate links. Thank you for your support.
These Homemade Dinner Rolls are soft, fluffy and bursting with rich, buttery flavor! This easy rolls recipe only requires 7 ingredients and they’re ready in under one hour – from start to finish! These yeast rolls are perfect for beginning bakers and I’ve included tons of tips and tricks for making the best dinner rolls from scratch!
Featured comment: I have to admit, I was skeptical, but decided to try these. I have gone from skeptical to AMAZED—how could such a short time yield such fluffy, buttery delicious results!!? These rolls tasted like I’d spent half my day kneading, proofing, etc. Thank you so much for such a stunning dinner roll! I was able to get these beauties in the table, with dinner, even after working all day. Thank you, thank you, thank you!!” – Anstrom
Continue to read on to learn more about how to easily customize your dinner rolls! Plus, how to make them in advance and tips for storing, freezing and reheating! These soft rolls are truly amazing and so simple to prepare, making them the perfect side to accompany any meal!

Update: This post was originally published in March 2021. I made updates to the post below to include more information about making soft yeast rolls at home.
Hi, friends! If you love the taste of homemade, buttery, fluffy rolls, but hate the hassle of making bread dough (because who really has the time to let dough rise multiple times for hours on end?!) then I have the perfect recipe for you!!
Table of Contents
- About this dinner rolls recipe
- Ingredients for homemade dinner rolls
- FAQs: easy dinner rolls
- How to make dinner rolls in an hour?
- Troubleshooting: tips for easy dinner rolls
- Tips for shaping and rising homemade rolls
- Tips for the best yeast dinner rolls
- Tips for storing and freezing dinner rolls
- Serving this quick rolls recipe
- More dinner bread recipes!
- Easy Dinner Rolls Recipe
About this dinner rolls recipe
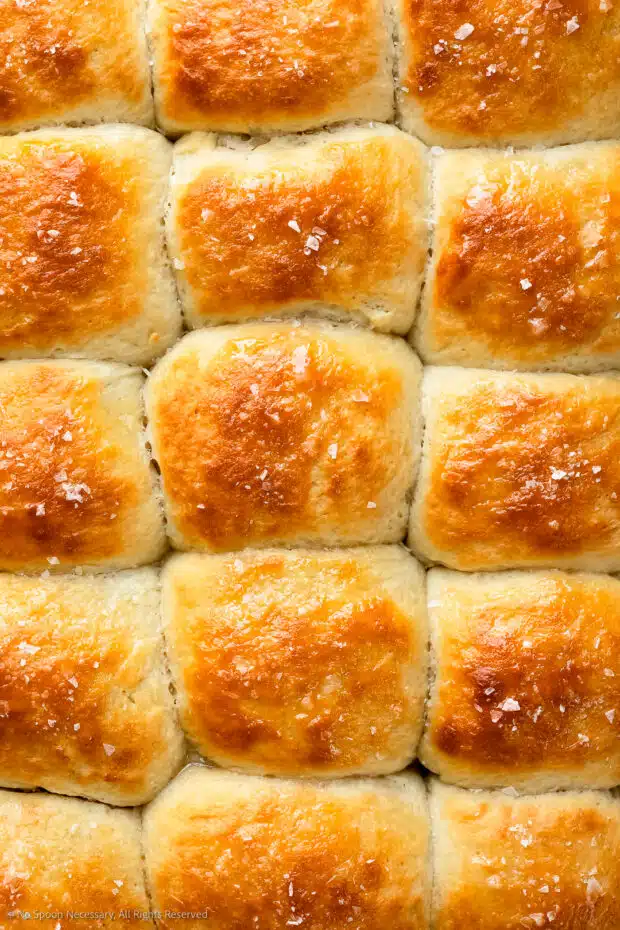
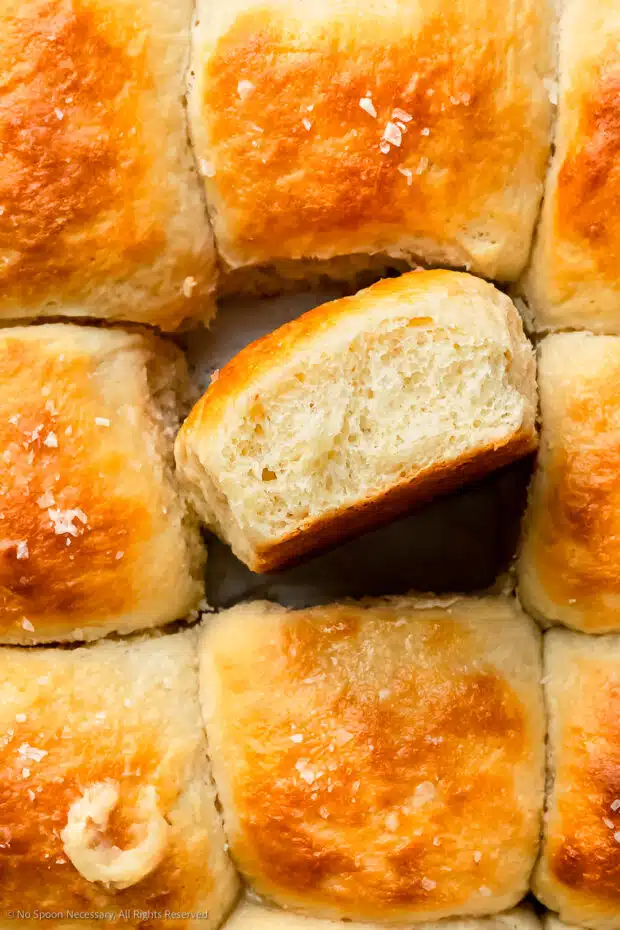
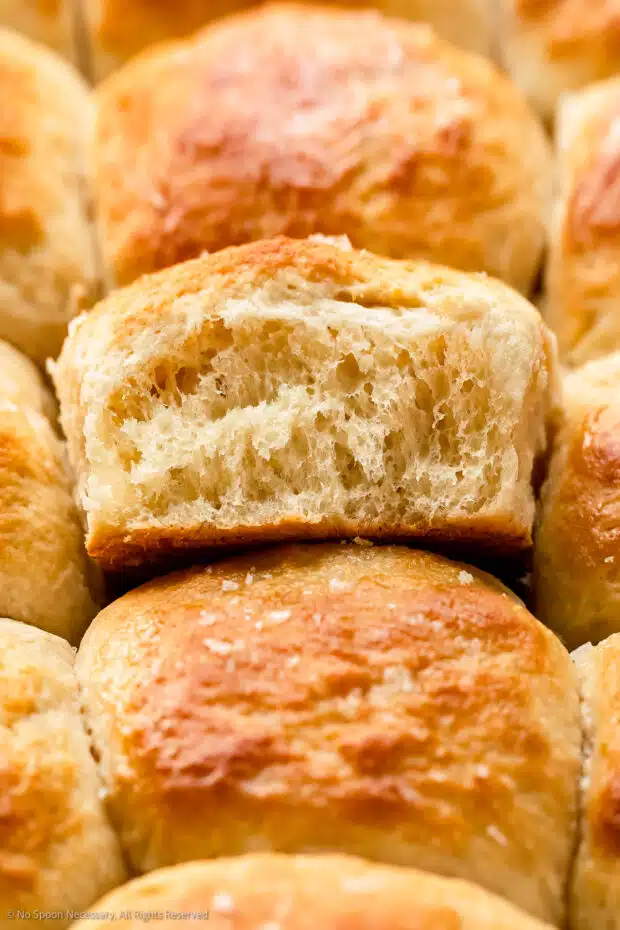
There is nothing like a sight of a rustic bread basket overflowing with gorgeous, golden brown and delicious dinner rolls! Their pillowy-soft texture and yeasty, buttery, fragrant aroma is enough to make anyone’s heart go pitter patter! But, now imagine those same rolls are also ridiculously simple to prepare! And, they can be ready, from start to finish, in under one hour! Well, say hello to the greatest dinner roll recipe of all time – these Quick One-Hour Rolls!
These rolls are light, fluffy and every-so-slightly chewy with the most amazing rich, buttery taste! And, (arguably) the best part of all – this recipe only requires 7 simple ingredients you probably already have on hand! This yeast bread dough is super easy and straightforward to prepare! The entire process (from making the dough through baking) takes roughly 45 minutes, which means you can have warm, fluffy homemade dinner rolls on your table in under 60 minutes!
Basically, these soft bread rolls are all around wining! While your family is going to love the buttery, fresh taste of these homemade rolls, you are going to love how stress-free, quick and easy this soft rolls recipe is to prepare!
Why you’ll love these homemade rolls
- Simple ingredients! These homemade rolls are made with simple ingredients you probably already have hanging around your pantry and refrigerator!
- Easy to make! This easy yeast roll recipe is so easy to make and requires no hand kneading – it’s perfect for even beginning bakers!
- Quick 1-hour recipe! This entire recipe takes less than 1 hour to make from start to finish!!
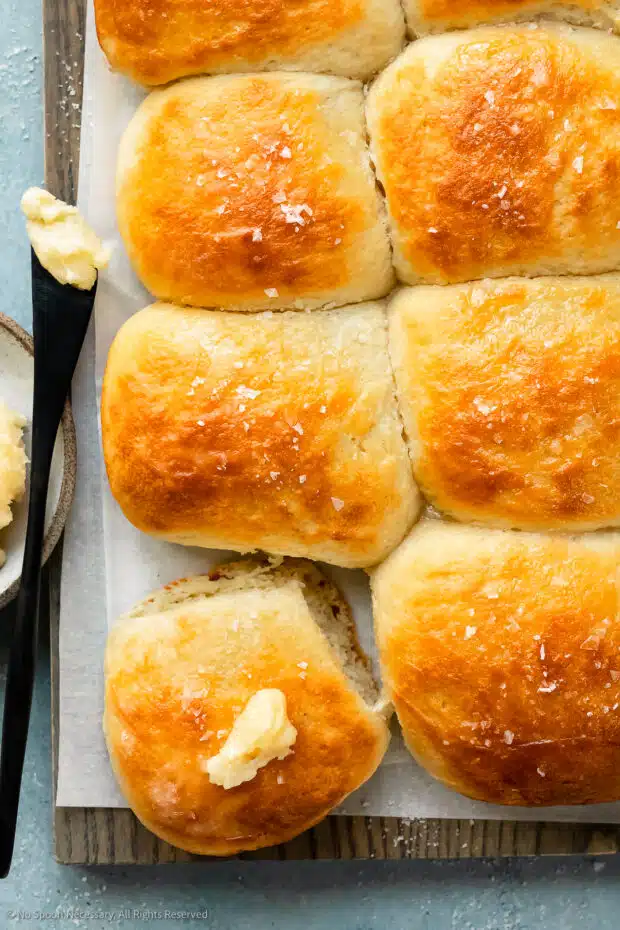
- Soft and buttery! The perfect ratio of flour to fat and milk makes these dinner rolls pillowy soft and super fluffy! Plus, they are double brushed with butter the ultimate savory, salty, buttery roll experience!
- Easy to customize! You can easily customize these rolls with your favorite seasonings, spices and herbs! I’ve included some delicious variations to try below!
- Store beautifully! These soft rolls stay fresh at room temperature for days! Or you can bake and store them in the freezer and quickly warm them in the oven!
- Family favorite! Fair warning, these rolls always disappear fast from the dinner table! Make them and watch as your family gobbles them up!
- Perfect for every occasion! These easy dinner rolls are perfect for every occasion, from quick weeknight meals with your family to more extravagant holiday gatherings!
Ingredients for homemade dinner rolls
These soft, rich, and buttery yeast dinner rolls only require 7 simple ingredients – all of which you probably already have on hand in your kitchen and pantry! Here’s what you’ll need:
- Milk: You need a liquid to activate the yeast. For the softest texture and richest flavor, I recommend you use whole milk. You can substitute 2% milk, but your rolls will be lacking in both flavor and texture.
- Sugar: The purpose of granulated sugar is twofold – it helps feed the yeast, resulting in a faster rise and it helps tenderize the dough.
- Oil: A small amount of vegetable oil (1 tablespoon) lends fat, which helps keep the rolls tender on the inside and slightly crisp on the outside.
- Yeast: Yeast is the ingredient that makes dinner rolls soft and fluffy! This rolls recipe calls for a large amount of active dry yeast – 2 tablespoons. The big amount of yeast is what helps these 1 hour rolls rise very quickly! (Scroll down to read all about baking with yeast!)
- Egg: One large egg provides structure, while also adding rich flavor.
- Butter: Unsalted butter delivers tons of flavor and tenderize the dough.
- Salt: Kosher salt is necessary for flavor.
- Flour: You will need anywhere from 3 to 3 ½ cups of all-purpose flour to make these easy dinner rolls. You can substitute bread flour if you prefer dinner rolls with a chewier texture. (Scroll down to read about accurately measuring flour!)
Variations of yeast rolls
Want to add some pizzaz and take your fluffy dinner rolls to the next level of yum!? This dough is incredibly easy to customize. There are so many variations you can try – so get creative in the kitchen and create a dinner roll recipe YOU love! Below are a few ideas to get you started:
- Honey Butter Rolls: If you prefer your homemade rolls to be truly flavorful with a hint of sweet decadence, I recommend you don’t skip the honey butter!! The honey butter truly takes these rolls from really good to amazingly great!! (I’ve included instructions in the printable recipe card below)
- Garlic Rolls: Love the mellow flavor of garlic in your rolls?! Try brushing your dinner rolls with butter and then sprinkling on some garlic salt! Or try brushing your rolls with homemade garlic butter (mix together ½ cup of softened butter with 2 cloves of minced garlic)!
- Parmesan rolls: Prefer your rolls with a touch of nutty parmesan flavor? Try adding ½ cup of freshly grated parmesan to your dough and don’t forget to add sprinkle your rolls with more parmesan cheese before baking! Just make sure you grate the parmesan yourself (don’t use that stuff in a green can!)
- Herb Dinner Rolls: Prefer the bright, fresh flavor of herbs? Try adding your favorite dried herbs to your dough! I love the combination of rosemary, basil and parsley – use 2 teaspoons of each.
FAQs: easy dinner rolls
What type of yeast to make soft dinner rolls?
There are two main categories of yeast – wet yeast and dry yeast. Wet yeast is mainly used by professionals, so we are going to focus on dry yeast – which is what you need to use when making homemade dinner rolls.
There are two types of dry yeast: active-dry yeast and instant yeast (also known as rapid rise). You can use either type of dry yeast to make One Hour Dinner Rolls; however, this recipe focuses on using active-dry yeast.
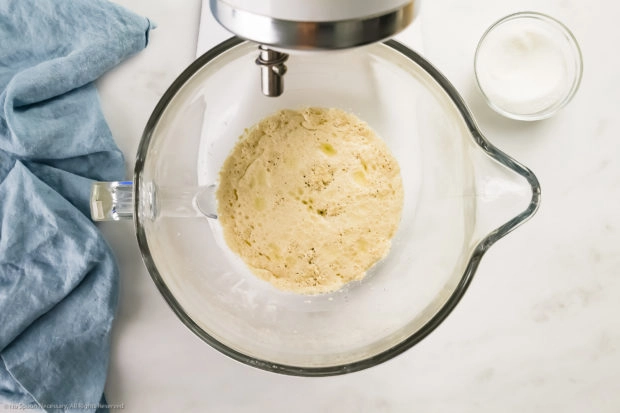
Active-dry yeast is made of bigger size granules and needs to be “proofed” or activated before using. To proof active-dry yeast, you simply add it to a mixture of warm milk, sugar and oil, and let it sit for 5-10 minutes until the mixture is frothy and very bubbly.
On the other hand, instant yeast can be added directly to the dry ingredients and doesn’t require any proofing.
Both types of dry yeast are sold in little individual packets or loose in a jar. You can find dry yeast in the baking section of most major grocery stores. Dry yeast is perishable, so once you open the package of yeast, you must place it in an airtight container and store it in the refrigerator (for up to 4 months) or freezer (for up to 6 months).
How to properly measure flour for yeasty rolls?
One of the easiest ways to ruin your dinner rolls is to improperly measure your flour! But thankfully, accurately measuring flour is easy to do and it will help you avoid the most basic baking error! If you are using a kitchen scale, 1 cup of flour equals 125 grams.
Measure flour in 3 easy steps
- Fluff: Use a spoon or fork to stir the flour in its container. Don’t skip this step – flour will settle and become compact upon sitting.
- Spoon: Use a large spoon to spoon the flour from the container and into your measuring cup, making sure the flour is lightly overflowing the cup.
- Level: Use the back, straightedge of a knife to level off the flour. Repeat leveling off the surface of the flour until it’s smooth across the top of the measuring cup.
Mistakes to avoid when measuring flour
- Sifting: Never sift your flour unless the recipe calls for it. You don’t need to sift the flour for this dinner roll recipe!
- Packing: Never dip your measuring cup into the flour container! Dipping the measuring cup right into the container will result in packing the flour and you will end up with significantly more flour than you need!
How to make dinner rolls in an hour?
Making light and fluffy dinner rolls can be a quick and easy process if you follow this straightforward recipe! (Don’t forget to scroll down for the detailed instructions in the complete printable recipe at the bottom of the page.)
- Proof the yeast: Make sure your active dry yeast is alive by blooming it in a mixture of warm milk along with a pinch of sugar and small drizzle of oil.
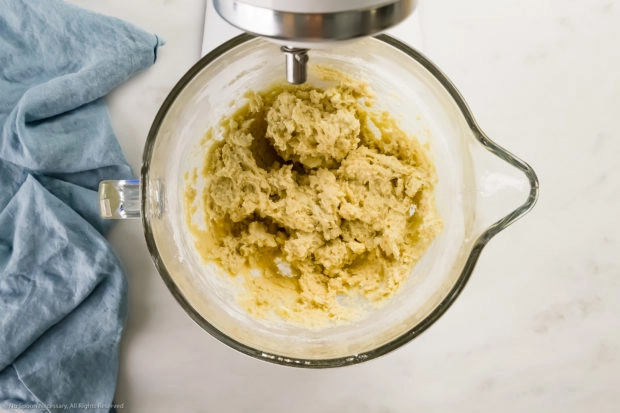
- Prepare the dough: Add an egg, butter, salt, flour and the remaining sugar to the yeast mixture. Use a stand mixer to combine the ingredients together.
- Knead: Continue to mix and knead the dough until it’s smooth, soft, elastic and gently pulls away from the sides of the bowl.
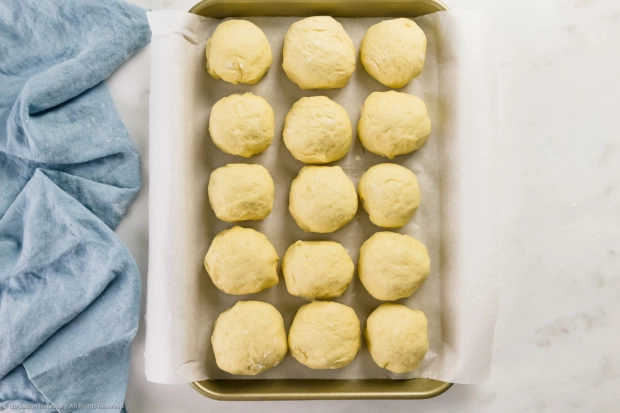
- Shape rolls: Use a bench scraper or paring knife to cut the dough into 15 equal pieces. Roll and shape each piece into a ball and transfer to a greased baking pan.
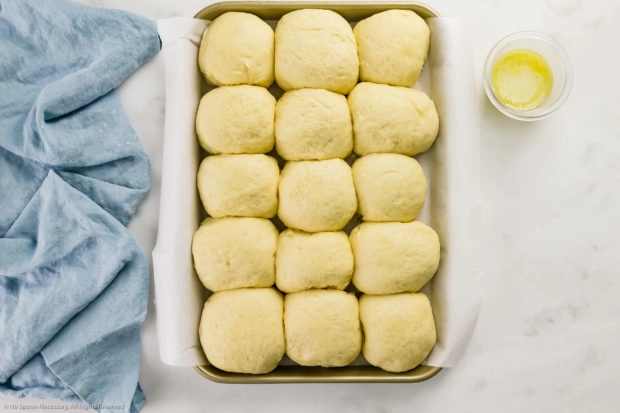
- Quick rise: Transfer the pan to a slightly warm oven and let rise for 15 minutes.
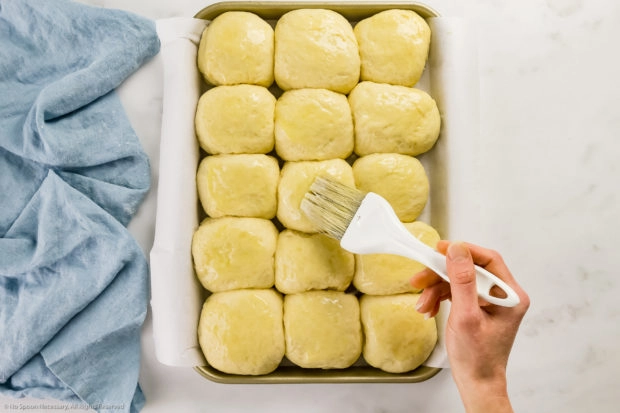
- Bake: Lightly brush the rolls with butter before baking them for 15-20 minutes at 375 degrees Fahrenheit. Remove the rolls from the oven, generously brush with butter and enjoy!
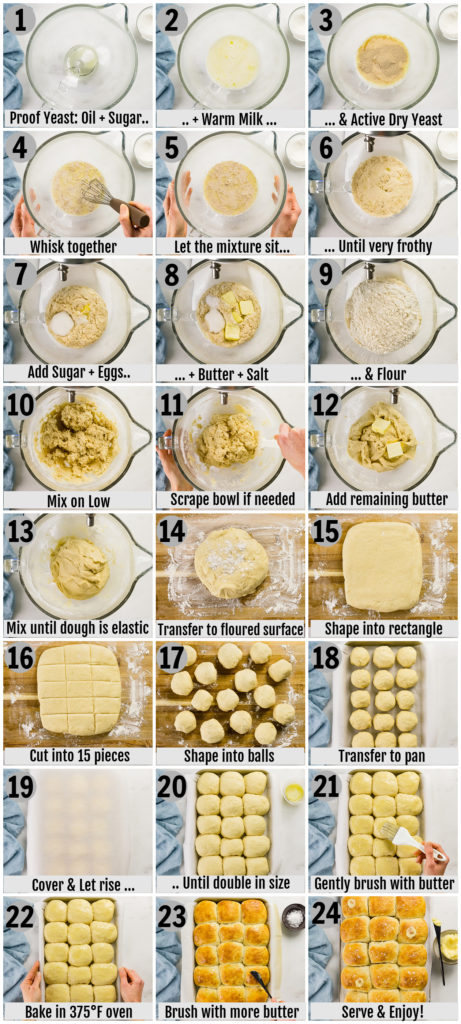
Step-by-step photos: Making quick yeast rolls recipe
(Please see the complete, printable recipe card at the bottom of the post for measurements and full instructions.)
Troubleshooting: tips for easy dinner rolls
Baking fails happen to the best of us! Follow these simple tips and easy tricks to avoid your next homemade bread making fail!
How to tell I’ve used enough flour in my yeast roll dough?
This homemade dinner rolls recipe is very straightforward with one exception – the precise amount of flour you need to use will depend upon two factors: accurate measurement and the humidity in your environment. When making this recipe, it’s best to tell if you’ve added enough flour by touching and feeling the dough!
Start with the minimum amount of flour – 3 cups. Use the stand mixer to knead the dough until it looks ropey and barely pulls away from the sides of your mixing bowl. You want the dinner roll dough to be wet enough that it holds together, but not so sticky that it sticks to everything! The dough should be smooth, elastic and ever-so-slightly sticky. If the yeast dough is extremely sticky and clinging to the sides of the bowl, add more flour, one tablespoon at a time, until it just clears the sides of the bowl and is soft to the touch.
Why are my dinner rolls dense?
There is nothing more disappointing than dense, heavy dinner rolls! Below are some of the factors and mistakes that contribute to your homemade rolls being dense.
- Your yeast was expired. If the yeast doesn’t bubble and froth during foaming, your yeast is dead and your rolls will never rise. Dead yeast will cause your homemade rolls to be more like hockey pucks than dinner rolls.
- Too much flour. When making your dough, start with 3 cups of flour! If your dough is still very sticky, add more flour one tablespoon at a time! Make sure you are only adding a little bit of flour at a time! Adding too much flour will cause your rolls to be less fluffy.
- You kneaded the dough too much or too little. Making bread dough is straightforward and finicky all at the same time. You want to knead the dough long enough to develop a strong gluten network, which makes your rolls delightfully chewy. However, you don’t want to knead the dough so long that you develop too much gluten, which will result in rock-hard rolls! After proper kneading your dough should feel soft and spring back immediately when you lightly press it with your finger. If it doesn’t spring back, the dough needs more kneading. If your dough feels tight or tough, then you have over kneaded your dough. Take-away: Knead the dough until it’s soft to the touch.
- You didn’t let it rise! Once you have properly kneaded your dough, you need to let it rise until it’s puffy and almost double in size. Rising improves the flavor and creates a structure within the rolls which produces fluffy texture!
Tips for shaping and rising homemade rolls
Before you bust out your mixer and grab your yeast, read the simple tips and tricks below for creating perfectly soft and fluffy butter dinner rolls every single time!
Where should my dough rise?
These one-hour dinner rolls rely on one quick rise versus standard yeast rolls that require two longer rises! Therefore, where you place the dough to rise is important!
Typically, the kitchen counter is a fine place to let dough rise, however you will need to speed up the rising process by placing the rolls in the warm oven. To quickly rise dough, preheat the oven to 200 degrees Fahrenheit and then immediately turn the oven off. Cut the dough, shape it into balls and transfer the dough balls to your baking pan. Next, place the pan in the warm oven. The slightly warm oven speeds up the yeast activity, helping your dough balls rise very quickly! Tip: Make sure you preheat your oven and turn it off before you start cutting the dinner roll dough. You don’t want your oven to be too hot when rising your dough!
How to cut dough for butter rolls?
Cutting your dough for dinner rolls is super simple! You don’t need to worry about them being perfect! (If you’re a perfectionist, see below for getting them equal in size!)
- Flour work surface: Lightly flour your work surface and place your dough on top. Sprinkle a little bit of flour evenly over the surface of the dough.
- Shape it into a rectangle: Gently roll and pat the dough into a rectangle.
- Cut dough: Use a pastry scraper or sharp paring knife to cut the dough into 12-15 evenly sized pieces.
How do I make my yeast rolls equal in size?
Want to ensure all your buttery dinner rolls are uniform and equal in size? Use a kitchen scale! To make uniform rolls equal in size, weigh the entire ball of dough using a kitchen scale. Next, divide that weight by 12 or 15 – depending upon how big you want your rolls. That number is your target weight for each roll.
How to shape dinner rolls?
When it comes to shaping dough into homemade dinner rolls, the possibilities are pretty endless! You can twist and turn the dough into cloverleaves, knots and crescent shapes to name a few. However, today we are going to stick to the basic round shape because it’s straightforward and classic!
- Divide the dough: Divide the dough into 12-15 even pieces.
- Shape: Lightly flour your hands. Working with one piece at a time, shape each piece into a ball by stretching the top and pulling down the sides of the dough.
- Seal: Pinch the bottom of the ball to seal the roll, creating a smooth top to the dough.
- Place in pan: Add the rolls to a lightly greased baking pan, arranging them with the sealed side down.
Tip: Stretching the dough helps the rolls hold up to the expansion that occurs during baking, while sealing the bottom prevents the rolls from opening up and becoming doughy on the bottom.
Tips for the best yeast dinner rolls
Follow the easy tips below for baking up dinner rolls that turn out fluffy and delicious every single time!
- Check your yeast: Check the expiration date on your yeast to make sure it isn’t expired.
- Check your milk temperature: You need to proof your active-dry yeast in warm milk. The milk needs to be between 105 to 115 degrees Fahrenheit. If your milk is too hot, the yeast will die and your bread will not rise; however, if your milk is too cold, the yeast won’t activate, and your bread won’t rise. Make sure you check the temperature of your milk with an instant read thermometer.
- Watch the yeast when proofing: I prefer using active-dry yeast over instant yeast because you can actually double check to make sure your yeast is alive! After dissolving your yeast in the warm milk, the mixture should be very bubbly and frothy. If your mixture isn’t foamy, then your yeast is dead, and you need to start over with a new batch.
- Measure your flour correctly: Make sure you measure your flour correctly using the tips I’ve outlined above! And make sure you only add enough flour to the roll dough so that it barely pulls away from the sides of the bowl!
- Don’t press down on the dough when brushing with butter: Do not use a lot of force when brushing dinner rolls with butter before baking. Be very gentle with your pastry brush – you don’t want to deflate the delicate rolls!
Tips for storing and freezing dinner rolls
Food safety is important when it comes to food storage! Follow the simple tips below for properly storing your homemade quick dinner rolls!
Can I make this rolls recipe ahead of time?
Absolutely! However, since these are quick-rise 1-hour dinner rolls they aren’t as flexible in the make ahead process as traditional rolls. Meaning, you can’t start, stop and pick up again whenever you want to when making the dough – but, the dough doesn’t require resting or multiple rises, so it’s a very quick process!
The best way to make this dinner rolls recipe ahead: Don’t. Instead, fully bake the rolls and store them in the freezer! Now, all you need to do to enjoy those buttery soft dinner rolls is pull them out of the freezer the night before, and let them thaw in the refrigerator. Then, quickly warm them before serving! Bonus, if you forget to thaw the yeast rolls, don’t worry – you can’t reheat them straight from the freezer! (See the tips below for freezing and warming rolls!)
How do you store freshly baked butter rolls?
The best way to keep homemade bread rolls fresh is proper storage! Before storing, make sure you allow your rolls to cool completely to room temperature!
To maximize the shelf life of your rolls, wrap your rolls in foil, plastic wrap or place them in a resealable bag (with all the air removed) before storing. Wrapping your rolls helps prevents them from being subject to mold or drying out.
Once properly wrapped, store your rolls at room temperature in a cool, dark, dry place, such as a breadbox or your pantry.
Pro-Tip: Avoid refrigerating yeasty rolls as the cold climate will dry out the bread, causing your rolls to become stale faster than storing them at room temperature!
How long do homemade dinner rolls last?
Properly stored, yeast rolls will keep fresh for up to 5 days at room temperature. To further extend the shelf-life of your rolls, you can store them in the freezer! (See below)
Can I freeze yeasty rolls?
Fluffy rolls freeze beautifully! Storing your homemade rolls in the freezer is a wonderful option for longer-term storage! Plus, it ensures you always have delicious buns on hand for busy weeknight dinner!
Freezing rolls
- Cool: Allow your freshly baked rolls to cool completely to room temperature.
- Store: Wrap your rolls tightly with plastic wrap or aluminum foil and place them in a freezer-safe resealable bag.
- Freeze: Transfer homemade dinner rolls to the freezer for storage. Properly stored, homemade buns will keep fresh in the freezer for up to 3 months.
How to reheat buttery dinner rolls?
Sure, room temperature dinner rolls are tasty! But, nothing beats a warm, toasty, buttery roll!! Follow the simple tips below for reheating your homemade dinner rolls.
- To warm room temperature rolls: You can reheat dinner rolls one of two ways depending upon your personal preference!
- Oven (recommended method): Preheat oven to 325 degrees Fahrenheit. Wrap your dinner rolls loosely in aluminum foil and place them on a baking sheet. Bake for 10-15 minutes, or until warm throughout.
- Microwave: Lightly moisten a large sheet of paper towel. Loosely wrap an individual dinner roll in the paper towel and place on a microwave-safe plate. Transfer to the microwave and reheat on LOW power in 15 second intervals until just warm throughout. Tip: Precise time will depend upon the strength of your microwave. You may only need just 15 seconds to reheat your roll!
- To thaw frozen rolls: Remove the rolls from the freezer the night before you want to enjoy them. Remove and discard the wrapping to prevent excess condensation which will cause your rolls to get soggy. Transfer the rolls back to the resealable bag (minus the wrapping) and partially seal the bag. Let the rolls thaw at room temperature overnight. You can enjoy the rolls at room temperature, or re-warm them using the instructions above.
- To reheat rolls straight from the freezer: Remove the rolls from the freezer. Preheat the oven to 300 degrees Fahrenheit. Wrap the rolls loosely in aluminum foil and place them directly on the oven rack. Bake for 20-25 minutes, or until the rolls are warm throughout.
Serving this quick rolls recipe
Looking for new and exciting ways to use your fluffy rolls? Or are you searching for a few delicious recipes to serve with these rolls? Below are a few of my family’s favorite ways to enjoy these homemade 1-hour dinner rolls!
What to serve with dinner rolls?
Homemade dinner rolls are (arguably) the most versatile side dish! These buttery, pillowy-soft rolls go with everything, from meatballs and pasta to soups and stews! Below are a few delicious pairing options for these buttery buns!
8 dishes to serve with rolls
- Anything with gravy: Are you even living if you don’t have a bun to sop up that luscious gravy?!
- Soups: Serving soups with rolls is mandatory in this house. My vote are these this rich and creamy soup recipes: creamy cauliflower soup recipe, basil tomato soup, parsnip soup, beer cheese soup, apple soups, or butternut squash soup. But, this white bean and tomato soup and Tuscan bean soup are terrific here, too.
- Stews & Chilis: Same as above! We love this recipe for 3 bean chili, all meat no bean chili, and chili with beer.
- Barbecue: Any kind of meat dripping in BBQ sauce requires rolls for soaking up that good stuff.
- Pasta: Because carbs on carbs is never a bad choice. I love these fluffy rolls with baked ziti with italian sausage, short ribs bolognese, lemony chicken pasta, tomato pasta and chicken, or this chicken florentine recipe.
- Casseroles: Hearty, creamy, and cheesy casseroles are going to need some rolls for mopping.
- Meatballs: Meatballs and dinner rolls are classic for a reason.
- Fried Chicken or Pork: A classic homestyle pairing if there ever was one – fried chicken or pork with fluffy rolls.
- Roast: Class up those rolls with a beautiful roast chicken, roasted turkey breast, Thanksgiving turkey, or rib roast.
- Braises: Juicy braised meats and fluffy rolls go hand in hand.
What can you do with leftover dinner rolls?
Got a bunch of leftover dinner rolls and you’re wondering what to do with them? Below are a few unique and tasty ways to use up dinner rolls before they go stale!
10 ways to use up leftover butter rolls
- Make toast with the most: Slice and toast homemade rolls and slather them with plenty of soft whipped butter, homemade jam and a drizzle of honey for an easy, yet epic breakfast!
- Transform them into croutons: Homemade croutons are incredibly simple to prepare and make a delicious topping for your soups and salads!
- Make a sandwich: Use your soft rolls to make sliders or sandwiches. Stack on your favorite deli meats, cheeses, veggies and spreads. Or try piling on smokey pulled pork or chicken salad with curry and cashews for a next level sandwich!
- Use as a pizza crust: Love French bread pizza? Try fluffy dinner roll personal pizzas! Cut your rolls in half, brush them with butter, toast until golden and use them as a crust for your favorite pizza toppings!
- Bruschetta: Transform those buns into a rustic bruschetta appetizer or snack! Slice the rolls in half, brush them with oil, toast until golden and top them with plenty of fresh tomatoes, garlic and basil! But don’t forget to finish them with a generous drizzle of balsamic!
- Blitz them into breadcrumbs: Use your food processor to make quick work of transforming your butter rolls into homemade breadcrumbs!
- Use as a dipper: Slice your rolls into sticks and grill or toast them up! Then use them as a dipper for your favorite spreads and dips!
- French toast: Use those leftover rolls to make individual French toast cups or an overnight French toast breakfast bake!
- Use it to make a breakfast casserole: Use leftover dinner rolls to make a delicious breakfast strata or breakfast casserole!
- Make stuffing: Don’t wait for the holidays to make your favorite stuffing recipe! Cube the yeasty rolls and make use them to make Thanksgiving stuffing with chestnuts or swap out the croissants in this sausage stuffing for your next family dinner!
What are you waiting for? These buttery soft dinner rolls are calling your name!
Until next time, friends – cheers!
Cheyanne
Craving MORE? Follow all the deliciousness on Facebook, Pinterest and Instagram!
More dinner bread recipes!
If you love therapeutic baking, try these no-fail bread recipes next:
The best homemade bread rolls recipe👇

Easy Dinner Rolls Recipe
Equipment
- 1 Stand Mixer
- 1 9x13-inch Baking Pan or Quarter Sheet Pan
Ingredients
- 1 cup (240 ml) Whole Milk – warmed to 110F (sub: warm water)
- 1/3 Cup Granulated Sugar – DIVIDED
- 1 TBS Vegetable Oil
- 2 TBS Active Dry Yeast (about 2 ½ packets)
- 1 large Egg – lightly beaten
- 6 TBS Unsalted Butter – softened to room temperature & cut into 6 pieces - DIVIDED
- 1 tsp Kosher Salt
- 3 – 3 ½ Cups (375g +) All Purpose Flour – spooned & leveled, or more as needed (SEE NOTES)
- 2 TBS Unsalted Butter – Melted (OR HONEY BUTTER – SEE NOTES)
Instructions
- Proof Yeast: In the bowl of a stand mixer, whisk together the warm milk, 1 tablespoon of sugar, oil and yeast. Let the mixture sit until very bubbly and frothy (about 5-8 minutes). If the mixture isn’t frothy, start over with new yeast.

- Meanwhile, Warm Oven: Adjust oven rack to lower 1/3 position. Preheat oven to 200 degrees F. Once preheated, immediately TURN OFF THE OVEN and keep the oven door closed. Lightly grease a quarter sheet pan or a 9x13-inch baking pan with cooking spray. Set aside.
- Prepare Dough: Fit the paddle attachment to the mixer. Add the remaining sugar, egg, 4 TBS of butter, salt and 3 cups of flour. Mix on low speed for 1 minute. Use a rubber spatula to scrape down the sides and the bottom of the bowl. Continue to mix on low until the dough is well mixed, cohesive and starts to come together, about 2 minutes.
- Knead bread: Switch to the dough hook. Cut the remaining 2 tablespoons of butter into small cubes and add it to the dough. Continue to mix on low until the butter is incorporated and the dough is smooth, elastic and pulls away from the sides of the bowl, about 5-6 minutes. (NOTE: The dough should be thick, yet soft and slightly sticky. If the dough is too sticky to handle and doesn’t pull away from the sides of the bowl when mixing, add more flour, 1 tablespoon at a time. Don’t add TOO MUCH flour – you want fluffy rolls, not dense rolls.)
- Form rolls: Transfer the dough to a lightly floured work surface and sprinkle the top of the dough with a little more flour. Use your hands or a rolling pin to very gently shape the dough into a rectangle. Using a sharp knife, cut the dough into 15 even pieces. With floured hands, roll and shape each piece into a ball by pulling down on the sides and pinching to seal underneath – they don’t need to be perfect! Transfer the balls to the greased pan – spacing them out evenly. Cover the baking dish with a large sheet of parchment paper.
- Quick Rise: Transfer the pan to the slightly warm oven. Let the dough rise for 15 minutes. Remove the dough from the oven. Preheat oven to 375 degrees F.
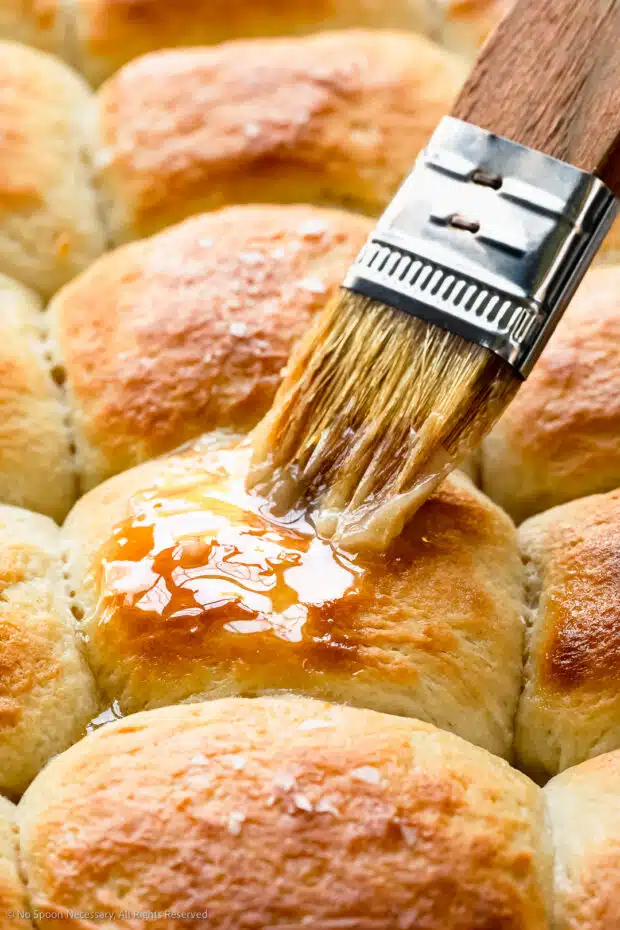
- Brush with Butter & Bake: Remove the kitchen towel and parchment paper from the rolls. Very gently brush the tops of the rolls with the melted butter – be careful not to press down and deflate the delicate rolls. Transfer to the oven and bake for 15-20 minutes or until the rolls are just golden.
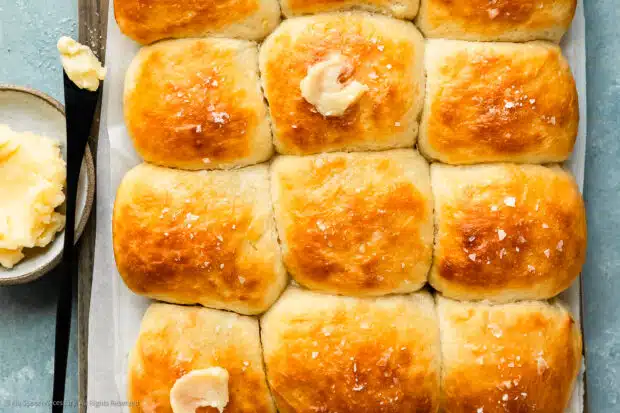
- Serve: When rolls are done baking, generously brush melted butter or honey butter onto each warm roll. Sprinkle rolls with flakey sea salt and serve with more butter on the side. Enjoy!

Notes
- To properly measure flour:
- Fluff: Use a spoon or fork to stir the flour in its container. Don’t skip this step – flour will settle and become compact upon sitting.
- Spoon: Use a large spoon to spoon the flour from the container and into your measuring cup, making sure the flour is lightly overflowing the cup.
- Level: Use the back, straightedge of a knife to level off the flour. Repeat leveling off the surface of the flour until it’s smooth across the top of the measuring cup.
- Homemade Honey Butter:
- Ingredients: ¼ Cup Very Soft Butter + 1 ½ TBS Honey
- Directions: In a medium mixing bowl with a handheld mixer or the bowl of a stand mixer, Beat butter with a generous pinch of sea salt on medium speed until fluffy & creamy. Add the honey and beat until combined.
- Storage: Honey butter will keep in an airtight container in the refrigerator for up to 2 weeks.
Nutrition
Did you make this recipe?
Mention @nospoonnecessary on Instagram and tag it #nospoonnecessary!
©No Spoon Necessary. All images and content are under copyright protection. Please do not use any images without prior permission. Kindly do not publish this recipe without prior consent. If you want to reference this recipe, please do so by linking directly to this post.
kim s
Made them exactly as written. These rolls are so awesome – fluffy, light and buttery! Low maintenance process as well. Super yummy!
Anstrom Novak
I have to admit, I was skeptical, but decided to try these. I have gone from skeptical to AMAZED—how could such a short time yield such fluffy, buttery delicious results!!?
I brushed them with melted butter and fresh dill and minced garlic—heavenly!!! These rolls tasted like I’d spent half my day kneading, proofing, etc.
Thank you so much for such a stunning dinner roll! I was able to get these beauties in the table, with dinner, even after working all day.
Thank you, thank you, thank you!!
Cheyanne
Hi Anstrom,
I am absolutely thrilled you enjoyed this dinner roll recipe!! Brushing them with butter, dill and garlic sounds delicious! Thank you so much for coming back and leaving a review. Your kind words made my day! Cheers! 🙂
Mary Ann | The Beach House Kitchen
These look just perfect Chey! So soft and fluffy. We’d love these with our Easter ham. Can’t wait to give your recipe a try this holiday!!
Shashi
I so love that this recipe only calls for 7 ingredients and 1 hour! It’s been a hot minute since I made bread but cannot wait to try these rolls out soon. They look mouthwateringly delicious – so buttery and flaky! Hope y’all have a great weekend! XO
Ben | Havocinthekitchen
I must admit they look splendid – some one of the best dinner rolls I’ve seen for a long time. Baked until a beautiful golden-brown, fluffy, airy, pillowy. You know what? I can easily eat 2 or 3 of them instead of dinner haha. (Well, maybe with a glass of wine.)
Jennifer @ Seasons and Suppers
Love that these are 1 hour rolls, so you can make them at the last minute, instead of having to plan ahead. Works for me! And they look absolutely delicious, too 🙂
Marissa
1 hour! This is an amazing recipe, Cheyanne! We all need a back pocket roll recipe like this!
angiesrecipes
They look so darn soft and tender…who would have thought that they just needed an hour? Wow…excellent, Chey!