This post may include affiliate links. Thank you for your support.
Tired of the same old chicken dishes for dinner? Look no further than this Thai Peanut Chicken recipe! With tender chicken and tasty veggies coated in a savory, slightly spicy peanut sauce that doubles as a marinade, this quick and easy dish is sure to become a new favorite. Best part – it’s all cooked on one sheet pan in just 35 minutes. Whether you’re a seasoned chef or a beginner cook, this sheet pan chicken with Thai peanut sauce is sure to impress!
Featured comment: This was good! Thank you! I replaced one of the bell peppers with snap peas. They turned out really well. I am trying to get a sheet pan repertoire going. This will be on the list!” – Margaret
Update: This post was originally published in April 2018. I made updates to the article below to include more information about making chicken and veggies with peanut sauce.
Table of Contents
- About this peanut chicken recipe
- What is a sheet pan dinner?
- Ingredients for thai peanut chicken
- How to make Thai chicken with peanuts
- FAQs: chicken thai peanut sauce
- Serving chicken with thai peanut sauce
- Storage Instructions
- More sheet pan chicken dinner recipes!
- Thai Peanut Chicken with Onions & Peppers
About this peanut chicken recipe
Today I’m sharing a delicious tray bake chicken with Thai peanut sauce for you to add to your arsenal of weeknight wonders. And, I pinkie-promise it doesn’t disappoint!
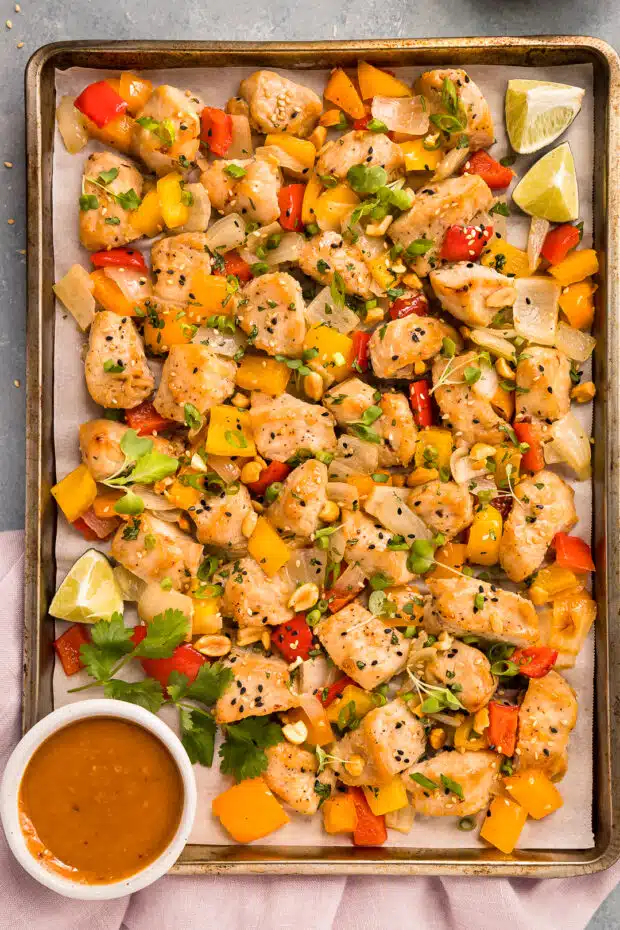
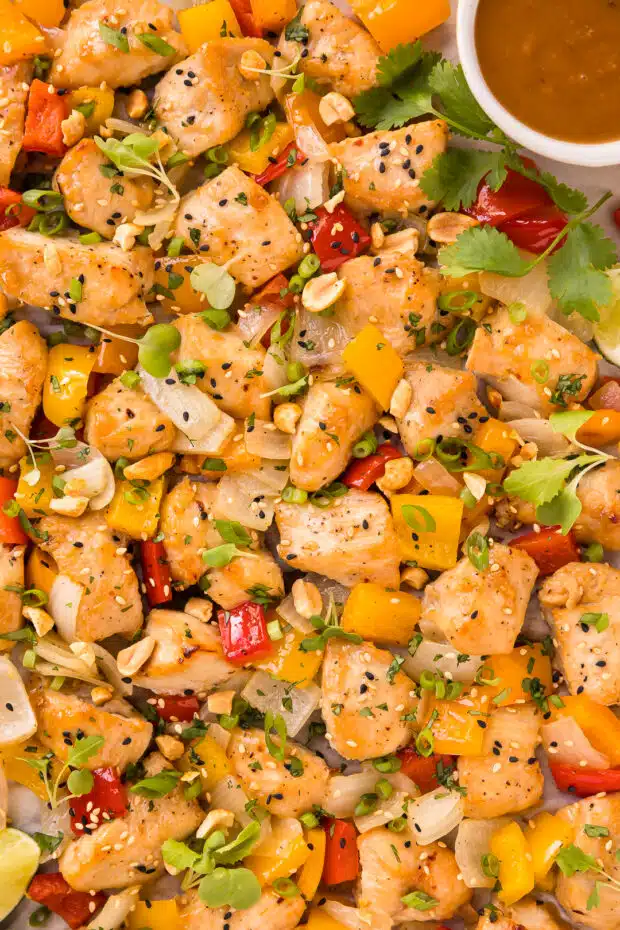
Tender, bite-sized pieces of white meat chicken are coated in a silky, savory, subtly sweet, umami-packed Thai peanut-based marinade and roasted with tender-crisp, sweet peppers and mild onions.
All that Asian-flavored deliciousness gets served up with a creamy, smooth flavorful Thai peanut sauce perfect for dipping. Serve it over steamed rice for a perfectly balanced meal.
Oh, and in case you are thinking, ugh, I have to dirty TWO bowls?! One for the marinade AND one for the sauce?! Don’t fret – the marinade DOUBLES as the sauce! Hello, one pan wonder + weeknight dinner winner!
Looking for more Thai recipes for your next family dinner? Try these fan favorites next: chicken noodle Thai soup, Thai chicken meatball recipe, and thai tacos with chicken.
Why you’ll love this sheet pan dinner recipe
TL;DR? Aside from being rich, savory, and deliciously nutritious, this Thai chicken bake is also:
- Quick & Easy – Chop your chicken and veggies, stir up a tasty marinade (keeping some reserved for a delicious drizzle sauce), mix, and bake — that’s the whole shebang! You’ll be ready to sit down to a steaming hot plate of baked Thai peanut chicken in just 35 minutes from when you start.
- Made With Mostly Pantry Ingredients – You’ll need chicken, peppers, onions, garlic, and ginger. The rest of the yumminess is probably already waiting for you in the kitchen.
- Wholesome & Filling – Lean protein, tender veggies, and nutritious nuts combine forces for a tasty meal that’ll beat even the biggest hunger.
What is a sheet pan dinner?
Sheet pan dinners are a fantastic way to get dinner on the table during the hectic work week! Making a delicious sheet pan dinner is simply an ultrafast, super easy dinner that requires little more than to scatter a few ingredients on a pan and pop it in the oven.
The only thing to remember is to make sure you are actually using a sheet pan! A sheet pan is made from stainless steel or aluminum, and has a deep rim around the edge. You want to make sure you avoid using any flimsy, non-rimmed baking sheet.
Pro tip: If you use foil or parchment paper before you arrange your food on the sheet pan, it will make the clean up a breeze. Simply toss the parchment or foil when you’re done, give the pan a cheeky little rinse, and you’re aces!
An ode to sheet pan dinners
Can we talk about sheet pan meals for a fraction of a second? I feel the need to shout out my love of them from the rooftops! They are just so quick, easy, and the perfect way to get a delicious dinner on the table in flash!
Seriously, they should have their own hashtag… like, #SavingDinnerOneSheetPanAtATime.
Honestly, even when I’m absolutely tapped for energy, I can muster the energy to spend 10 easy minutes of prep (or less) to get a deeply satisfying, super nourishing, and budget-friendly meal on the table.
One-pan meals are definitely a weeknight staple in our house, and while half the population will stop using their oven during the summer, I will STILL be rocking those sheet pan dinners on the regular, like it’s my job. (Well, it kind of is my job as a food blogger. But, tiny details aside, I think you get the point. 😉)
If you love simple, yet delicious sheet pan dinners, check these recipes out next: one pan sausage and veggies and one pan shrimp with vegetables.
Ingredients for thai peanut chicken
As promised, you only need a handful of ingredients plus some pantry staples to make this Thai chicken in peanut sauce:
- Chicken Breasts – Keep your calories down and your protein up with lean boneless skinless chicken breasts.
- Substitution: Swap in boneless, skinless chicken thighs to save money.
- Bell Peppers – Use any color that you like. However, green bell peppers will be more earthy and less sweet than their yellow, orange, or red counterparts.
- Yellow Onion – Onions add sweet allium complexity.
- Substitutions: Red onions or shallots work too.
- Neutral Oil – Vegetable oil, canola oil, corn oil, peanut oil, grapeseed oil, or avocado oil are all great candidates.
- Sesame Oil – For a savory, toasty flavor that can’t be beat.
- Substitutions: You can try using some tahini paste in its place.
- Kosher Salt and Freshly Ground Pepper – For seasoning.
Thai peanut sauce
- Creamy Peanut Butter – Look for a brand with just peanuts and salt for the best taste.
- Substitutions: Use crunchy peanut butter or your favorite seed butter if you prefer.
- Soy Sauce – Low-sodium soy sauce lends a punch of umami goodness. If you only have regular on hand, simply dilute it 1:1 with water to reduce the sodium.
- Substitutions: You can also use tamari (though you may want to dilute it), Bragg’s liquid aminos, or coconut aminos.
- Coconut Milk – You can find coconut milk in the refrigerated milk aisle. However, the canned stuff is better in flavor and rich, creamy consistency.
- Substitution: To cut back on calories you can use a can of “lite” coconut milk instead.
- Garlic – Fresh is best, but swap in minced jarred garlic to save on prep time.
- Ginger – Again, fresh is best, but tubes of ginger paste are a time saver.
- Rice Vinegar – Delicately flavored rice wine vinegar adds the perfect amount of sweet tang.
- Substitutions: White wine vinegar or apple cider vinegar work in a pinch. Alternatively, you can use lemon or lime juice; however, you may need to balance out the tang with more honey.
- Honey – For sticky sweet goodness.
- Substitutions: Other liquid sweeteners, like agave nectar or brown rice syrup work too.
- Crushed Red Pepper Flakes – For a hint of heat.
- Substitutions: Swap in cayenne pepper or hot paprika. You can also use sweet or smoked paprika if you don’t want heat, but like the warmth. Alternatively, consider swapping in an Asian-style hot sauce like sambal oelek or sriracha.
Variations & dietary adaptations
As much as I love this Thai peanut sauce chicken recipe just the way its written, there are still plenty of ways for you to customize it to suit your needs. Here are a few variations worth considering:
- Gluten-Free – Swap in tamari or coconut aminos for soy sauce to make this celiac-friendly.
- Soy-Free – If you can’t do soy, coconut aminos or Bragg’s liquid aminos will work beautifully in place of the soy sauce.
- Peanut-Free – Allergic to peanuts? Try cashew butter or macadamia nut butter instead. Can’t do nuts at all? Sunflower seed butter makes a great swap.
- Optional Garnishes & Serving Options: Don’t forget to gussy up your plate by going nuts with toppings. Here are some of my favorite toppings for this peanut chicken recipe:
- Lime Wedges
- Sesame Seeds, preferably toasted
- Chopped Toasted Peanuts (or the toasted and chopped nuts or seeds of your choice)
- Sliced Green Onions
- Cilantro, Mint, and/or Thai Basil
- Jasmine Rice or Rice Noodles
How to make Thai chicken with peanuts
Want to make the best Thai chicken with peanut sauce for your family? Look no further than this simple sheet pan recipe!
- Make peanut sauce: In a large bowl, combine the peanut butter with soy sauce, coconut milk, garlic, ginger, vinegar, honey, and pepper flakes. Whisk well to combine, then pour ¼ cup of the sauce into a separate small bowl and set aside to use a sauce for serving.
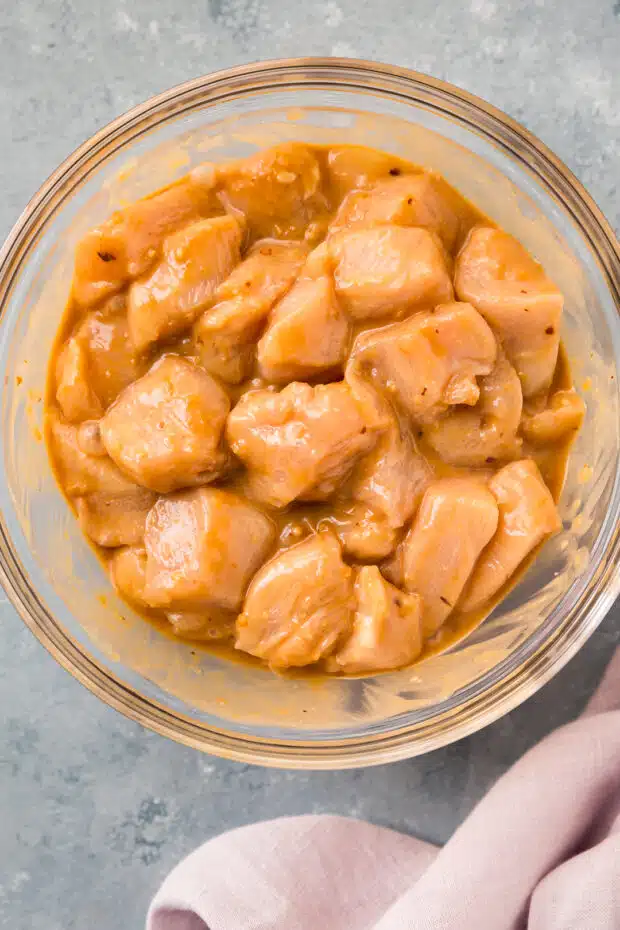
- Prepare the chicken: Add the chicken to the bowl with the Thai peanut sauce. Toss well to coat the chicken in sauce.
- Optional – marinate chicken: Cover the bowl with plastic wrap and let marinate in the fridge for up to 8 hours.
- Roast onions and peppers: Line a large, rimmed baking sheet parchment paper (or with foil and spray the foil with non-stick spray). Dump the peppers and onions out on the baking sheet. Drizzle with vegetable oil and season generously with salt and pepper. Then, toss to combine. Place in the hot oven and bake for 8-10 minutes. (Note: veggies will continue to cook in step 6).
- Wipe sheet pan: Remove the veggies from the oven and drain (or wipe) off any excess liquid that has collected in the pan. Then, push the peppers and onions to one side of the pan.
- Add the chicken to the empty side of the pan, spreading it out into an even layer. Then, season the chicken pieces generously with salt and pepper.
- Return pan to the oven and roast for 12-15 minutes, or until the chicken is almost cooked through. Switch the oven to BROIL and broil about 3-5 minutes, or until chicken is cooked to an internal temperature of 165 degrees F.
- To Serve: Remove the veggies and chicken in peanut sauce from the oven and use a slotted spoon to transfer the chicken and veggies to a serving bowl. Toss with all the sesame oil and the remaining tablespoon of vinegar. Serve the chicken and veggies with reserved Thai peanut sauce (step 1) and optional garnishes. Enjoy immediately!
Expert tips for thai peanut sauce chicken
- Make Ahead: You can prepare the chicken Thai peanut sauce up to 3 days in advance. Store it in a container with a tight fitted lid in the refrigerator. When ready to use, microwave the sauce for 15-20 seconds to loosen it up if needed.
- Make sure you are using a large sheet pan for this Thai peanut chicken bake to give everything plenty of space to roast to perfection. If you do not have one, use two sheet pans and rotate the pans from top to bottom, and front to back halfway through baking.
- Watch carefully during the broiling phase! Things can go from a lovely golden color to burnt very quickly.
- There will be excess liquid from the onions and peppers in the sheet pan when baking is complete — don’t stress about it. Make sure you use a slotted spoon or slotted spatula to transfer the Thai peanut chicken and veggies to a bowl before tossing with the sesame oil and vinegar.
FAQs: chicken thai peanut sauce
Does Thai peanut chicken sauce have gluten?
If you use this peanut chicken recipe as written, yes. However you can EASILY make it gluten-free by swapping in either gluten-free tamari or coconut aminos!
Does Thai peanut sauce chicken have dairy?
Nope! All that creamy goodness comes from coconut milk, so it’s entirely dairy-free.
Does Thai peanut sauce need to be refrigerated?
It sure does! While you can leave it out for a few hours, you’ll want to store it in the fridge for a shelf life of 3 days.
What is Thai peanut sauce called?
Thai chicken peanut sauce is called “satay sauce” or “sate sauce” in Thailand, where it’s used as a dipping sauce for meats and tofu.
Serving chicken with thai peanut sauce
What goes with peanut chicken?
This tray baked chicken with peanut sauce recipe is already paired with bell peppers and onions, so it can be served on its own as a lighter, healthier meal.
However, if you are looking for a more complete, substantial meal with carbohydrates, this Thai chicken with peanuts would be delicious served with jasmine rice, or any variety of Asian noodles. If you are looking to keep things healthy, mango salsa, cauliflower rice or broccoli rice are also excellent options. Or create a Thai family dinner and serve your peanut chicken with your favorite Thai recipes, like Thai Salad with Mango or Soba Thai Noodles.
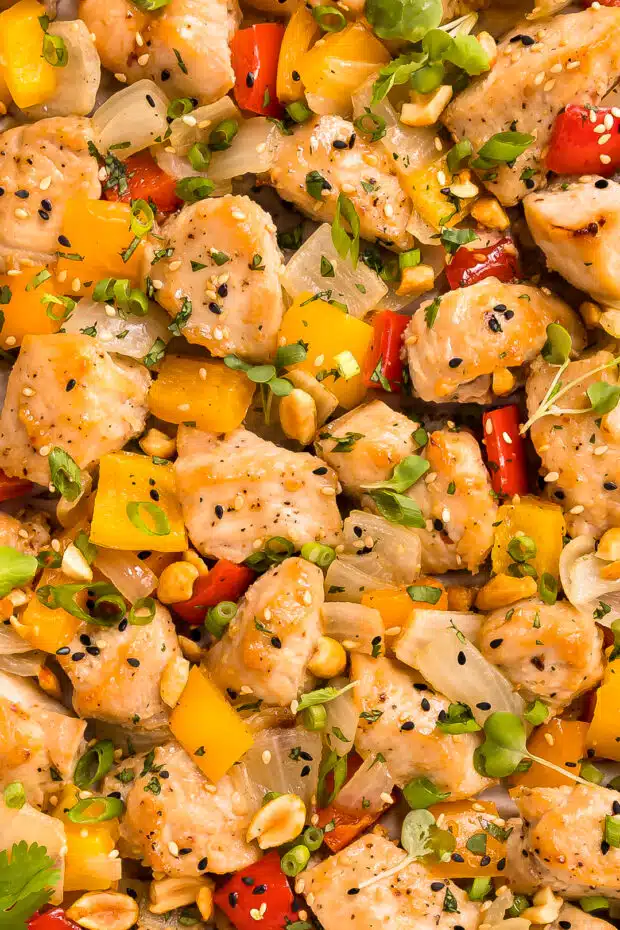
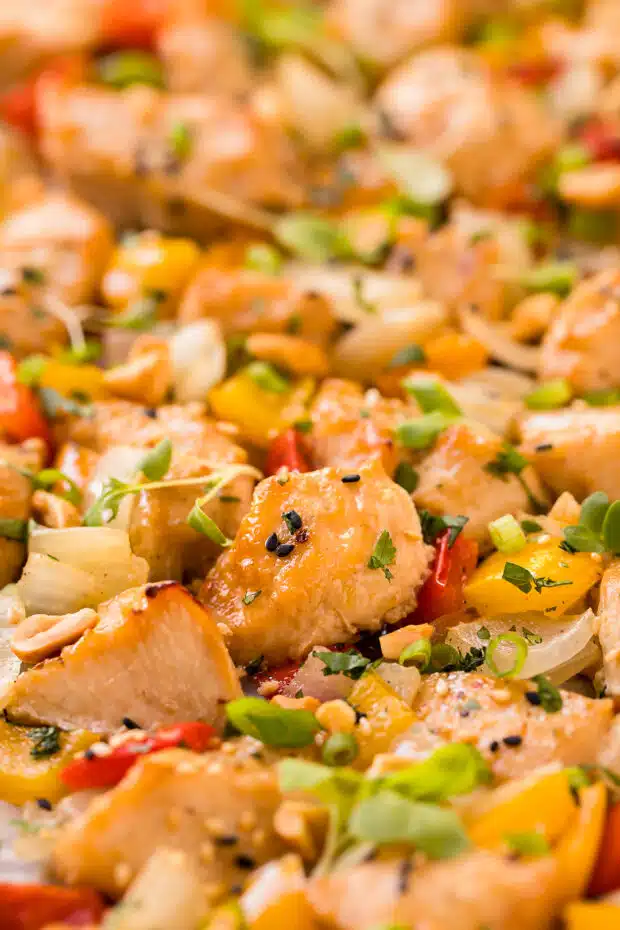
Also, this Thai peanut butter chicken tastes best when garnished! Finishing this peanut chicken recipe off with crunchy, chopped peanuts, nutty sesame seeds, fresh cilantro and sliced scallions really enhances the flavor profile of this dish!
Storage Instructions
- Make sure you cool leftover to room temperature before storing. And, don’t leave it out for longer than two hours before placing it in the refrigerator or freezer.
- Store the leftover chicken with thai peanut chicken sauce in an airtight container in the refrigerator for up to 3-4 days. To freeze the leftovers, transfer them to a freezer-safe container and label with the date. You can keep the leftover peanut chicken in the freezer for up to 2-3 months.
- To reheat the leftovers, allow them to defrost overnight in the fridge. You can then either microwave the chicken or reheat it in a 350-degree oven. Make sure the food reaches an internal temperature of 165°F (74°C) before consuming.
Alrighty, friends — gotta go stir-fry up some more work. Don’t forget to chicken on me soon so we can satay in touch. Keep calm and curry on enjoying this yummy baked peanut butter chicken Thai goodness! Until next time, happy eating!
Cheyanne
Craving MORE? Follow all the deliciousness on Facebook, Pinterest and Instagram!
More sheet pan chicken dinner recipes!
If you love this peanut chicken recipe, try these delicious and easy one pan meals next:
- Balsamic Honey Chicken
- Chicken Wrapped in Prosciutto
- Curried Spaghetti Squash with Chicken
- Harissa Chicken
The best recipe for Thai Peanut Chicken in the Oven👇
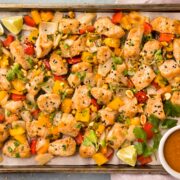
Thai Peanut Chicken with Onions & Peppers
Equipment
- 1 Mixing Bowl (for making peanut sauce)
- 1 Large Rimmed Baking Sheet (for baking chicken and veggies)
Ingredients
Thai Peanut Sauce:
- ¼ Cup Creamy Peanut Butter
- 2 TBS Reduced Sodium Soy Sauce
- ¼ Cup Coconut Milk - stirred
- 3 small Cloves Garlic - minced
- 1 TBS Ginger - grated
- 2 TBS Rice Wine Vinegar - DIVIED
- 1 ½ TBS Honey
- ½ tsp Crushed Red Pepper Flakes
- Kosher Salt and Freshly Ground Pepper - to taste
Chicken and Veggies:
- 1 ½ Pound Boneless Skinless Chicken Breasts - cut into ¾ - 1’’ cubes
- 3 Bell Peppers seeded and chopped
- 1 Yellow Onion peeled and chopped
- 1 TBS Vegetable Oil
- 1 tsp Sesame Oil or more to taste
- Optional Garnishes Sesame Seeds, Chopped Peanuts, Sliced Green Onions, Cilantro
- Optional for Serving: Lime Wedges, Jasmine Rice or Rice Noodles
Instructions
- Preheat oven to 400 degrees F. Line a large, rimmed baking sheet with parchment paper (or foil sprayed with non-stick cooking spray) for easy clean up.
- Make peanut sauce: To a large bowl, add the peanut butter, soy sauce, coconut milk, garlic, ginger, vinegar, honey, and pepper flakes. Whisk well to combine. Taste and adjust for seasoning. Then pour ¼ cup of the sauce into a separate small bowl and set aside to use a sauce for serving.
- Prepare the chicken: Add the chicken to the large bowl of peanut sauce and toss well to coat. Optional – marinate chicken: Cover the bowl with plastic wrap and let marinate in the fridge for up to 8 hours. (OR just continue with recipe.)
- Season and roast onions & peppers: Dump the peppers and onions out on the prepared baking sheet. Drizzle with oil, season generously with salt and pepper, and toss to combine. Place the veggies in the oven and bake for 8-10 minutes (Note: Vegetables will continue to bake in step 6.)
- Wipe pan, add chicken: Drain or use paper towels to wipe off any excess liquid that has collected in the pan. Push the peppers and onions to one side of the pan. Then, add the chicken pieces to the empty side of the pan, spreading it out into an even layer. Season everything generously with salt and pepper.
- Return pan to the oven and bake: Return the baking sheet to the oven and roast for 12-15 minutes, or until the chicken is ALMOST cooked through. Switch the oven to BROIL and broil about 3-5 minutes (SEE NOTES), or until chicken is cook to an internal temperature of 165 degrees F.
- Add more flavor: Use a slotted spoon to transfer the peanut chicken and veggies to a serving bowl. Drizzle all the sesame oil and the remaining tablespoon of vinegar over the chicken and veggies. Toss well to coat and combine.
- Serve: Garnish Thai Peanut Chicken and Veggies with fresh herbs and roasted peanuts, if using. Serve the reserved peanut sauce (from step 1)on the side. Enjoy!
Notes
- Peanut Sauce: You can prepare the peanut sauce up to 3 days in advance. Store it in a container with a tight fitted lid in the refrigerator. When ready to use, microwave the sauce for 15-20 seconds to loosen it up.
- Sheet Pans: Make sure you are using a large sheet pan for this meal. If you do not have one, use two sheet pans and rotate the pans from top to bottom, and front to back halfway through baking.
- When broiling the sheet pan dinner, make sure to watch over it carefully! Things can go from a lovely golden color to burnt very quickly.
- Step #5: There will be excess liquid from the onions and peppers in the sheet pan when baking is complete. Don’t stress about it. Make sure you use a slotted spoon or slotted spatula to transfer the chicken and veggies to a bowl before tossing with the sesame oil and vinegar.
Nutrition
Did you make this recipe?
Mention @nospoonnecessary on Instagram and tag it #nospoonnecessary!
©No Spoon Necessary. All images and content are under copyright protection. Please do not use any images without prior permission. If you want to reference this recipe, please link directly back to this post.
Maddie
Very tasty and easy to make!
Kassandra
I’ve struggled to find a peanut sauce recipe that I really like. This was fantastic, thank you!
I also diced a sweet potato, pre roasted and made that the base instead of rice. Thought it was good if not making the dish just a little too sweet.
Cheyanne
Hi Kassandra,
I’m absolutely thrilled you enjoyed the recipe (especially the peanut sauce!)! Serving this chicken with roasted sweet potatoes sounds delicious – I’ll have to try that!! Thank you so much for coming back and letting me know how everything went over! Cheers! 🙂
Margaret
This was good! Thank you!
I replaced one of the bell peppers with snap peas. They turned out really well.
(Also replaced the soy sauce with coconut aminos, since I am wheat-free.)
The chicken cooked a few minutes faster than expected–I was glad I had an in-oven thermometer in there.
I am trying to get a sheet pan repertoire going. This will be on the list!
Cheyanne
Hi Margaret,
I’m thrilled you enjoyed this sheet pan chicken! I love your addition of snap peas – I’ll have to do that next time I make this!
Thank you so much for coming back and letting me know how everything went over!
Cheers and happy holidays,
Cheyanne
Margaret
Hi, Cheyanne! & I forgot to add: I’m sugar-free now. I left out the honey and it still tasted great. Thanks again!
Ben|Havocinthekitchen
Chicken and peanut butter make one of my favorite combos. However, I haven’t had it for quite a while so thank your for such a delicious reminder! Cheers to easy and scrumptious chicken recipes, our bellies, and and sanity! 🙂
marcie
Thai peanut flavors get me every time and so do sheet pan meals! This is right up my alley and I can’t wait to try it!!
Kevin O’Leary
I love any dinner that’s on the table, and this one looks fantastic! And who can resist peanut sauce? 🙂
Christina
Yummy! Real talk – I make sheet pan dinners at least 2 times a week, sometimes more. I’m always on the lookout for new flavor combinations so I’m grateful I found this recipe! Sheet pan dinners for the win!
Jennifer @ Seasons and Suppers
I’m a huge fan of sheet pan dinners, too, so I’m adding this one to the dinner rotation asap! Love everything about it 🙂
Kelsie | the itsy-bitsy kitchen
I 100% support making that hashtag a thing! Sheet pan dinners are the bomb dot com! (Do people still say that? Did anyone ever say that?) I love pb in savory preparations so I’m ALL over this, Chey! Have a great weekend, my dear!
Mary Ann | The Beach House Kitchen
Totally my kinda sheet pan meal Chey!! So easy, so packed with flavor, and perfect for those busy nights!! So adding this to our weeknight menu! Casey will be home from college shortly, so I’ll need to up my dinner game! Thanks for helping!
Angie@Angie’s Recipes
Love that marinade sauce! I actually use it for my noodles too :-)) This looks so yummy!