Green Goddess Hummus with Herbs
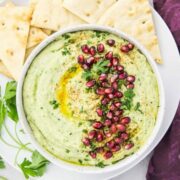
Creamy, dreamy, and festively fabulous, this green goddess hummus recipe is the perfect way to kick off all your holiday parties. Featuring white beans, roasted garlic, plenty of fresh herbs, and peppery arugula, this dip proves your holidays don't have to be filled with just fattening foods!
Equipment
- 1 Microwave-Safe Bowl (for softening the white beans or chickpeas)
- 1 Food Processor or High-Speed Blender (for making hummus)
Ingredients
- 1 (15 oz) can Cannellini Beans or Garbanzo Beans - DO NOT DRAIN
- 6-8 Cloves Roasted Garlic
- 3 TBS Tahini - well stirred
- 2 TBS Fresh Lemon Juice (from 1 small lemon)
- 1 Cup Baby Arugula - packed
- ¼ Cup Fresh Parsley Leaves - gently packed
- 2 TBS Freshly Snipped Chives - packed
- ½ tsp Kosher Salt and Ground Black Pepper - to taste
- 1-2 TBS Extra Virgin Olive Oil - to taste (use a good brand!)
- Optional Garnishes Chopped Fresh Herbs and Pomegranate Arils
- Serving Suggestions Pita Chips Garlic Bread, Crostinis
Instructions
- Soften Beans: Empty the can of beans along with their liquid into a microwave-safe bowl. Then cover the bowl with a lid, leaving the lid slightly cracked open on the side to form a vent. Place the bowl in the microwave and heat on high power for 4-6 minutes, or until beans are very soft. Drain the beans, reserving all the liquid and then set everything aside. (Tip: This step is optional; however, it is one of the keys to creating a super smooth hummus.) (Note: Cook time will depend upon the strength of your microwave. You can also do this on the stove-top in a small saucepan if you prefer.)
- Start Green Goddess Hummus: Pour 7 TBS of aquafaba (reserved liquid from the can of beans) into the bowl of a food processor or high-speed blender. Add the roasted garlic cloves, tahini, and fresh lemon juice. Season with 1 teaspoon salt and scant ¼ teaspoon of black pepper. Process for 1 minute. Stop and use a rubber spatula to scrape down the sides and the bottom of the bowl. Then continue to process for an additional minute, or until the mixture is smooth in consistency. Scrape the sides and bottom of the bowl again before proceeding.
- Add the Beans: Add the softened white beans or chickpeas to the food processor and process the hummus again until it’s very smooth, about 3 minutes. Then scrape the sides and bottom of the bowl.
- Add Arugula and Fresh Herbs: Add the baby arugula, fresh parsley leaves, and fresh chives to the food processor and pulse until roughly chopped.
- Stream in Oil and Adjust for Taste and Consistency: With the food processor running, slowly stream in a tablespoon of olive oil. Once combined, stop the motor. Use a spoon to taste the green hummus and adjust for taste and consistency by adding more seasonings for flavor, oil for richness, and more aquafaba or ice-cold water (one tablespoon at a time) for a thinner dip.
- Garnish and Serve Green Hummus: Transfer the herbed green hummus to a large serving bowl and top with more fresh herbs and pomegranate arils, if using. Serve with crostini, pita chips, roasted garlic toasts, or your favorite dippers and enjoy!
Video
Notes
- This recipe calls for roasted garlic cloves as they're much milder, yet richer in flavor than raw garlic. Good news? Roasted garlic tastes good almost everywhere (hello toast, mashed potatoes, baked potatoes, roasted veggies, spaghetti sauce, etc. Store leftover roasted cloves in an airtight container, cover with oil, and store them in the refrigerator.
- I encourage customization! The best part of cooking at home is making recipes to your specific taste. Please think of the measurements of arugula, cloves of garlic, and fresh herbs in this hummus recipe as a mere suggestion. If you like a lot of peppery bite from arugula, use more. If roasted garlic make your heart go pitter patter (it does mine), increase the amount of cloves (I use 8). If you are nervous about taking a recipe off course and making it your own, simply try making the recipe as directed, then taste it and be sure to adjust it to suit YOUR tastebuds. Just make sure you give the hummus a good blitz in the food processor after any additions or adjustments.
- Storage: Hummus will keep, covered in the refrigerator, for up to one week.
- Got questions? I've got answers! If you ever run into an issue, have a question, or need any clarification - please feel free to drop them in the comments section. I'm happy to help when I can!
- Recipe Yield – Roughly 3 cups
Nutrition
Calories: 73kcal Carbohydrates: 3g Protein: 2g Fat: 6g Saturated Fat: 1g Polyunsaturated Fat: 2g Monounsaturated Fat: 3g Sodium: 6mg Potassium: 81mg Fiber: 1g Sugar: 0.3g Vitamin A: 339IU Vitamin C: 8mg Calcium: 26mg Iron: 1mg