This post may include affiliate links. Thank you for your support.
Stop overpaying for peeled and deveined crustaceans at the grocery store and learn How to Clean Shrimp yourself. This easy step-by-step tutorial walks you through the quickest methods of how to peel raw, thawed shrimp and the easiest way to devein shrimp at home.
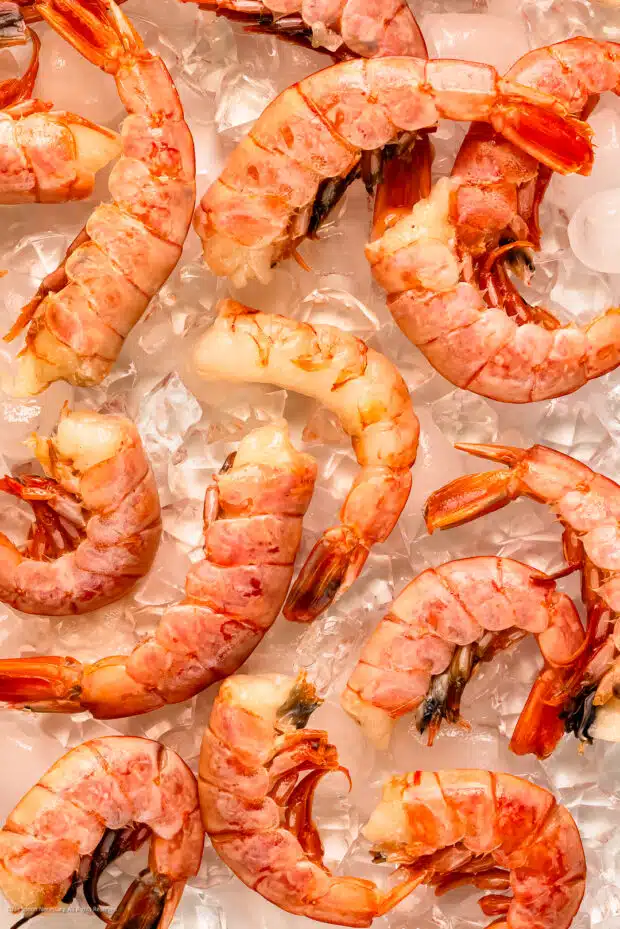
Table of Contents
- About this tutorial for cleaning shrimp
- What you’ll need to clean shrimp
- How to clean shrimp properly
- Expert tips for cleaning and deveining
- FAQs: frequently asked questions
- What is the vein in shrimp?
- What is the black line in shrimp?
- Is it a shrimp vein or poop?
- Where is the vein in shrimp?
- Which side of the shrimp do you devein?
- Do you devein both sides of shrimp?
- Why devein shrimp?
- Can you eat the vein in shrimp?
- What does deveined shrimp mean?
- How to tell if shrimp is deveined?
- Using cleaned shrimp
- Storing deveined shrimps
- More culinary tutorials!
- Tutorial for Peeling and Deveining Shrimp
About this tutorial for cleaning shrimp
Today, I’m about to spill the shrimp-peeling secrets that will not only save you some serious bucks but also take your seafood game to the next level. Imagine delighting in succulent shrimp dishes without shelling ( 😂) out extra dough at the grocery store. Trust me, it’s way easier than it sounds!
Now, you might be thinking: “Why bother peeling shrimp myself when I can just buy them them that way at the store?” Well, not only will you be making significant savings, but cleaning shrimp yourself is also:
- Surprisingly simple and therapeutic, like a kitchen meditation session that ends with a delicious reward!
- Smart! As a bonus, when you peel your own shrimp, you’ll end up with a treasure trove of shrimp shells. Say hello to homemade fish stock! Those seemingly discardable shells are packed with flavors that will elevate your soups, stews, and seafood dishes to new heights of yumminess. So, not only are you saving money, but you’re also getting an extra FREE ingredient in the process. Tricky, right?!?
Whether you’re cooking up a fancy scampi dinner for your loved ones or just craving a tasty shrimp cocktail, this skill is a game-changer. Let’s dive in! 🍤💦
What you’ll need to clean shrimp
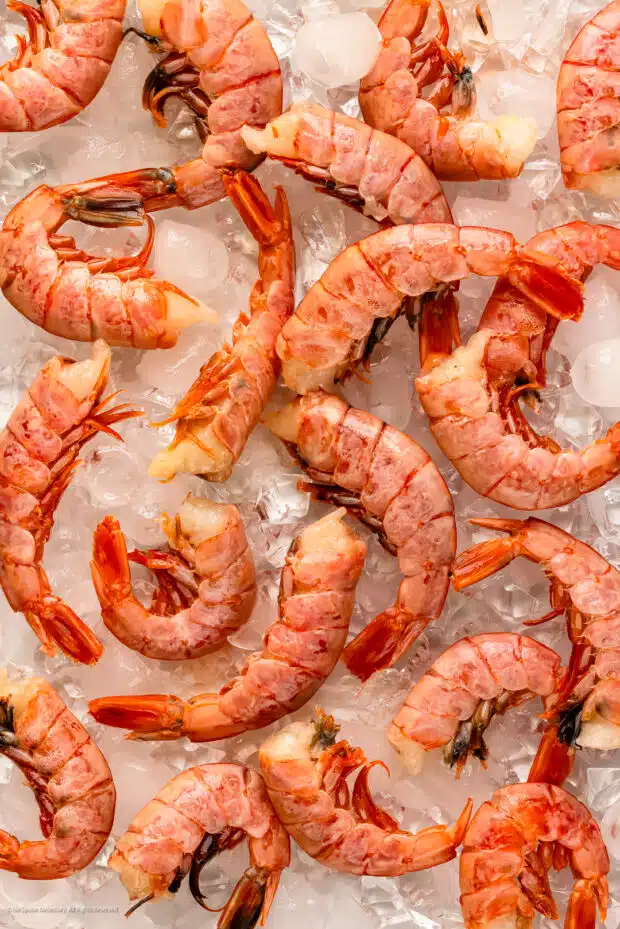
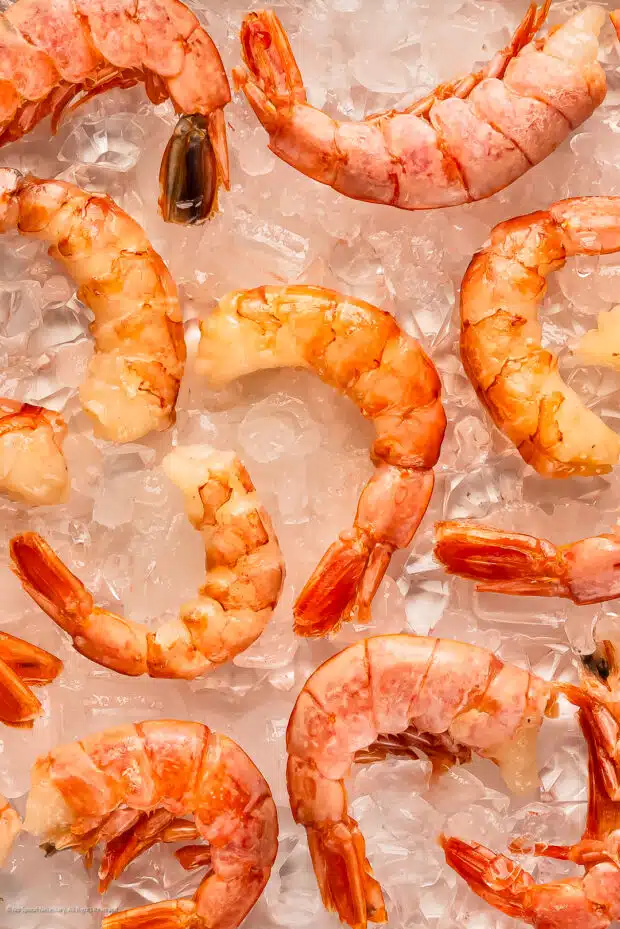
- Fresh or Frozen Shrimp – When it comes to cleaning and deveining shrimp, you can apply this process to various types of shrimp, both fresh and frozen. Here are the most common types of shrimp that can be cleaned and deveined:
- White Shrimp: Also known as Pacific White Shrimp or Whiteleg Shrimp, these are one of the most popular varieties of shrimp available in many markets.
- Brown Shrimp: Often found in the Gulf of Mexico and the southeastern United States, Brown Shrimp have a rich, slightly stronger flavor compared to White Shrimp.
- Pink Shrimp: These are smaller shrimp that are often found in colder waters. They have a delicate, sweet flavor and are perfect for various dishes.
- Tiger Shrimp: Known for their distinctive stripes, Tiger Shrimp are native to Asia and have a slightly briny taste with a firm texture.
- Rock Shrimp: With a similar taste to lobster, Rock Shrimp have a firm texture and are great for grilling or in seafood pasta dishes.
- Spot Prawns: These large, sweet shrimp are native to the west coast of North America and are prized for their unique flavor.
It’s worth noting that shrimp are available in various sizes, from tiny salad shrimp or large shrimp to jumbo-sized ones. The cleaning and deveining process is the same for all sizes, but it’ll be easier if you opt for no smaller than about 41/50 size (that means there are 41-50 pieces per pound).
- Rimmed Pan With Ice – Shrimp are notorious for being carriers of food-borne illness. Make sure you keep them nice and cold to prevent any icky side effects! 🤢
- Paring Knife – A small, sharp knife that’s easy to wield is perfect here. You’re also welcome to use kitchen shears if you prefer!
- Colander – This is an easy way to clean your peeled and deveined shrimp.
How to clean shrimp properly
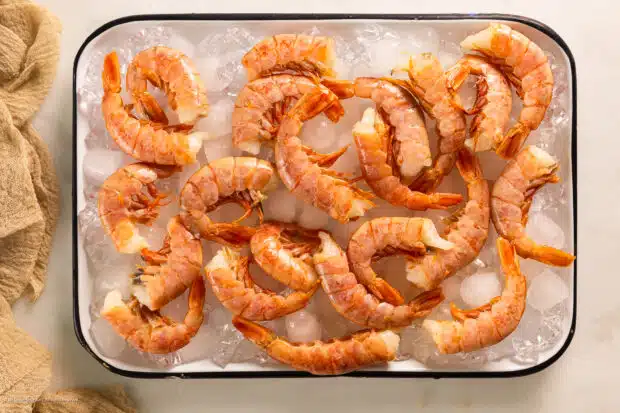
- Prep and Gather: Grab a large, rimmed sheet pan or a large baking pan and fill it with ice cubes. Collect the shrimp from the refrigerator and arrange them on the ice. (Why? You need to keep your shrimp cold to avoid food-borne illness.)
How to clean shrimps with heads on
- Remove Head, if applicable: Working with one shrimp at a time over a clean cutting board, hold the shrimp in your hand and twist off the head if it’s still attached. Alternatively, you can simply chop off the head if you prefer.
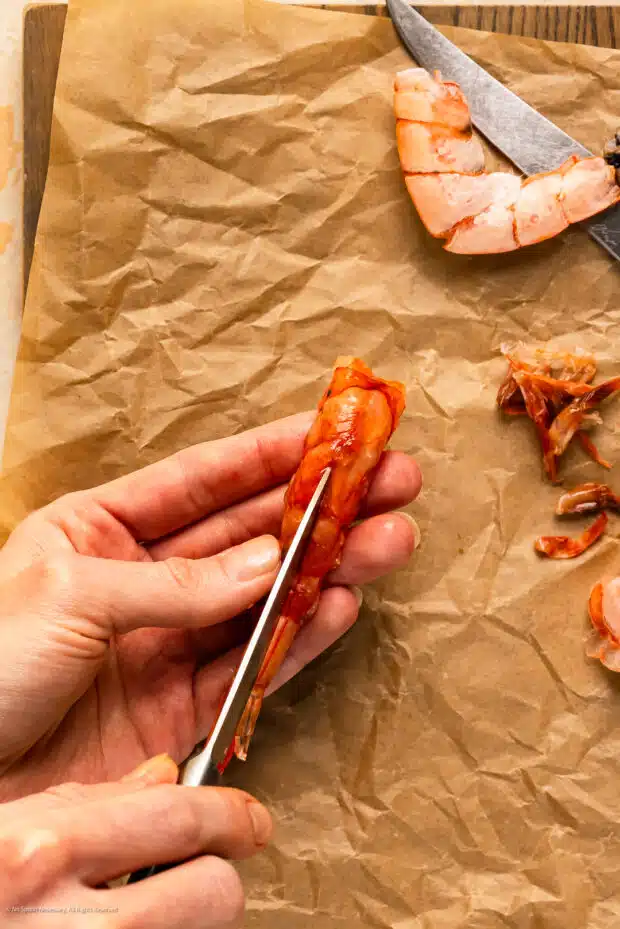
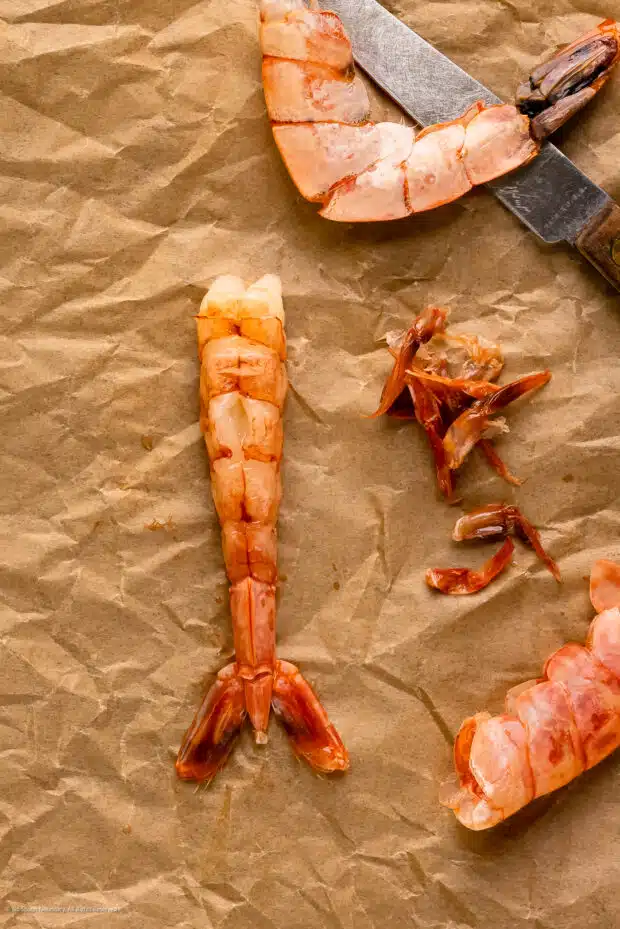
Shelling shrimp with a paring knife
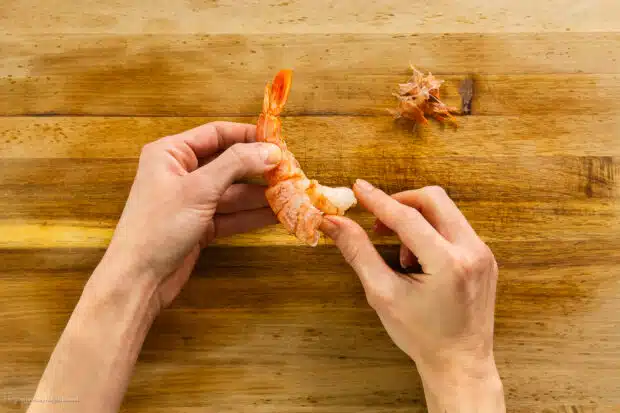
- Peel Shrimp and Remove Shells – paring knife: Use your fingers to pull off and remove the legs from the underside of the shrimp. Then, starting from the head and working from the bottom (underside of the shrimp), slide your thumb up and under the edge of the shell and pull the shell off in one piece. Leave the tail attached for “shrimp hand-held” recipes, like Ebi tempura and shrimp cocktail. For all other recipes, you can gently pinch the tail to pull it right off the shrimp. Once you have peeled the shrimp, place it back on the tray of ice and repeat peeling all the remaining shrimp.
How to devein shrimp
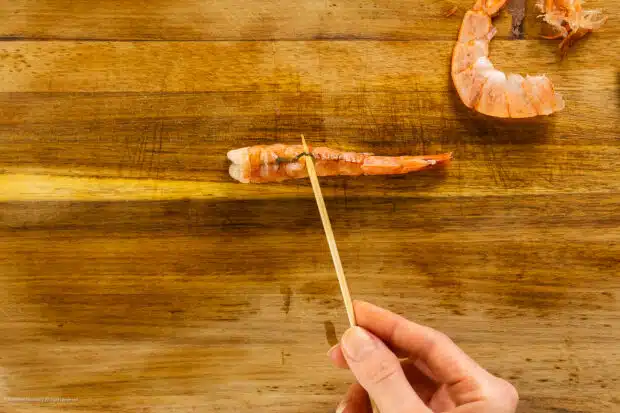
- Devein the Shrimp: Hold the shrimp in your hand so the back of the shrimp is facing you. Now, locate the dark vein on bottom of shrimp. Next, work from the head of the shrimp and go down about ½ to 1-inch along the back. Then, use a sharp paring knife to carefully make a small slit along the back to reveal the vein. Next, you are going to want to insert the tip of a wooden skewer underneath the vein, perpendicular to it. To do this, insert the skewer sideways, underneath the vein and gently pull up on the skewer tip to lift the vein up towards you and off the shrimp. Then, pull on the vein using your fingers or the skewer to completely remove and discard it from the shrimp. Once the shrimp is deveined, place it back onto the tray of ice and repeat deveining the remaining shrimp.
Deveining shrimp with the shell on using kitchen shears
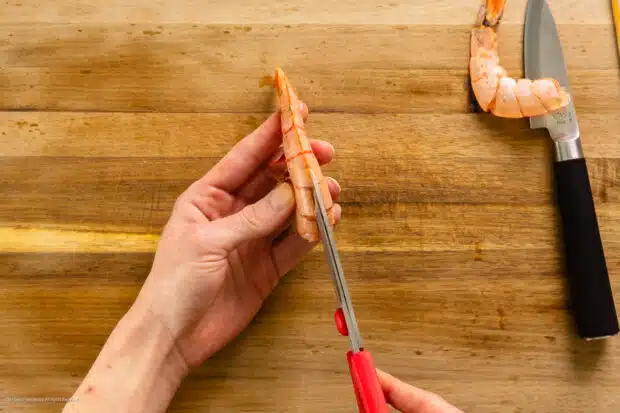
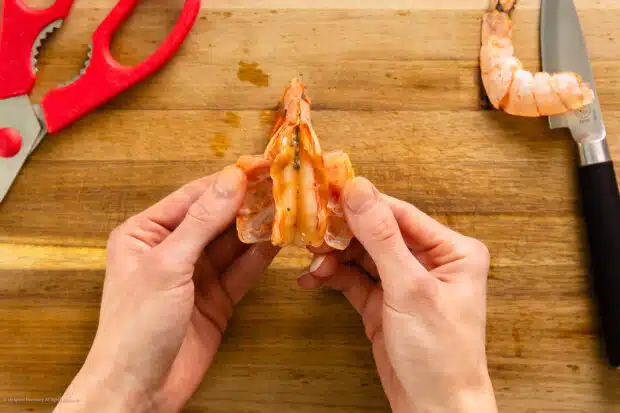
- Peel Shrimp and Remove Shells – kitchen shears: Hold the shrimp in your hand so its back is facing you. Next, insert the tip of the kitchen shears between the shrimp meat and the shrimp shell, and begin to cut into the shell along the back of the shrimp. Stop snipping when you get to the tail. Use your fingers to carefully peel back the shell on either or both sides of the shrimp and discard. Once you have peeled the shrimp, place it back on the tray of ice and repeat peeling all the remaining shrimp.
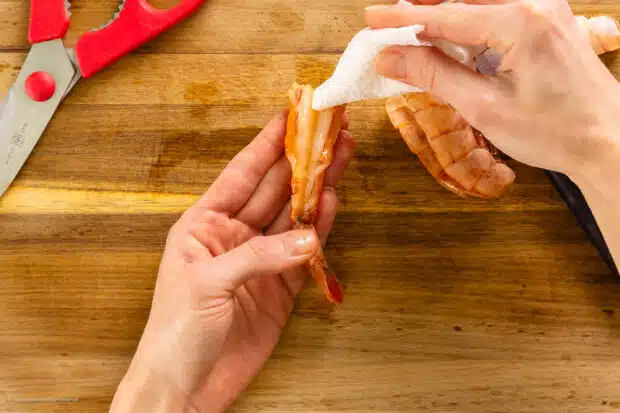
- Devein the Shrimp: Since you used kitchen shears, your shrimp should be scored open (butterflied) along the back. If it’s not, use your paring knife to gently make a shallow cut along the back of the shrimp to expose the black vein. Use your paring knife to gently pull up on the vein, lifting it towards you and off the shrimp, discarding the vein. (Tip 1: Keep paper towels nearby to wipe your hands as the black veins can be sticky!) (Tip 2:.)
How to wash shrimp
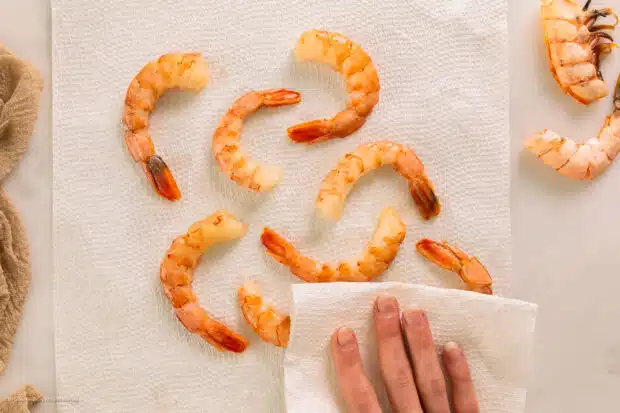
- Wipe or Rinse Shrimps: Clean the shrimp using your preferred method.
- Paper Towels: Use clean paper towels to gently wipe the shrimp to remove any excess grit or errant veins.
- Colander + Water: Transfer the peeled and deveined shrimp to a colander and gently rinse with cool water to remove any grit. Drain and pat the shrimp THOROUGHLY dry before using. (Tip: Moisture is the enemy of shrimp – make sure you pat them as thoroughly dry as possible before using.)
- Use: Use peeled, deveined shrimp to make your favorite recipes.
- Or store: Store your shrimp using one of the methods below.
Expert tips for cleaning and deveining
- If your shrimp are frozen, thaw them prior to peeling and deveining.
- Be gentle during the peeling and deveining process, as you don’t want to tear the shrimp meat.
- Save the shrimp shells to make stock or poaching liquids.
- Sometimes shrimp have larger, fuller intestinal tracks or very thin, delicate tracks that are more difficult to remove. Simply use your paring knife and butterfly the back of the shrimp to fully expose the shrimp intestinal track.
- Keep paper towels nearby to wipe your hands as the black veins can be sticky!
- When lifting and removing the vein, start at the top, or the head, and work towards the bottom.
- The vein is slightly elastic; however, it will sometimes break. Simply use your fingers to pull both sides out when breaks happen.
- Leave the tail attached for “shrimp hand-held” recipes, like Ebi tempura and shrimp cocktail. For all other recipes, you can gently pinch the tail to pull it right off the shrimp.
FAQs: frequently asked questions
What is the vein in shrimp?
The “vein” in shrimp is not actually a vein but is often referred to as one. It’s actually the shrimp’s digestive tract, which runs along the back of the shrimp. The fancy schmancy scientific term for this digestive tract is “the alimentary canal.”
What is the black line in shrimp?
The “black line” in shrimp is a visual representation of the shrimp intestines, and it’s more noticeable in larger shrimp. Since the black line is the shrimp’s intestinal tract, it contains waste material, including what could be considered shrimp “poop.”
Is it a shrimp vein or poop?
When you clean and devein shrimp, you’re removing this shrimp poop line from the back of the shrimp, along with any sand or debris that might be trapped there. By doing this, you’ll end up with shrimp that looks and tastes cleaner.
Where is the vein in shrimp?
If you turn the shrimp over and take a peek at its back, you’ll see a dark line running along the curved part of the shrimp. That’s the vein we’re talking about!
Which side of the shrimp do you devein?
When it’s time to work some shrimp-peeling magic, focus on the backside of the shrimp (the curved part, where the legs used to be). Grab a small, sharp knife or use your trusty kitchen shears and make a shallow cut along that dark line we just spotted. Then, you can gently lift it out – and ta-da! You’ve just deveined your shrimp!
Do you devein both sides of shrimp?
But wait, do we devein both sides? Nah, you’re good to go with just that one side! One quick swipe and you’ve removed the digestive tract, also known as the “vein.” It’s the part that holds the shrimp’s waste, and trust me, we’re all happier when that’s gone!
Why devein shrimp?
Removing that dark line, which is the shrimp’s digestive tract, is not just about aesthetics. It’s also about improving the overall texture and taste of your seafood delights. Nobody wants a gritty, not-so-tasty surprise in their mouth, right?
Do you need to devein shrimp?
But do you need to devein shrimp every single time you cook them? The answer is, not necessarily. Smaller shrimp often have a less noticeable “vein,” and some folks don’t mind leaving it in. It’s all about personal preference and what you’re comfortable with.
Do you have to devein shrimp?
What happens if you don’t devein shrimp? No major catastrophe, I promise! The shrimp police won’t come knocking on your door. It’s totally safe to eat shrimp with the “vein” in there. However, as mentioned earlier, it might have a bit of gritty texture and can affect the taste. So, if you want the best shrimp experience, deveining is the way to go.
Can you eat the vein in shrimp?
Now, the burning question: Can you eat the shrimp vein? Technically, you *can* eat it, but it’s not something most people prefer. But, don’t fret! Deveining shrimp is not a must-do, but it’s a delightful kitchen skill to have in your pocket. It’s quick, easy, and will level up your seafood game!
So, do you have to devein shrimp every single time? Nope, not a must, but giving it a try will unlock a secret flavor upgrade. If you’re feeling adventurous, grab that knife and let the deveining adventure begin! 🍤🔪
What does deveined shrimp mean?
When we say shrimp is “deveined,” it means that the dark digestive tract, also known as the “vein,” has been removed from the back of the shrimp. Deveined shrimp are typically cleaner in appearance and have a smoother texture, making them more enjoyable to eat in your delicious seafood dishes.
How to tell if shrimp is deveined?
Now, how can you tell if shrimp is deveined? It’s not as tricky as you might think! When you look at the back of the shrimp, where the legs used to be, you’ll notice a dark line running along the curved part of the shrimp. If that line is missing, congratulations – you’ve got yourself some deveined shrimp!
Using cleaned shrimp
Now that you’ve totally nailed the art of peeling and deveining those little crustacean critters, it’s time to get creative. Excuse me while I go full-on Bubba Gump:
- Shrimp Scampi: Imagine sautéing your shrimp in a heavenly garlic and butter sauce, a splash of lemon juice, and then serving them over some slurp-worthy linguine pasta. And don’t forget to sprinkle some fresh parsley on top for that extra pizzazz!
- Shrimp Tacos: Season your shrimp with a zesty blend of spices, grill or pan-sear them to perfection, and stuff those babies into warm tortillas. Add all your favorite toppings like shredded cabbage, creamy avocado, tangy salsa, and drizzle on that luscious sauce for the ultimate Taco Tuesday fiesta. Margs optional, but totally recommended!
- Shrimp Stir-Fry: Toss your shrimp with a rainbow of bell peppers, snap peas, and carrots, all swirled in a savory stir-fry sauce. Now, serve over a mound of steamed rice or noodles – easy, breezy, and oh-so-healthy!
- Garlic Butter Shrimp Skewers: Thread your shrimp onto skewers, give ’em a generous brush of garlicky buttery goodness, and then grill to perfection.
- Shrimp and Avocado Salad: Mix avocado, cherry tomatoes, cucumbers, and juicy shrimp in a zingy lime dressing – it’s the perfect summertime salad!
- Coconut Shrimp: Get ready for a tropical getaway – in your mouth! Dip your shrimp in a light batter, coat ’em in shredded coconut, and fry ’em up to a glorious golden brown. Serve with a sweet and tangy dipping sauce for the full stay-cation vibes.
- Shrimp and Grits: Let’s indulge in some Southern comfort! Creamy, cheesy grits topped with sautéed shrimp and a smoky, flavorful gravy.
- Shrimp Po’ Boy Sandwich: Get a taste of the Big Easy by tucking crispy fried shrimp into a soft baguette with shredded lettuce, juicy tomatoes, and a drizzle of spicy remoulade.
Recipes using clean shrimp
If you’re looking for some delicious shrimp-spiration for your next family dinner, try these recipes next:
- Shrimp Bisque
- How to Make Cocktail Shrimp
- Tostadas with Shrimp Ceviche
- Grilled Shrimp with Salad
- Air Fried Shrimp
- Shrimp Tacos with Slaw
- Shrimp with Ramen
- Sheet Pan Shrimp and Potatoes
- Shrimp Risotto
- Saganaki Shrimp
- Shrimp with Honey Garlic Sauce
- Cajun Shrimp
- White Seafood Sauce (my favorite sauce for shrimp!)
Storing deveined shrimps
- Very short-term storage: Place the peeled, deveined shrimp back onto a tray of ice and refrigerate until ready to use. This will work for a few hours.
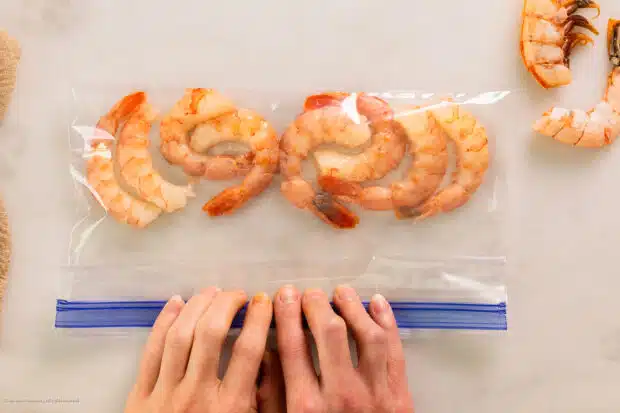
- 2-Day Storage: Transfer the shrimp to a resealable storage bag, press out all the air, and seal. Store shrimp in the fridge for up to 48 hours.
- If you start with fresh shrimp, they can be frozen in a single layer on a parchment-lined plate, then transferred to a freezer-safe container after they’re frozen, removing as much air as possible to prevent freezer burn. They will keep for up to 3 months if stored properly.
- However, if you started with frozen shrimp, do NOT refreeze them.
You’ve peeled, deveined, and conquered the shrimp world like the true culinary champions you are. With these a-peel-ing skills in your apron pocket, you’re now ready to dive into a sea of scrumptious shrimp dishes! So, the next time you’re at the grocery store, remember – why pay extra for pre-peeled shrimp when you can work some magic in your kitchen? You’ve got the power to save money and unlock the hidden treasure of homemade fish stock from those shrimp shells, turning kitchen scraps into gold! Until next time, remember: I think you’re shrimply the best!
Cheyanne
Craving MORE? For more tasty recipe inspiration, be sure to follow me on Instagram, Pinterest, and Facebook. You can also get all of my newest content delivered straight to your inbox by signing up for my email newsletter.
More culinary tutorials!
- Stocking Kitchen Cabinets for Easy Home Cooking
- List of Fresh Herbs and How to Use Them for Cooking
- Best Ways for Storing Fresh Herbs
- Meat Cooking Temperatures Chart
How to clean shrimp at home 👇
Tutorial for Peeling and Deveining Shrimp
Equipment
- 1 Sheet Pan or Baking Pan (filled with ice)
- 1 Cutting Board
- 1 Paring knife or Kitchen Shears
- 1 Colander
Ingredients
- 1 Pound Thawed Shrimp (substitute: Prawns)
Instructions
- Prep and Gather: Grab a large, rimmed sheet pan or a large baking pan and fill it with ice cubes. Collect the shrimp from the refrigerator and arrange them on the ice. (Why? You need to keep your shrimp cold to avoid food-borne illness.)

- Remove Head, if applicable: Working with one shrimp at a time over a clean cutting board, hold the shrimp in your hand and twist off the head if it’s still attached. Alternatively, you can simply chop off the head if you prefer.
Peeling with a paring knife
- Peel Shrimp and Remove Shells - paring knife method: Use your fingers to pull off and remove the legs from the underside of the shrimp. Then, starting from the head and working from the bottom (underside of the shrimp), slide your thumb up and under the edge of the shell and pull the shell off in one piece. Leave the tail attached for “shrimp hand-held” recipes, like Ebi tempura and shrimp cocktail. For all other recipes, you can gently pinch the tail to pull it right off the shrimp. Once you have peeled the shrimp, place it back on the tray of ice and repeat peeling all the remaining shrimp.
- Devein the Shrimp with Paring Knife: Hold the shrimp in your hand so the back of the shrimp is facing you. Now, locate the black vein running along the back of the shrimp or prawn. Next, work from the head of the shrimp and go down about ½ to 1-inch along the back. Then, use a sharp paring knife to carefully make a small incision along the back to reveal the vein. Next, you are going to want to insert the tip of a wooden skewer or toothpick underneath the vein, perpendicular to it. To do this, insert the skewer sideways, underneath the vein and gently pull up on the skewer tip to lift the vein up towards you and off the shrimp. Then, pull on the vein using your fingers or the skewer to completely remove and discard it from the shrimp. Once the shrimp is deveined, place it back onto the tray of ice and repeat deveining the remaining shrimp. (Tip 1: Sometimes shrimp have larger, fuller intestinal tracks or very thin, delicate tracks that are more difficult to remove. Simply use your paring knife and butterfly the back of the shrimp to fully expose the intestinal track.) (Tip 2: Keep paper towels nearby to wipe your hands as the black veins can be sticky!) (Tip 3: The vein is slightly elastic; however, it will break. Simply use your fingers to pull both sides out when breaks happen.)
Peeling with a pair of kitchen shears
- Peel Shrimp and Remove Shells – kitchen scissors method: Hold the shrimp in your hand so its back is facing you. Next, insert the tip of the kitchen shears between the shrimp meat and the shrimp shell, and begin to cut into the shell along the back of the shrimp. Stop snipping when you get to the tail. Use your fingers to carefully peel back the shell on either or both sides of the shrimp and discard. Leave the tail attached for “shrimp hand-held” recipes, like Ebi tempura and shrimp cocktail. For all other recipes, you can gently pinch the tail to pull it right off the shrimp. Once you have peeled the shrimp, place it back on the tray of ice and repeat peeling all the remaining shrimp.
- Devein the Shrimp – kitchen scissors method: Since you used kitchen shears, your shrimp should be scored open (butterflied) along the back. If it’s not, use your paring knife to gently make a shallow cut along the back of the shrimp to expose the black vein. Use your paring knife to gently pull up on the vein, lifting it towards you and off the shrimp, discarding the vein. (Tip 1: Keep paper towels nearby to wipe your hands as the black veins can be sticky!) (Tip 2: When lifting and removing the vein, start at the top, or the head, and work towards the bottom.)
- Wipe or Rinse Shrimps: Clean the shrimp using your preferred method:Paper Towels: Use clean paper towel to gently wipe the shrimp to remove any excess grit or errant veins.Colander + Water: Transfer the peeled and deveined shrimp to a colander and gently rinse with cool water to remove any grit. Drain and pat the shrimp THOROUGHLY dry before using.
- Use Cleaned Shrimp: Use peeled, deveined shrimp to make your favorite recipes.(Tip: Moisture is the enemy of shrimp – make sure you pat them as thoroughly dry as possible before using.)
- Store for Later: Store your shrimp using one of the methods below:Very short-term storage: Place the peeled, deveined shrimp back onto a tray or bowl of ice and refrigerate until ready to use.Storage: Transfer the shrimp to a resealable storage bag, press out all the air, and seal. Store shrimp in the fridge for up to 48 hours.
Notes
- Shrimp: If your shrimp are frozen, make sure you thaw them prior to peeling and deveining.
- Peeling and Deveining Process: Be gentle when during this process, as you don’t want to tear the shrimp meat.
- Save the shrimp shells to make seafood stocks or poaching liquids.
Nutrition
Did you make this recipe?
Mention @nospoonnecessary on Instagram and tag it #nospoonnecessary!
©No Spoon Necessary. All images and content are under copyright protection. Please do not use any images without prior permission. Kindly do not publish this recipe. If you would like to reference this dish, please link directly back to this post.
Have additional questions about cleaning shrimp? Leave them in the comments section below and I’ll update this article to include an answer for you.