This post may include affiliate links. Thank you for your support.
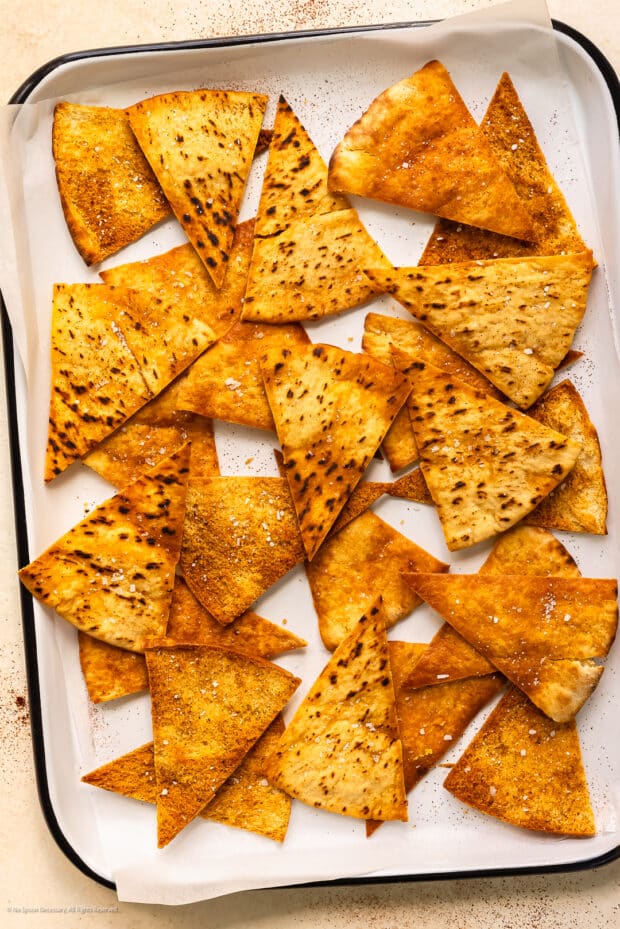
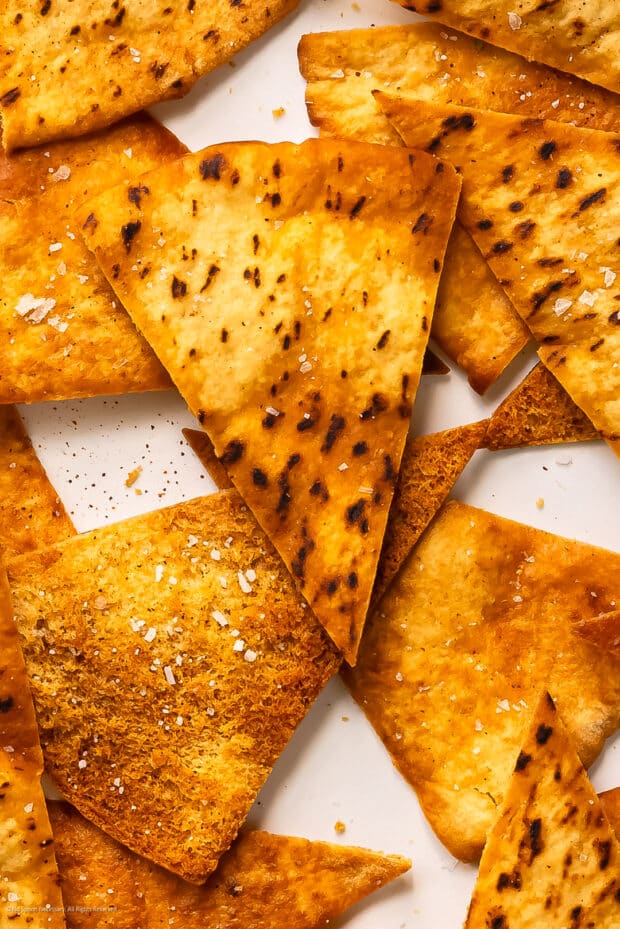
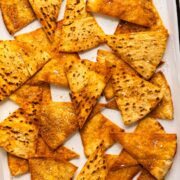
These perfectly crispy Homemade Pita Chips requires just 3 simple ingredients – pita pockets, extra virgin olive oil, and your choice of seasonings. Golden, thin, and beautifully crisp, my better-than-Stacey’s baked pita bread chips recipe is the perfect grab-and-go snack and ideal for pairing with all your favorite dips, spreads, and salsas.
Table of Contents
About this pita chips recipe
When it comes to snacking, it’s hard to beat the classic combo of hummus and pita chips. I mean, who can resist the combination of creamy, crunchy, salty, garlicky deliciousness? Plus, the whole carb-protein balance is on lock so you can actually crush that hunger instead of merely brushing it aside until the main course comes along.
But the quickest way to take your chip and dip game to whole new heights of yum? Make homemade pita chips from scratch (kinda). All you need are a few store-bought pita pockets plus a few pantry staples to make these baked pita chips.
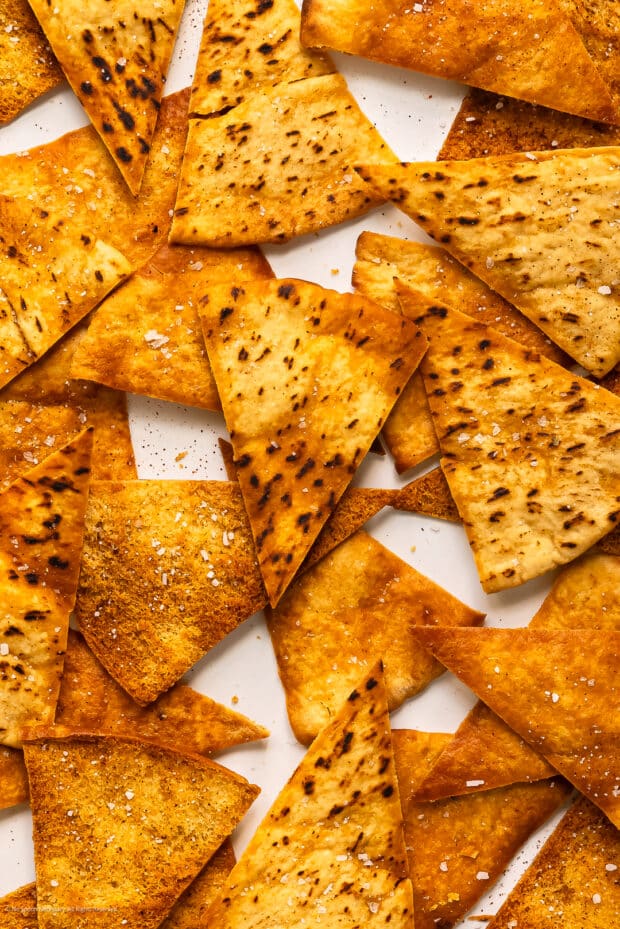
As you take that first irresistible crunch, the crispy perfection of these DIY pita chips will leave you spellbound. Their delicate yet sturdy texture ensures a satisfying snap with every bite, making them the ultimate snack for pairing with all your favorite dips, spreads, and salsas.
Why you’ll love this snack recipe
Aside from yielding triangles of crunchy golden-brown deliciousness, this baked pita chips recipe is ALSO:
- Made With Only 3 Ingredients – If you’re ready to transform a trio of basic ingredients into a crispy, flavorful revelation, you’ve come to the right place.
- Quick & Easy – Simply cut store-bought pita into wedges, toss with oil and spices, then bake to perfection. The whole process takes just 10 minutes of active time or less!
- Super Versatile – From classic hummus to rich and creamy spinach-artichoke dip, these pita chips are the ideal partners-in-crime, elevating every dip to a new level of deliciousness.
- Easily Customizable – The beauty of these pita chips lies in their adaptability, allowing you to customize them for your every craving and mood. Want a burst of zesty flavor? Spice them up with your favorite seasoning blend. Craving a touch of sweetness? A sprinkle of cinnamon sugar will do the trick. Read on for more ideas!
Ingredients for homemade pita chips
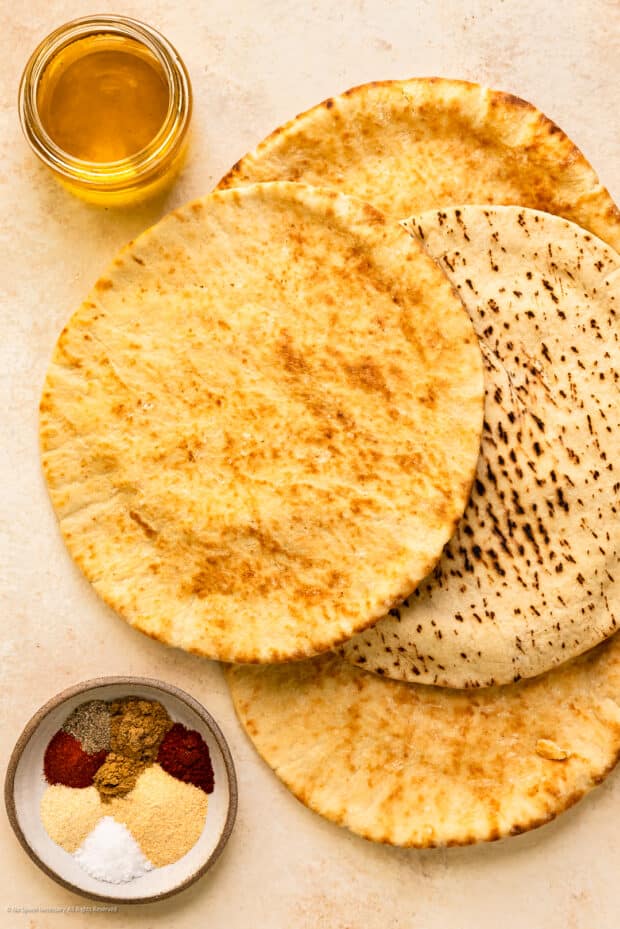
As promised, the infinitely adaptable base recipe for pita chips requires just a handful of ingredients:
- Pita Bread – You can use homemade or store-bought pita breads for this chip recipe. However, I personally recommend using the 2-ply pita pocket variety, as they bake up crispier.
- Extra Virgin Olive Oil – Just your normal cooking oil will do perfectly here. The precise amount will depend upon how many pita breads you are working with and how heavily handed you are with your oil. I recommend about 2 tablespoons per pita. If you are unsure, start small — you can always add more oil if you need to!
- You’re also welcome to use a more neutral-flavored oil like avocado or grapeseed. (This is recommended if you are making a sweet variation.)
- Kosher Salt & Black Pepper – Basic seasoning is all you need, though there are tons of options to spice things up further. Read on below!
Chip variations
You can easily transform your kitchen into a veritable snack aisle by simply adding the seasoning of your choice. Depending on what you have in the spice cabinet, there are probably dozens of flavors of crispy pita chips to try. Here are some of my favorites:
Spicy pita
If a little fiery magic is what your snacking mind craves, try this simple seasoning blend:
- Garlic Powder – For mild, almost sweet allium flavor.
- If you only have garlic salt, omit the added kosher salt.
- Smoked Paprika – For a touch of smoky warmth.
- Feel free to swap in smoky chipotle powder instead.
- Chili Powder – Despite what it sounds like, chili powder is actually a spice blend made from several types of chilis and warming spices like cumin.
- Cayenne – This is where the real heat comes from.
- Feel free to swap in other tongue tinglers like crushed red chili flakes, hot paprika, or ground ghost pepper.
Mexican-style chips
We’re essentially going to dress up your baked pita crackers with a makeshift taco seasoning. If you’d rather keep it simple, use actual taco seasoning — just omit the added salt if you do.
- Garlic Powder – I love garlic like a squirrel loves nuts.
- If you’re allium-free, try swapping in a pinch of asafoetida.
- Smoked Paprika & Chili Powder – For just a touch of heat.
- Feel free to amp up the Scoville scale by swapping in hot smoked paprika and/or cayenne pepper.
- Cumin – For warmth. If you only have whole cumin seeds, quickly toast them in a dry pan until they’re fragrant, then crush in a mortar & pestle or spice blender.
- Coriander – For a bright, floral, almost citrusy undertone.
Mediterranean pitas
Even if you eat them plain, snacking on these delectably spiced oven pita chips is like taking a mini trip to the Aegean. Here’s what you’ll need:
- Za’atar – This Middle Eastern spice blend made with several savory herbs and spices (plus roasty, toasty sesame seeds!) is easily one of my favorites.
- Feel free to swap in the Mediterranean spiced blend of your choice (e.g. Dukkah, Baharat, or Berbere.)
- Oregano – For extra herbaceousness and a bit of spiciness.
- You can also use marjoram in a pinch.
- Thyme – For sweet, peppery, floral goodness.
- Red Pepper Flakes – For a hint of heat.
- You can also use cayenne!
Sweet pita chips
If you’re looking for something to serve with your dessert hummus or fruit dip, cinnamon sugar-dusted toasted pita bread chips are the way to go. You’ll want to omit the black pepper from the base recipe and use a more neutral oil. Then, we’re gonna add:
- Cinnamon – For sweet warmth.
- Other warming spices like ginger, cardamom, cloves, or pumpkin pie spice can also be used here!
- Sugar – I find plain granulated sugar works best, but you can also use brown sugar if you prefer.
- You’re also welcome to swap in your favorite cup-for-cup sugar alternative (e.g. monkfruit or stevia) if you’re watching your sugar intake.
Dietary adaptations
If this regular baked pita chip recipe doesn’t work for your diet, you have a few options:
- Gluten-Free – Swap in your favorite gluten-free pita wedges.
- Lighter/Faster – If you are looking for a super quick, better-for-you hack, you can cut the pita breads into wedges, place the triangles onto the prepared baking sheet, spray both sides with non-stick olive oil cooking spray, sprinkle the seasonings over the top of one side (or both if you like), and bake. HOWEVER, please note the pita points don’t turn out as crispy as if you were to brush them with more oil. Don’t get me wrong — they will still be crisp, however, it’s the softer, chewier type of crisp. I’d call this method pita bread dippers rather than “chips” or “crackers.”
How to make pita chips
Making these pita bread chips is a snap. Here’s how it’s done:
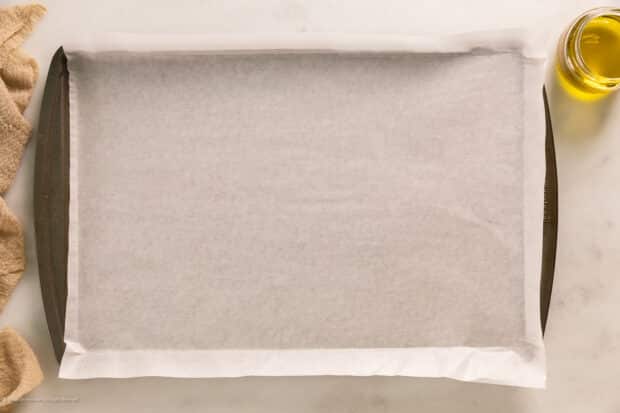
- Preheat Oven to 350-degrees Fahrenheit and line a large baking sheet with parchment paper.
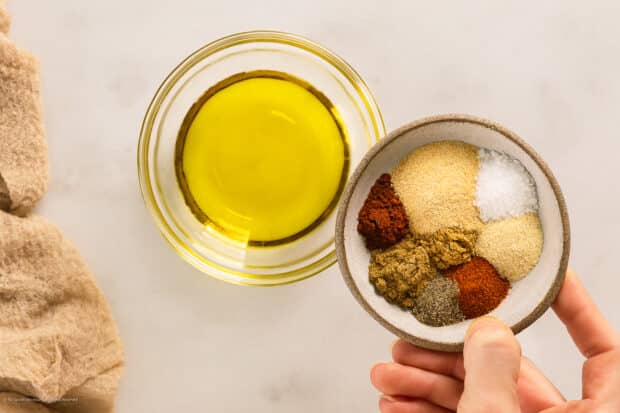
- Mix Oil with Seasonings: In a small bowl, combine the olive oil with the salt, pepper, and any optional spices. Use a fork and stir well to combine before setting aside.
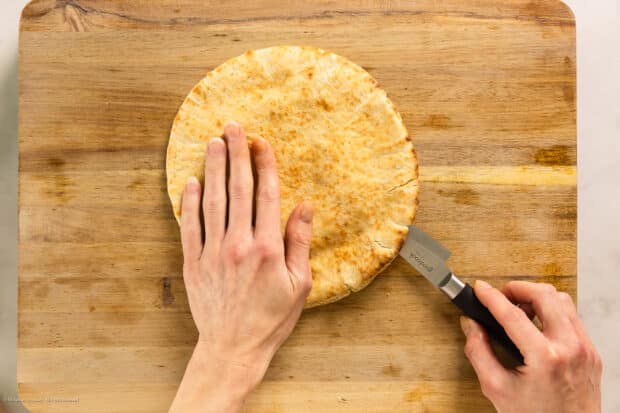
- Prep Pitas: Place the pita breads on a clean work surface. Use kitchen shears or a Chef’s knife to split the pita pockets in half at the seams to form 2 separate, single-layered pitas.
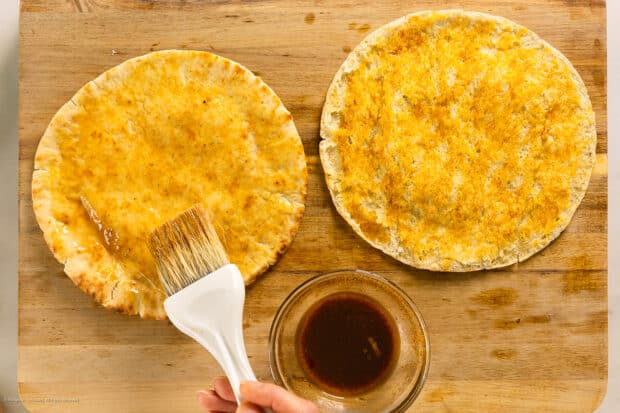
- Season Pitas: Use a pastry brush to generously coat both sides of the pita breads with the oil mixture.
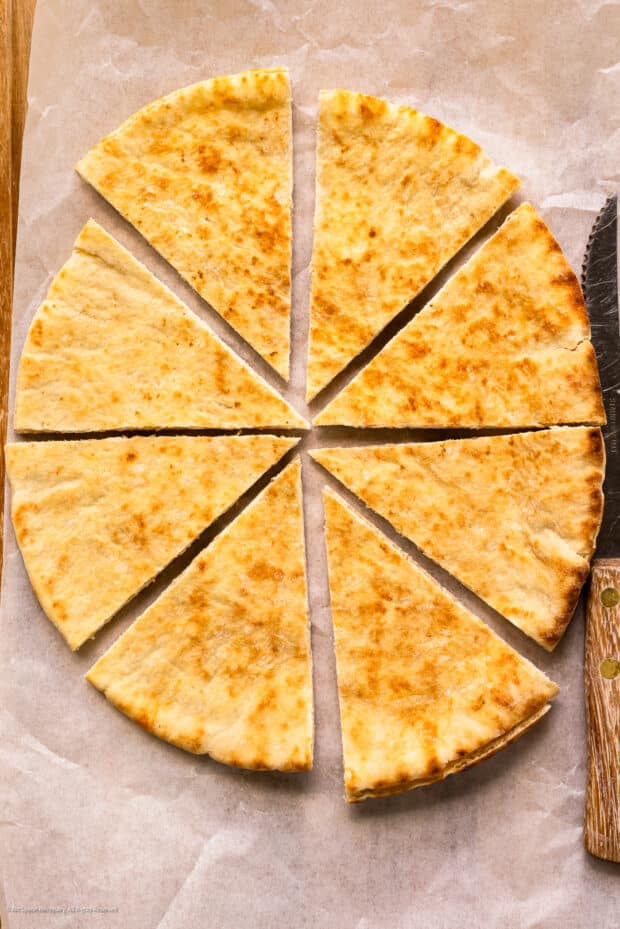
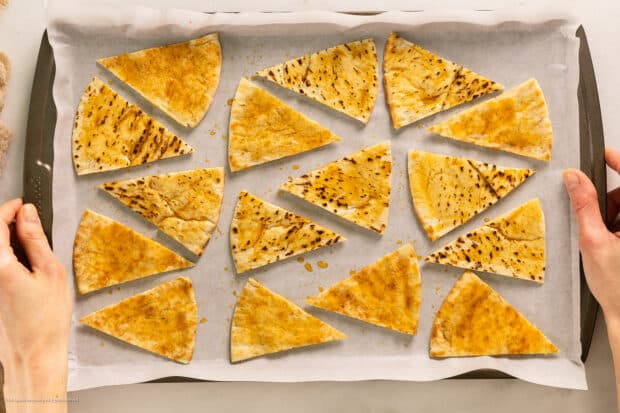
- Cut into Wedges: Use the kitchen shears or a Chef’s knife to cut the pita into 8ths to form triangles or pita wedges. Then transfer the oiled pita triangles to the prepared baking sheet, arranging them in a single layer.
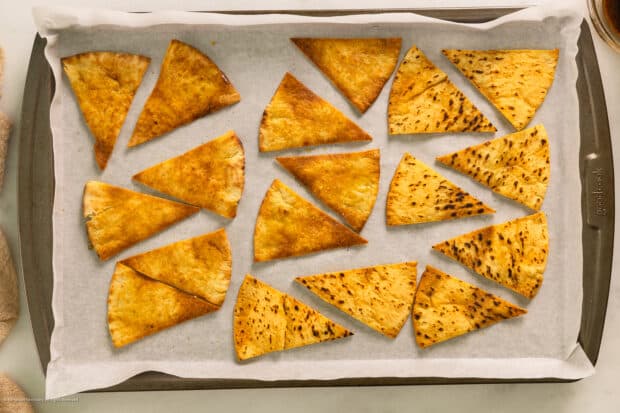
- Bake: Transfer the pita wedges to the pre-heated oven and bake, rotating the pan halfway through, for 8-13 minutes or until the pita chips are crisp and golden in color.
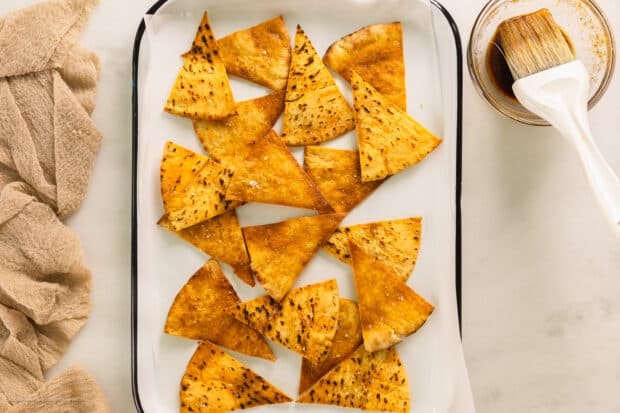
- Enjoy! Let baked pita chips cool slightly before enjoying with your favorite salsa, hummus, or other various dips.
Expert tips for making the best pita chip
- Be Mindful Of Serving Sizes: Depending on how many mouths you’re looking to feed, you can easily scale this healthy baked pita chips recipe up or down. For basic reference, 2 pita bread = 4 servings; 3 = 6 servings (1 serving = 4 pita chips).
- Line Your Sheet Pan with parchment paper or foil for super easy cleanup.
- Bloom Your Spices: Consider warming your olive oil up in a pan, then tossing in your preferred spice blend and stirring until fragrant (about 30 seconds). This technique is known as “blooming,” or tadka in Hindi, and helps to awaken the essential oils in your spices.
FAQs: baked pita chips
Are homemade pita chips healthy?
I know y’all hate this answer, but it depends.
A.) “Healthy” means a lot of different things to a lot of different people. If you’re a keto dieter, you’re probably not going to think these pita snacks are healthy. If you’re vegan, maybe you will!
B.) Your ingredients matter. If you’re using, say, vegetable oil instead of olive oil, you’re going to miss out on all those good heart-healthy benefits.
Are pita chips healthier than potato chips?
Are we talking homemade baked potato chips or store-bought bags of artificial ingredient-laden pita bread crisps? If we’re talking the former, I’d say these homemade pita chips are roughly on par. If we’re talking about the latter, I think I would personally prefer to snack on the pita chips.
For more of a definitive answer, consult a registered nutrition professional!
What makes pita chips different?
You know how there’s a sea of snacks out there, all claiming to be the best thing since sliced bread? Well, let me spill the chickpeas and tell you what makes pita chips stand out like a disco ball at a bowling alley!
First off, these little fellas are the Three Musketeers of snacking – three ingredients, that’s it! We’re talking about pita bread, a splash of oil, and a dash of salt. Boom, that’s the dream team right there. No crazy, unpronounceable stuff. Just pure deliciousness.
These pita chips are also snacking chameleons; they change their flavor like a kid trying out different ice cream toppings. Feeling spicy? Sprinkle some chili powder. Got a sweet tooth? Cinnamon and sugar are the answer. It’s a snack that can match your mood, like the BFF of your taste buds.
And can we talk about versatility? These chips are like the swiss army knife of snacks – they go with anything and everything! Pair ’em up with hummus, salsa, or guacamole? Oh yeah, they’re ready to dive right in. They’re the ultimate wingman, making every dip look and taste even better.
But the real game-changer here is that satisfying crunch. I’m talking about a crunch that can drown out your roommate’s loud music. It’s a crunch so loud and proud; you’d think it won an award for the noisiest snacker in town. It’s a crunch that lets you know you’re alive and enjoying every single bite!
So, there you have it, folks. Pita chips are the three-ingredient wonders that change flavors like a mood ring and can hang out with any dip like they own the party. Get ready for a snack attack that’s crunchy, customizable, and your new snacking sidekick. Pita chips, the snacker’s best friend! 🥳🎉
Serving pita bread chips
Need some snack-spiration? Here you go:
- Hummus Huddle: Gather your favorite hummus flavors – classic, avocado hummus, chipotle spiced hummus, hummus vegetable dip, sweet potato hummus, fresh basil hummus, or hummus bowls. Arrange an assortment of baked pita chips around them; dip and savor the harmony of flavors!
- Salsa Fiesta: Let’s crank up the fiesta vibes! Whip up a fresh and zesty dips – mango salsa, pineapple, traditional pico, balsamic tomato bruschetta, a fiery corn salsa, or pomegranate salsa recipes. Lay out the pita chips in a circle, and let the salsa party begin! Olé!
- Guacamole Gauntlet: The ultimate test of guac greatness! Set up a bar with various toppings like pickled onions, cilantro, and even crumbled feta cheese. Let the pita chips brave the guacamole gauntlet and emerge victorious with each scoop.
- Cheesy Breezy: Who doesn’t love cheese? Dunk pita chips in your favorite melty cheese dip, like this broccoli dip with bacon or goat cheese dip, or no-cook cold dips, like dips with ricotta.
- Salmon Spectacular: Prepare a luscious smoked salmon dip and invite the pita chips to a fancy seafood soirée.
- Pesto Party: Get ready for a green explosion! Whip up a vibrant basil pesto (or maybe a tangy sun-dried tomato pesto?!?). The pita chips will dive right into the verdant pool of deliciousness!
- Chocolate Dipping Delight: Make chocolate dipping sauce and create a dipping station with candy nuts, sprinkles, and mini marshmallows. The pita chips are the perfect vehicle for this delightful dessert adventure.
- Tapa the World: Set sail on a Mediterranean adventure! Pair the pita chips with an array of dips like tzatziki and baba ganoush.
- Chicken Salads: Serve crispy pita triangles with your favorite creamy salads, like chicken salad with bacon, cranberry and chicken salad, or this curry chicken salad recipe.
Storing toasted pita bread
- To store, let them cool completely, then transfer to an airtight container or zip-top bag. Remove as much air as possible. If you have one, toss in a spare silica packet to help ward off any moisture. Store in a dark, cool, dry spot at room temp for the best results.
- If you store homemade pita chips properly, they can maintain their freshness for about 1 to 2 weeks. But let’s be honest, you’ll probably devour them way before that!
Next time you’re craving a snack that’s crispy, customizable, and dips-friendly, don’t look any further. Embrace the simplicity, get creative with the flavors, and let this homemade pita chips recipe be the life of your snacking party. With these little wonders by your side, your tastebuds will be dancing and your snacking game will be on point. Until next time, happy snacking, and may your dips always have the perfect wing-chips to fly with! 🪂🌟
Cheyanne
Craving MORE? Follow all the deliciousness on Facebook, Pinterest, and Instagram!
How to toast pita bread to make chips👇
Baked Pita Chips Recipe
Equipment
- 1 Large Baking Sheet - with parchment paper
- 1 Small Bowl
- 1 Pastry brush
Ingredients
- 2-3 whole Pita Breads (SEE NOTES)
- 4-6 TBS Extra Virgin Olive Oil (SEE NOTES)
- ½ tsp Kosher Salt
- ¼ tsp Ground Black Pepper
Instructions
- Preheat Oven: Arrange oven rack to middle position and preheat the oven to 350-degrees Fahrenheit. Line a large baking sheet with parchment paper for easy clean-up.
- Mix Oil with Seasonings: In a small bowl, combine the olive oil with the salt, pepper, and any optional spices (SEE NOTES). Use a fork or small whisk and stir well to combine before setting aside.
- Prep Pitas: Place the pita breads on a clean work surface. Use kitchen shears or a Chef’s knife to split the pita pockets in half at the seams to form 2 separate, single-layered pitas. (Note: If you purchased the thick single-layer variety of pitas that can’t be separated at the seams – i.e., without a pocket - skip this step.)
- Season Pitas: Use a pastry brush to generously coat both sides of the pita breads with the flavored oil mixture.
- Cut into Triangles: Use the kitchen shears or a Chef’s knife to cut the pita into 8ths to form triangles or pita wedges. Then transfer the oiled pita triangles to the prepared baking sheet, arranging them in a single layer.
- Bake Pita Wedges: Transfer the pita wedges to the pre-heated oven and bake, rotating the pan halfway through, for 8-13 minutes or until the pita chips are crisp and golden in color. (Tip: If some of the pita chips turn golden before the time is up, simply remove them from the baking sheet and let the other chips continue baking.)
- Enjoy Pita Chips! Cool slightly before transferring to a serving platter. Serve with your favorite salsa, hummus, or other various dips and enjoy!
Notes
- Pita: You can use homemade or store-bought pita breads for this chip recipe. However, I personally recommend the 2-ply pita pocket variety, as they bake up crispier.
- Olive Oil: The precise amount will depend upon how many pita breads you are working with and how heavily handed you are with your oil. For 2 pita breads, start with ¼ cup; for 3 pitas, use 6 tablespoons. (Note: I’m heavy handed and use 5 tablespoons for 2 pita breads. However, if you are unsure, start small because you can always add more oil when you need to.)
- Pita Chip Hack: If you are looking for a super quick hack, you can cut the pita breads into wedges, place the triangles onto the prepared baking sheet, spray both sides with non-stick olive oil cooking spray, sprinkle the seasonings over the top of one side (or both if you like), and bake. HOWEVER, please note the pita chips don’t turn out as crispy as the brushing with oil method. Pita chips made using this hack method will still be crisp, however, it’s the softer, chewier type of crisp, where some of the bread sticks to your teeth. But it works in a pinch or a pickle!
- Pita Chip Flavor Variations: Spice up your life and try these various seasoning combinations on your pita breads! (See below)
- Serving Size: 2 pita bread = 4 servings; 3 = 6 servings (1 serving = 4 pita chips)
- ¾ tsp Garlic Powder
- ½ tsp Smoked Paprika
- ¼ to ½ tsp Chili Powder
- ¼ to ½ tsp Cayenne Pepper
- ½ tsp Garlic Powder
- ½ tsp Smoked Paprika
- ½ tsp Cumin
- ¼ tsp Coriander
- ¼ to ½ tsp Chili Powder
- 1 tsp Za’atar
- ¼ tsp Dried Oregano
- ¼ tsp Dried Thyme
- Generous Pinch Red Pepper Flakes
Nutrition
Did you make this recipe?
Mention @nospoonnecessary on Instagram and tag it #nospoonnecessary!
©No Spoon Necessary. All images and content are under copyright protection. Please do not use any images without prior permission. If you want to reference this recipe, please link directly back to this post.

