This post may include affiliate links. Thank you for your support.
Have you been on the hunt for a foolproof chicken breast recipe that yields tender and juicy meat, without any fancy kitchen equipment. Good news, because today we’re learning How To Poach A Chicken Breast. Whether you want to use it in salads, sandwiches, wraps, or just enjoy it on its own, mastering the art of Poaching Chicken Breasts is sure to take your culinary game to a whole new level.

Table of Contents
About this tutorial for poaching chicken breasts
Have you ever wondered how to cook moist chicken breast that is so tender it practically melts in your mouth? Well, get ready. This game-changing tutorial is going to show you the stunningly simple secret of poached chicken breasts.
Aside from being the hands-down easiest way to avoid dry, overcooked chicken disasters, this poached chicken breast recipe is also:
- Quick & Easy – If you’ve got a pot, some chicken breasts, filtered water, and a mere 5 minutes to spare, you’re all set to become a poaching pro.
- Customizable – While you only need 3 basic ingredients to to poach chicken, there are tons of ways to add delectable flavor to fit whatever profile you’re going for.
- Versatile – From salads to sandwiches, tacos to stir-fries, or even as the star of a light and wholesome dinner, this easy poached chicken effortlessly slips into any dish, adding tender protein goodness to every bite. Get ready to unleash your creativity in the kitchen, because with poached chicken breast, the possibilities are as limitless as your imagination!
What does “poaching” mean?
Poaching boneless chicken breasts is like giving your poultry a gentle spa treatment. This age-old cooking technique involves gently simmering chicken breasts in liquid until they become incredibly tender and flavorful.
Don’t fret — when we talk about “poaching” in the kitchen, we’re not talking about illegally stalking down protected prey. 😅Rather, think of it as a delicate, low-and-slow cooking process where your chicken takes a relaxing soak in salted water, or preferably, a flavorful broth.
This bath is heated to a temperature that’s just below boiling point, letting the delicate bubbles surround your meat like they’re in a naturally-occurring hot water spring. The poaching liquid surrounds the chicken with gentle warmth, ensuring it cooks evenly without losing its moisture and tenderness.
Once you try your hand at poaching poultry, you’ll definitely want to try poaching shrimp, poaching salmon, and poached tuna next!
What is poached chicken breast?
Unlike more aggressive cooking methods like frying or grilling that can make chicken tough, poaching is all about tenderness. It coaxes your chicken into becoming the most succulent version of itself. As the chicken cooks, it absorbs the subtle flavors of the liquid, infusing it with a hint of something special that elevates the taste to a whole new level. That’s why I love adding aromatics to the poaching liquid for chicken, like herbs, citrus, or onions!
Essentially, poached chicken is simply chicken that has been cooked while being submerged in a liquid over low heat.

Ingredients to poach chicken
As promised, you only need a handful of ingredients for this poached chicken recipe. Here’s what to grab:
- Boneless Skinless Chicken Breasts – The size of the breasts will determine how long they take to cook. If they’re particularly thick in one area, pound them out to an even thinness so they cook more evenly. Frozen chicken breasts are also totally acceptable — just be sure to defrost them first.
- Water – Start with cold, preferably filtered water. Why cold? It gives you greater control over *slowly* simmering the chicken breast, plus it’s less likely to draw out any not-so-great minerals from your pipes.
- Alternatively, you can poach in chicken broth flavored with your favorite aromatics, herbs, or seasonings.
- Salt & Pepper – At the very least, you need basic seasoning so your chicken at least tastes like chicken.
Poaching liquid variations
While the ingredients above are the absolute bare minimum, I suggest mixing and matching some of your favorite flavor-makers into the mix if you want to make the BEST poached chicken. Here are some of my personal go-to’s:
- Yellow Onion – Red or white onions, scallions, or shallots can also be used.
- Garlic Cloves – Go for whole cloves here for the best results.
- Ginger – A few inches of ginger sliced into thick rounds is great for making Asian-inspired tender poached chicken for salad or soup.
- Fresh Herbs – You can go hard or soft here. Think rosemary, thyme, tarragon, cilantro, dill, or parsley.
- White Wine – For adding a bit of complexity. Plus, once you open the bottle, you may as well sip on some while it poaches, right?? 😉
- Bay Leaf – These little fellas pack a wallop of flavor. For a more Southeast Asian bent, try using tej patta.
- Lemon – A few rounds of lemon adds tons of brightness. Lemongrass is also lovely!
- Low-Sodium Soy Sauce – For infusing your perfectly poached chicken breast with a little umami goodness.
Want to know my personal perfect poaching blend? I typically add ½ to 1 cup of chardonnay, ½ yellow onion, 2 cloves of garlic, ½ lemon, a handful of flat leaf parsley or chives, and a bay leaf to flavor my poaching liquid.
I’ve found this combination yields juicy chicken with just the right amount of savory flavor. It’s not bland, but it’s also not overwhelmingly flavorful, so I can use it in all kinds of recipes like soups, salads, and casseroles.
How to poach chicken breast
The moist-heat cooking method of poaching produces the juiciest chicken breasts you’ve ever had the pleasure of tasting – no fancy kitchen equipment or special gadgets necessary!
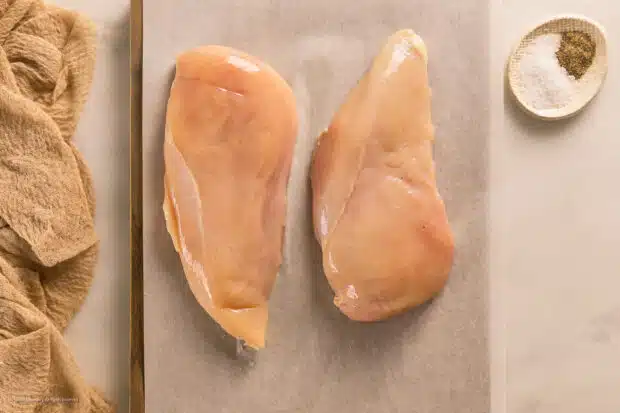
- 30 minutes before cooking: Take the chicken breasts out of the refrigerator and let come them to room temperature on the kitchen counter.
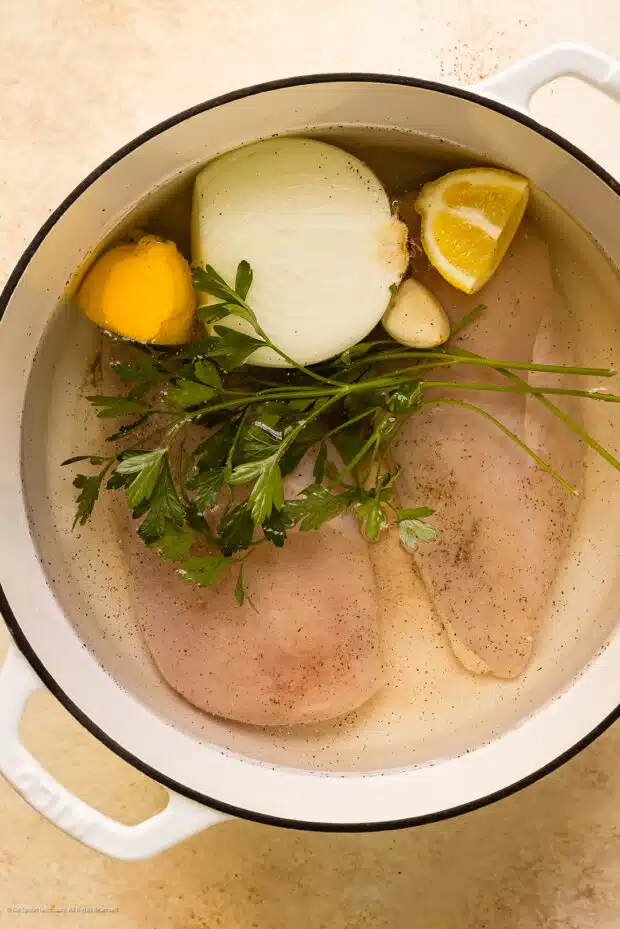
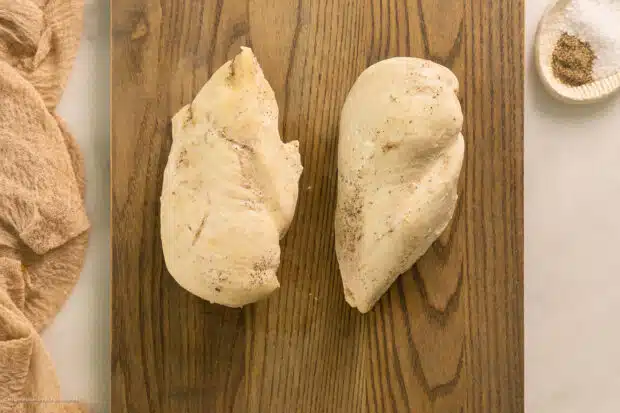
- Add chicken to pan: Season the chicken breasts on both sides with salt and pepper. Then transfer the chicken breasts to a saucepan or pot large enough to hold the chicken breasts in a single layer.
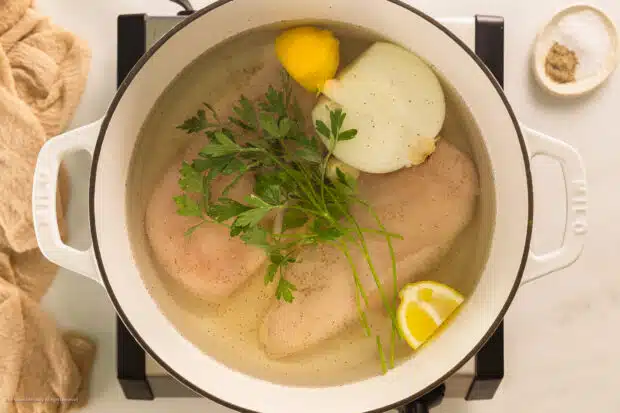
- Add water & flavor: Fill the saucepan with enough water to cover and submerge the chicken breasts with about 2-inches of water. Add any flavoring ingredients, such as wine, garlic, onion, and lemon, if using. Give everything a good stir to combine.
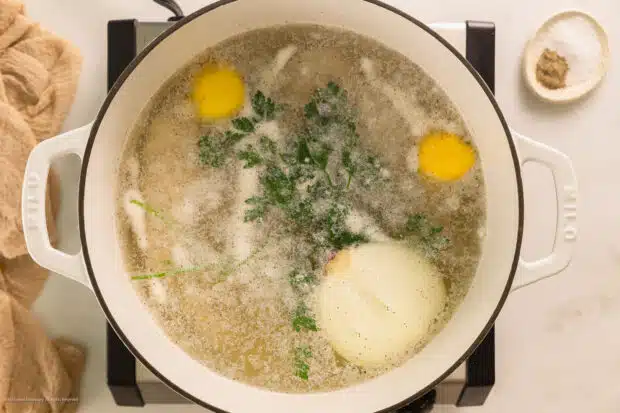
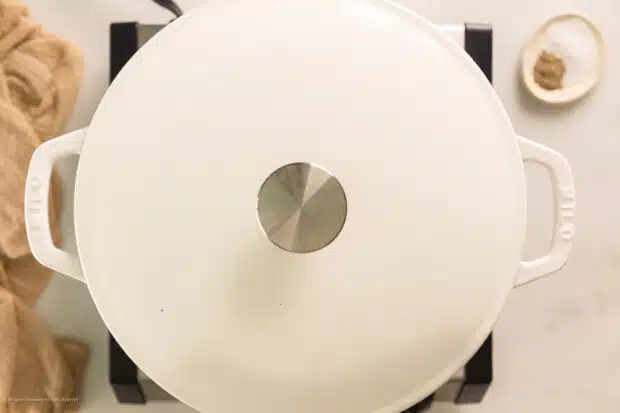
- Bring to simmer: Place the saucepan over medium-high heat and bring to a rapid simmer. Once simmering, immediately reduce the heat to low. Next, cover the saucepan with a lid, and cook for 7-12 minutes, or until the thickest part of the chicken registers 165-degrees on an instant-read thermometer.
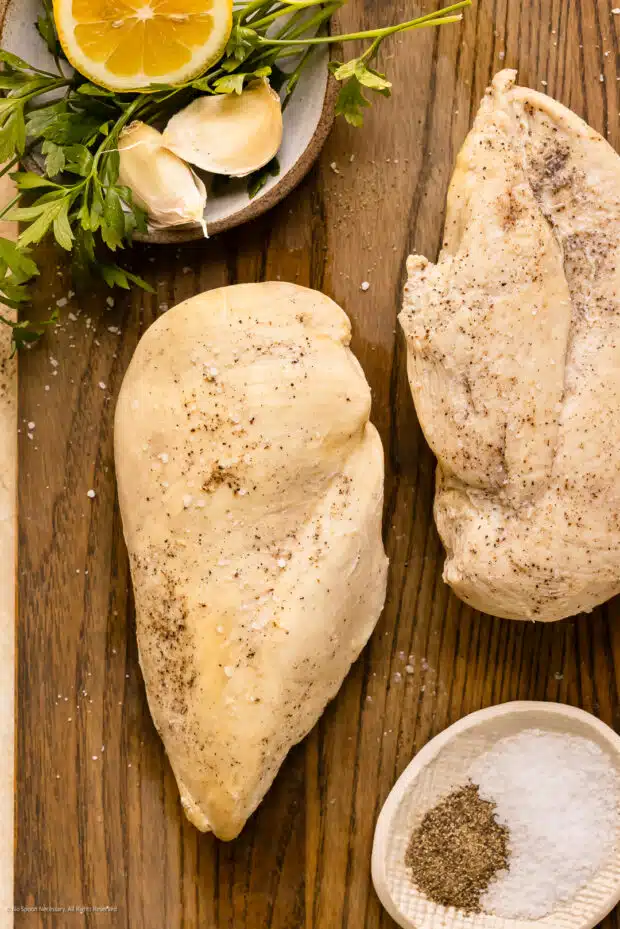
- Rest chicken, strain broth: Remove the chicken breasts from the poaching liquid and set aside on a clean work surface. Let chicken breasts rest for 5 minutes.
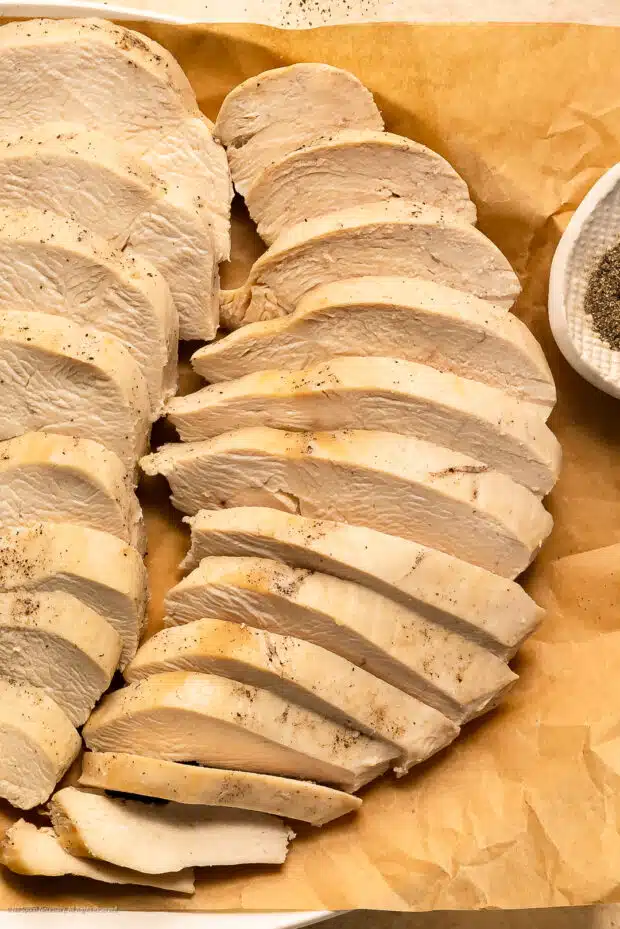
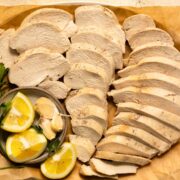
- Slice, shred, serve or store: Slice, shred, or chop the chicken breasts and use as desired. Alternatively, place the whole poached chicken breasts into airtight
Expert tips for poaching a chicken breast
Here are a few tips to ensure your simmered chicken turns out perfectly:
- Season Your Liquid: Don’t be shy! The liquid you use for poaching is a fantastic opportunity to infuse your chicken. Throw in aromatics like garlic, onion, herbs, and spices to add that extra oomph. If you poach your chicken in just water, the chicken will be super tender, but it won’t have any flavor – consider yourself warned!
- Save the Liquid Gold: Don’t toss that poaching liquid! It’s a treasure trove of flavor. Strain and save it as a base for soups, sauces, or even to cook grains like rice or quinoa. If it’s free from alliums, you can also drizzle a little on your fur baby’s dinner.
- Gentle Heat Wins: Keep the heat low and steady. You’re aiming for a gentle simmer, not a rolling boil. High heat results in tough chicken, and we’re all about tenderness here.
- Stay Patient: Let your chicken luxuriate in the simmering liquid. Depending on the size of your chicken breasts, it might take around 15-20 minutes for them to reach juicy perfection.
- Check the Temp: Use a meat thermometer to check if your chicken has cooked through. The internal temperature should reach 165°F (74°C), but I like to take it off the heat around 162°F so the carry-over cooking gets it *just right.* No guessing games here—precision is your kitchen ally!
- Rest and Savor: Once your chicken is cooked, remove it from the liquid and let it rest for a few minutes. This allows the juices to redistribute, resulting in a super succulent bite.
- Shred Like a Pro: If you’re planning to shred your chicken, let it cool slightly before doing so. It’s easiest to do while it’s still warm, but you don’t want to burn your little fingers!
FAQs: perfectly poached chicken breasts
How long to poach a chicken breast?
That all depends on the size of your birdy breasts. My two chicken breasts weighed a total of 1.43-pounds, and they needed 10 minutes in step 4 to reach 162-degrees Fahrenheit. (I rely on carry over cooking for the remaining few degrees.) If your breasts are bigger, they may take longer. Just keep an instant-read thermometer on hand and you should have zero issues!
What’s the difference between poached vs boiled chicken?
Let’s unravel the delicious differences between these two cooking methods:
Poaching involves simmering the chicken in liquid that’s just below the boiling point. This low and slow approach ensures that the chicken cooks evenly and retains its moisture. Poaching liquid is often infused with aromatics, herbs, and spices, allowing the chicken to absorb those flavors for an extra dimension of taste. The result? Tender, succulent chicken with a delicate taste profile.
Boiling, on the other hand, is a bit more vigorous. It involves immersing the chicken in rapidly boiling water, and it’s often done to cook chicken for recipes where the texture isn’t as crucial, like soups or stocks. Boiling can lead to slightly tougher chicken due to the high heat and aggressive cooking process. However, it’s efficient for extracting flavor from the chicken to enhance the broth or liquid you’re making.
What’s the proper poached chicken temperature?
My favorite mnemonic for knowing what temp to cook all your poultry to is “if it flies, 165!” Turkey, quail, and chicken, for example, should all reach 165F to be considered safe.
Recipes using poached chicken breasts
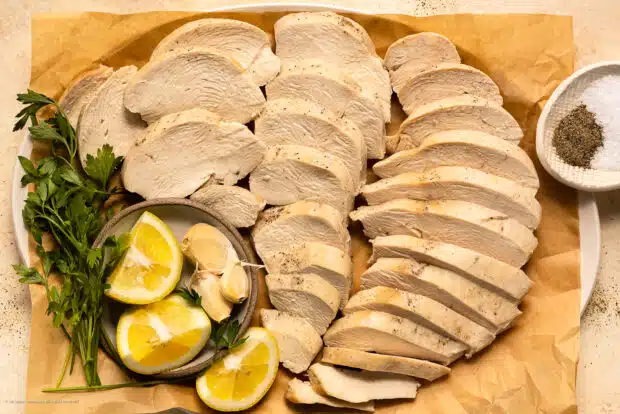
Wondering what to do with poached chicken? Luckily there are tons of recipes using poached chicken breasts. Here are some of my favorite delicious ideas to make the most of your perfectly poached chicken breasts:
- Rolls: vietnamese spring rolls with chicken, summer rolls, sandwich rolls and wraps
- Chicken Salads: cranberry chicken salad, creamy chicken salad with bacon, and chicken curry salad recipe
- Soups: Chicken Black Bean Soup
- Bowls: hummus bowl, harvest bowl
- Over Grains and Noodles: Serve poached chicken over your favorite rice, grains, and noodles. Think: coconut rice recipes, rice curry recipes, riced zucchini, riced broccoli, and rice salads for summer.
- Sauce it: Poach chicken breasts and serve with a flavorful sauce, like pesto with dried tomatoes, honey mustard, or marinara sauce.
- Top it: Dollop salsa fresca, bruschetta with balsamic, roasted corn salsa, or spicy mango salsa over the top of the chicken for a fast, flavorful, and healthy meal.
- Chicken Dinners: slow cooker chicken teriyaki bowls, chicken with moroccan couscous, and chicken soba noodle bowls
- Casseroles: green chicken enchilada casserole and healthy Mexican casserole with chicken
- Tacos: baja chicken Tacos, baked chicken buffalo tacos, and honey mustard chicken tacos
Remember, the sky’s the limit when it comes to using your poached chicken. Feel free to mix and match ingredients, flavors, and cuisines to create dishes that reflect your culinary personality. Enjoy the adventure and happy cooking! 🍗🍽️🎉
Storing leftovers
Let’s keep that poached chicken of yours as fresh and fabulous as ever.
- Pop any leftovers into an airtight container to give it a cozy little home in the fridge and don’t forget the date! Label that container so you can keep tabs on freshness.
- Got a bunch of poached chicken to store? Divide and conquer! Split it into smaller portions before tucking it away.
- When it’s time to reheat, let’s keep things gentle, just like we did when we poached it.
- If you’re rushing, the microwave comes to the rescue. Pop that chicken into a microwave-safe dish, cover it with a damp paper towel to keep the goodness locked in, and warm it up in quick bursts, giving it a stir now and then.
- Bigger portions or anti-microwave? No worries! Throw that chicken into a skillet over medium-low heat. Sprinkle in a bit of broth, water, or your favorite sauce to keep it juicy and sizzling.
- For larger quantities, set your oven to a low 300°F (150°C) dance. Nestle the chicken in an oven-safe dish with a dash of liquid, cover it up with foil, and let it warm up gently.
Whatever reheating route you take, just remember: we’re on Team No Overcooking here! Your chicken is already a rockstar, so we’re just giving it a warm encore. 🍗🔥🍽️
Armed with these poaching superpowers, you’re now the “chicken whisperer” ready to create dishes that’ll have taste buds doing a happy dance. Now go forth, poach with passion, and let those juicy chicken dreams come true! And remember: I think you’re clucking amazing! 🐔🍗✨
Cheyanne
More tutorials for basic cooking skills!
Poaching Chicken at Home
Equipment
- 1 Large Saucepan or Pot (for poaching chicken)
Ingredients
- 2 whole Boneless Skinless Chicken Breasts (SEE NOTES)
- As Needed Cold Filtered Water
- To Taste Kosher Salt & Ground Black Pepper
- Optional Flavoring Ingredients (SEE NOTES)
Instructions
- 30 minutes before cooking: Take the chicken breasts out of the refrigerator. Remove and discard the packaging and set on a clean work surface or plate. Set the chicken aside and let come to room temperature on the kitchen counter for 30 minutes.

- Add chicken to pan: Season the chicken breasts on both sides with salt and pepper. Then transfer the chicken breasts to a saucepan or pot large enough to hold the chicken breasts in a single layer.
- Add water & flavor: Fill the saucepan with enough COLD water to cover and submerge the chicken breasts with about 2-inches of water. Add any flavoring ingredients, such as wine, garlic, onion, and lemon, if using. Give everything a good stir to combine.
- Bring to simmer: Place the saucepan over medium-high heat and bring to a rapid simmer.
- Poach Chicken: Once simmering, immediately reduce the heat to LOW. COVER the saucepan with a lid, and cook for 7-12 minutes, or until the thickest part of the chicken registers 165-degrees on an instant-read thermometer.
- Rest chicken: Remove the chicken breasts from the poaching liquid and set aside on a clean work surface. Let chicken breasts rest for 5 minutes. Strain broth - optional: If you’d like to keep the poaching liquid, strain the broth through a fine-mesh strainer if you added flavoring ingredients (or simply use tongs to remove and discard larger flavoring ingredients if you’d like).
- Slice, shred, serve or store: Slice, shred, or chop the chicken breasts and use as desired. Alternatively, place the whole poached chicken breasts into airtight storage container or resealable bag and store in the fridge for up to 4 days.


Notes
- Chicken: You can use frozen boneless, skinless chicken breasts; however, you will need to thaw them prior to poaching.
- Make sure you start with chicken at room temperature. Poaching is all about gently cooking the chicken. Starting the chicken at room temperature aids in this process.
- Step Photos: My two chicken breasts weighed a total of 1.43-pounds, and they needed 10 1/2 minutes in step 5 to reach 162-degrees Fahrenheit. (I rely on carry over cooking for the remaining few degrees.)
- Flavoring Ingredients: These are entirely optional; however, it’s important to note that the subtle flavor they do add does a lot for the chicken. If you poach your chicken in just water, the chicken will be super tender, but it won’t have any flavor – just a heads up! Optional Flavoring Ingredients:
- 1 small Yellow Onion – peeled & halved with the root left intact
- 2-3 cloves Garlic – smashed & peeled
- 1 knob Fresh Ginger – peeled & thinly sliced
- Handful Fresh Herbs
- Celery Rib
- 1 Cup White Wine
- 1 dried Bay leaf
- 1 whole Lemon – quartered or sliced (sub: fresh lemon juice)
- 1-3 tsp Low-Sodium Soy Sauce
- What I typically use: ½ to 1 cup of chardonnay, ½ yellow onion, 2 cloves of garlic, ½ lemon, a handful of flat-leaf parsley or chives, and a bay leaf to flavor my poaching liquid. I’ve found this combination yields juicy chicken with just the right amount of savory flavor – meaning it’s not bland; however, it’s also not overwhelmingly flavorful, so I can use it in recipes like soups, salads, and casseroles.
- If you are keeping the broth for sipping, I highly recommend flavoring the poaching liquid so it’s aromatic and tastes delicious.
Nutrition
Did you make this recipe?
Mention @nospoonnecessary on Instagram and tag it #nospoonnecessary!
©No Spoon Necessary. All images and content are under copyright protection. Please do not use any images without prior permission. Please do not publish this recipe without prior consent. To reference this recipe, please link directly to this post.
