This post may include affiliate links. Thank you for your support.
Ever wondered how to roast garlic cloves in an oven? Look no further! With my simple method, a trifecta of simple ingredients, and a short roasting spell in the oven, you can transform ordinary garlic bulbs into luscious, caramelized clove treasures. A roasted garlic bulb is your secret weapon to make everything from veggie side dishes and creamy mashed potatoes to succulent meats EXTRA tasty, plus it’s make-ahead-friendly!
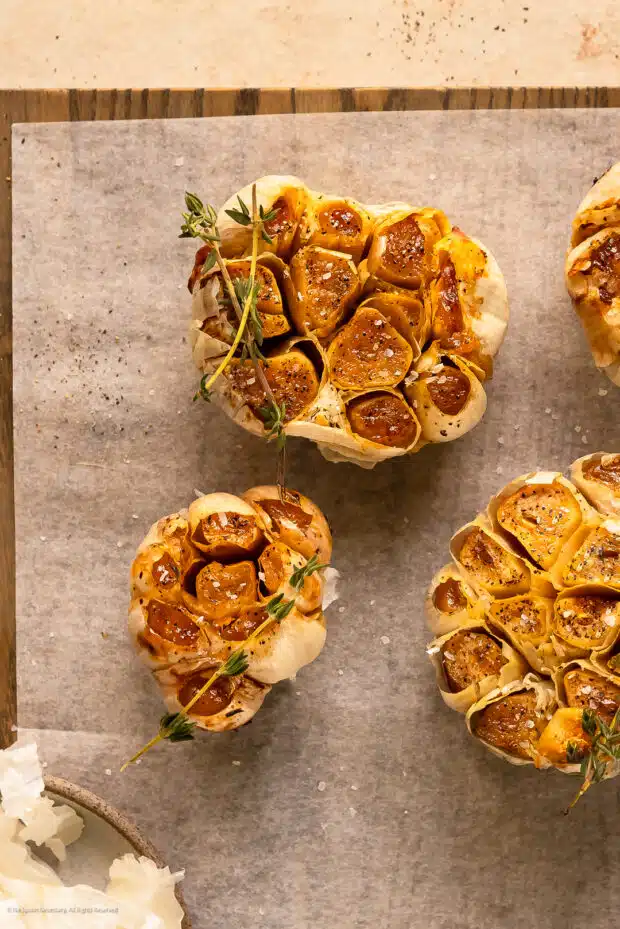
Table of Contents
- Why learn how to roast garlic in the oven?
- Ingredients for roasting garlic cloves in oven
- How to prep garlic for roasting
- How to roast garlic in an oven
- How to store roasted garlic bulb
- Recipes using oven roasted garlic
- FAQs: frequently asked questions
- More basic cooking tutorials!
- Roasting Garlic in the Oven: Culinary Tutorial
Why learn how to roast garlic in the oven?
Once you roast garlic, you’ll never want to go back to the raw stuff again. Roasting garlic changes the chemical makeup of the garlic clove, making it easier to digest and mellower in flavor.
What do oven roasted garlic cloves taste like?
When garlic is roasted, its sharp, pungent bite mellows out, giving way to a creamy, sweet, and subtly nutty flavor. Consider roasted garlic as raw garlic’s kinder, gentler cousin. Roasted garlic cloves transform into a soft, spreadable delight that can be smeared onto crusty bread, fluffy rolls, or parker rolls like smooth whipped butter or stirred into various dishes, adding a touch of rich and savory sweetness.
Why you’ll love this easy roasting garlic how to:
- 🌟 Simplicity is Key: No fancy tools or intricate steps to oven roasting garlic cloves! Just a head (or 10!) of garlic, a drizzle of your favorite oil, and maybe a few sprigs of thyme. It’s almost magical how roasting garlic transforms it in the oven.
- 🍞 Versatility Galore: Think of roasted garlic as your kitchen’s Swiss Army knife. Stir it into sauces, smear it on bread, mix it into mashed potatoes – the possibilities are endless, and every dish gets an instant flavor upgrade.
- 🕒 Make-Ahead Marvel: Busy week ahead? Roast a batch of garlic in the oven over the weekend, and you’ve got a flavor-packed ingredient ready to jazz up meals throughout the week.
- 🌱 Natural Flavor Boost: No need for artificial flavor enhancers when you’ve got roasted garlic cloves in your arsenal. This simple technique for roasting garlic cloves in an oven can turn an everyday meal into something extraordinary, making you feel like a gourmet chef in your own kitchen!
Ingredients for roasting garlic cloves in oven
As promised, you only need a few simple ingredients to make roasted garlic in the oven.
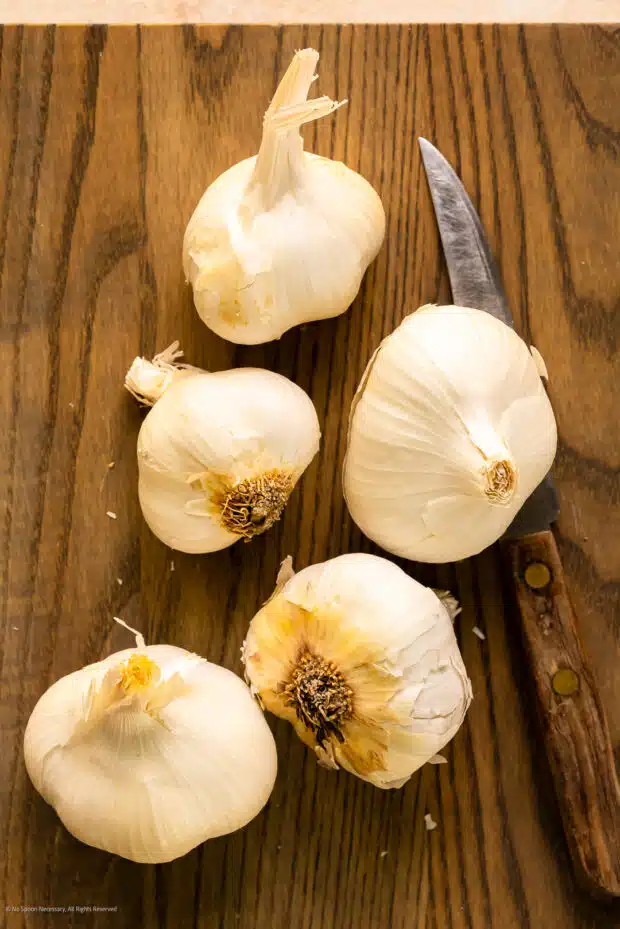
- Garlic: This recipe works for one bulb, or as many heads of garlic as you need. Note that you’ll need whole garlic bulbs, not pre-peeled cloves. The skins help to protect the cloves while they roast, and are naturally non-stick!
- Oil: I recommend a neutral oil, such as canola or vegetable oil; however, in a pinch, you may use regular olive oil. Just make sure you don’t use extra virgin olive oil for roasting garlic (or anything else!), as it does not hold up well to heat.
- Salt & Pepper: A touch of basic seasoning is all they need.
- Fresh Herbs: Optional, but thyme lends lovely a layer of aromatic flavor. Fresh rosemary works great, too.
How to prep garlic for roasting
Step 1: Preheat Oven to 325 degrees Fahrenheit.
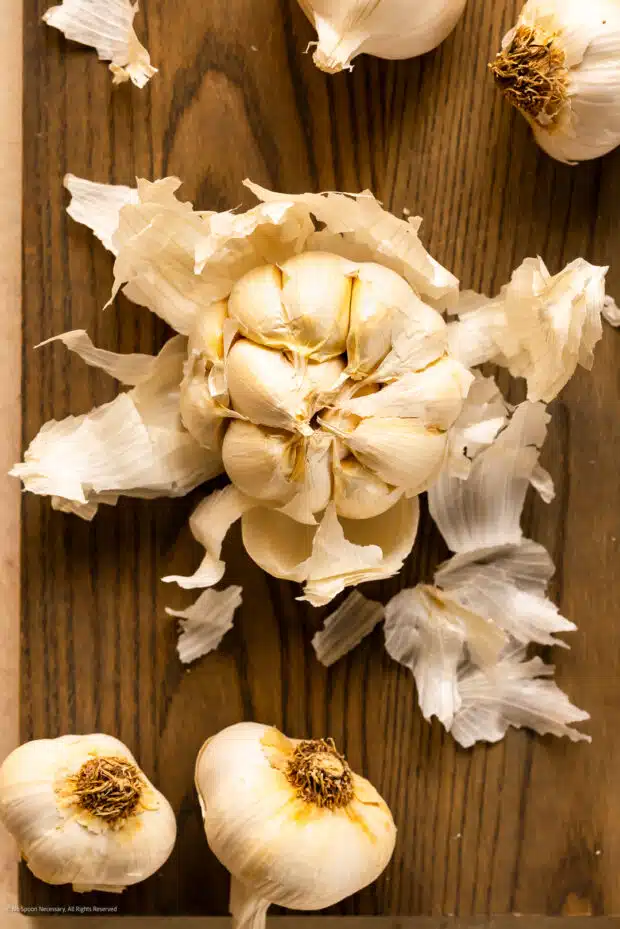
Step 2: Prep Garlic. Place the garlic on a clean work surface. Starting at the stem, use your fingers to pull off and discard the loose papery skin from around the heads of garlic to see where each clove of garlic is located within the bulb. However, you don’t want to completely peel the garlic!
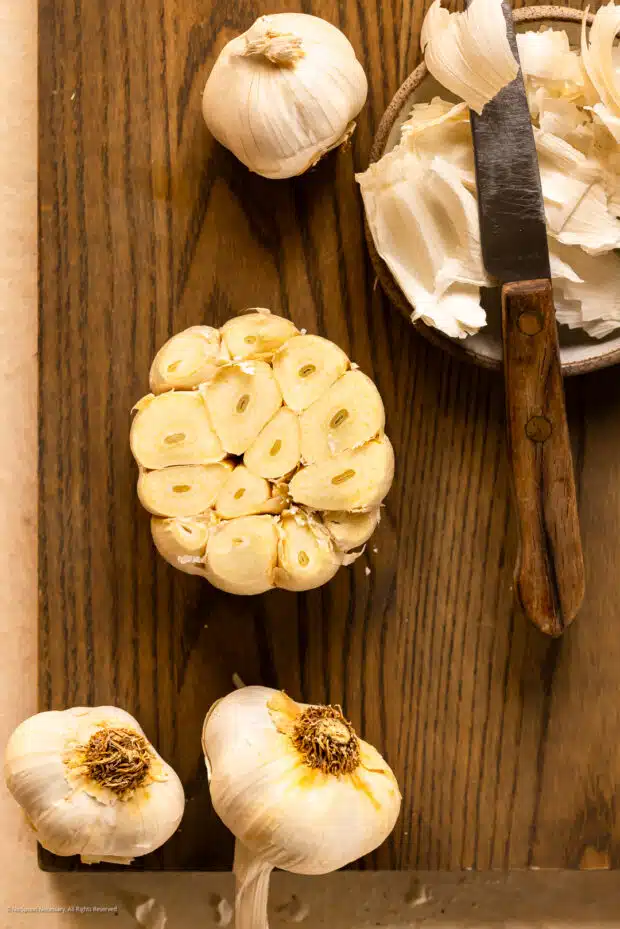
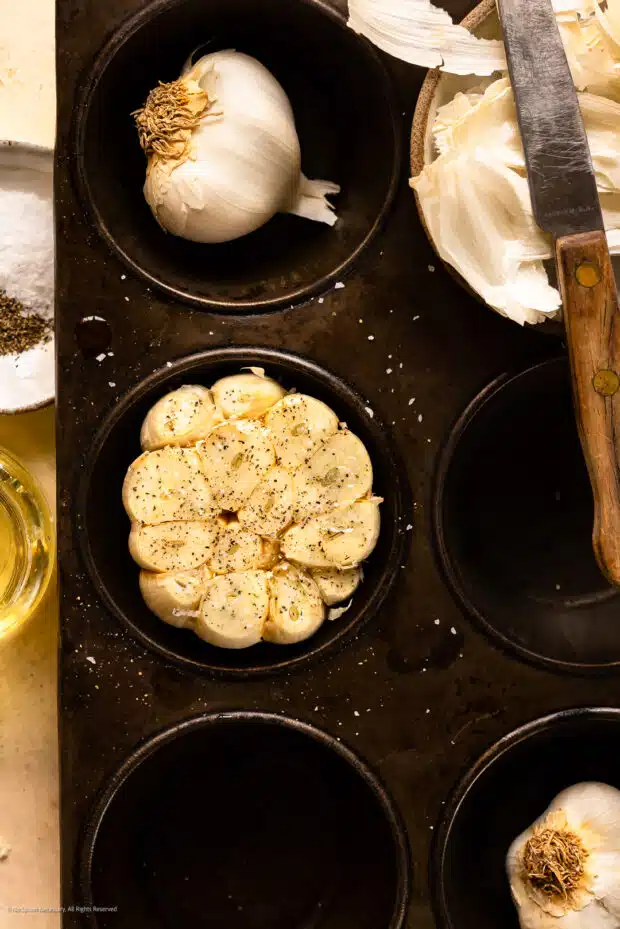
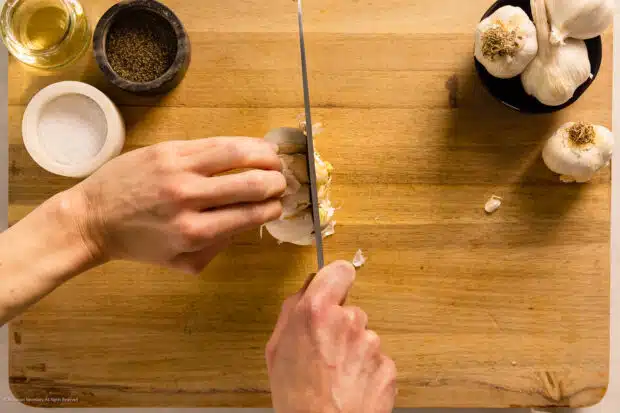
Step 3: Remove the Top of the Garlic Bulb. Using a sharp knife, cut off ¼ to ½-inch of the top (stem end) of the garlic bulbs and discard – make sure you keep the head of garlic intact at the root; you just want to trim off a small portion of the top to reveal the cloves slightly. However, you do want some portion of ALL the cloves exposed.
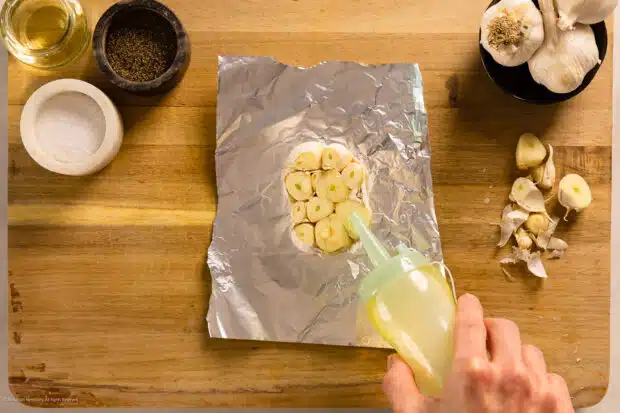
Step 4: Season Garlic. Drizzle 1 ½ tablespoons of oil over the top of each bulb, making sure to coat each evenly. Use your fingers to massage the oil onto the exposed portion of the garlic’s surface. Then, season the top generously with salt and pepper. Next, arrange two sprigs of thyme on top of each bulb (if using).
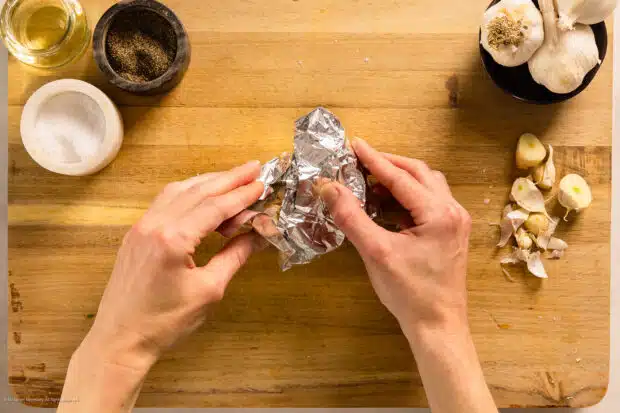
Step 5: Cover Garlic. You’ll need to wrap the garlic bulb before roasting. You can do this one of two ways:
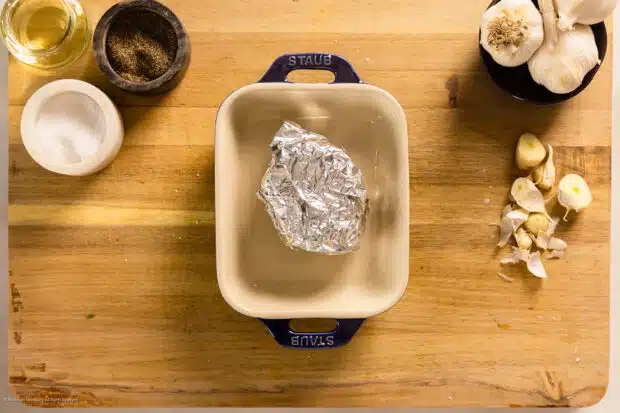
- Option 1: Aluminum Foil. Rip two sheets of aluminum foil large enough to wrap one garlic bulb. Then place one bulb, exposed-side-up, on top of each piece of foil. Next, wrap the bulbs loosely in the aluminum foil and place the foil packets of garlic onto a baking sheet or baking dish.
- Alternative: Muffin Pan. Place each garlic bulb into the tins of a muffin pan. Cover the garlic with another muffin tin (upside down) or aluminum foil.
How to roast garlic in an oven
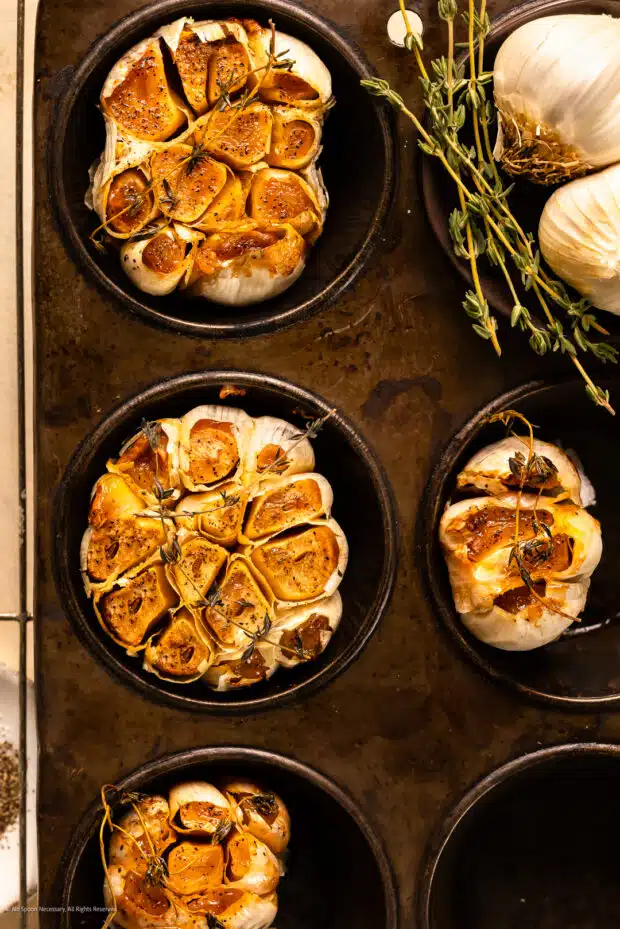
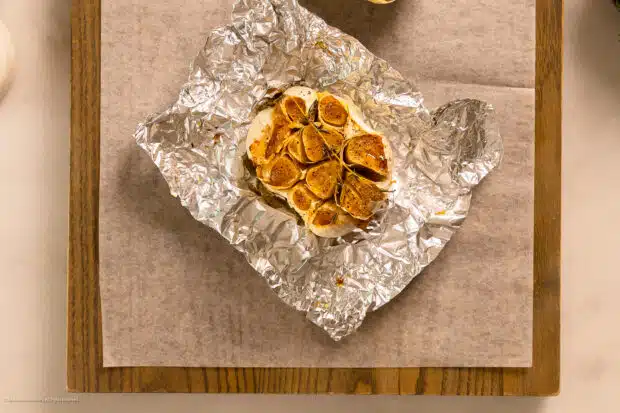
Step 1: Roast garlic. Transfer the heads of garlic to the preheated oven. Cook the garlic in the oven until the cloves are nicely caramelized, golden in color, and very soft to the touch.
- Roasting garlic at 325-degrees, cook the garlic for 75 minutes. Remove from the oven and check the cloves. If they aren’t soft, continue to roast in 15-minute increments until very soft to the touch and caramelized in color.
- If roasting garlic in the oven at 350-degrees, cook the garlic for 1 hour. Remove from the oven and check the cloves. If they aren’t soft, continue to roast in 15-minute increments until very soft to the touch and caramelized in color.
- For roasting garlic at 400-degrees, cook the garlic for 40 minutes. Remove from the oven and check the cloves. If they aren’t soft, continue to roast in 5-minute increments until very soft to the touch and caramelized in color.
Step 2: Cool Slightly. Remove the bulbs from the oven and unwrap the foil packets. Remove and discard the thyme sprigs. Set the garlic aside until it’s cool enough to handle.
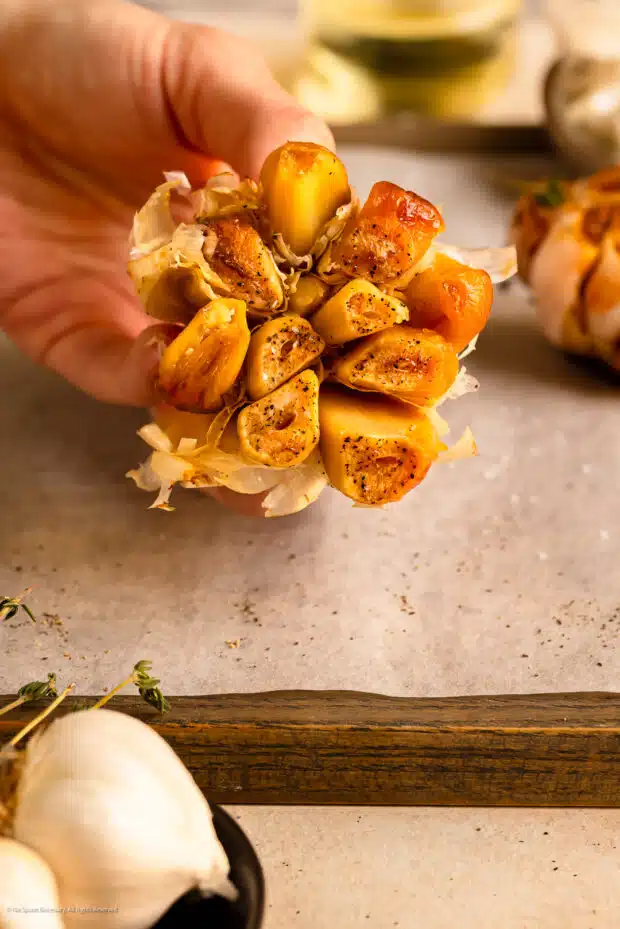
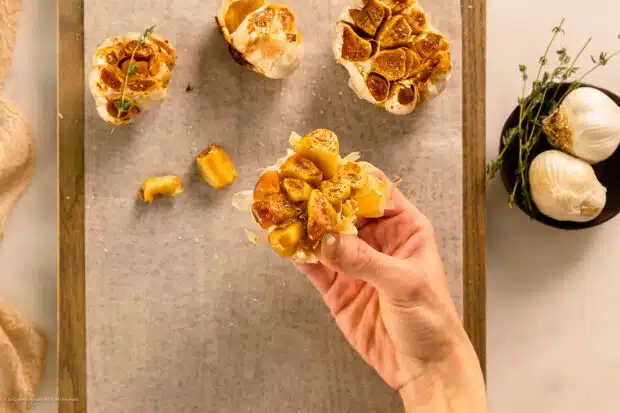
Step 3: Squeeze to Remove Cloves from the Papery Skin. Once the garlic is cool enough to handle, use your fingers to squeeze the cloves out of their skins. Alternatively, you can use the tins of a fork or cocktail fork to carefully lift the clove out of its skin, but where’s the fun in that?
Step 4: Use or Store. Use the roasted garlic cloves in your favorite recipes or store them for later according to the directions in the section below.
How to store roasted garlic bulb
Alright, you’ve nailed the art of roasting garlic to perfection and your kitchen is filled with that irresistible aroma. But what if you’ve made a little more than you can use right away? No worries! Let’s chat about how to store your roasted garlic bulb or cloves so you can savor its golden goodness for days to come.
Storage methods
Once you roast garlic, I recommend removing the oven-roasted garlic from the bulb. There are a few different storing options, depending upon your preferences and needs:
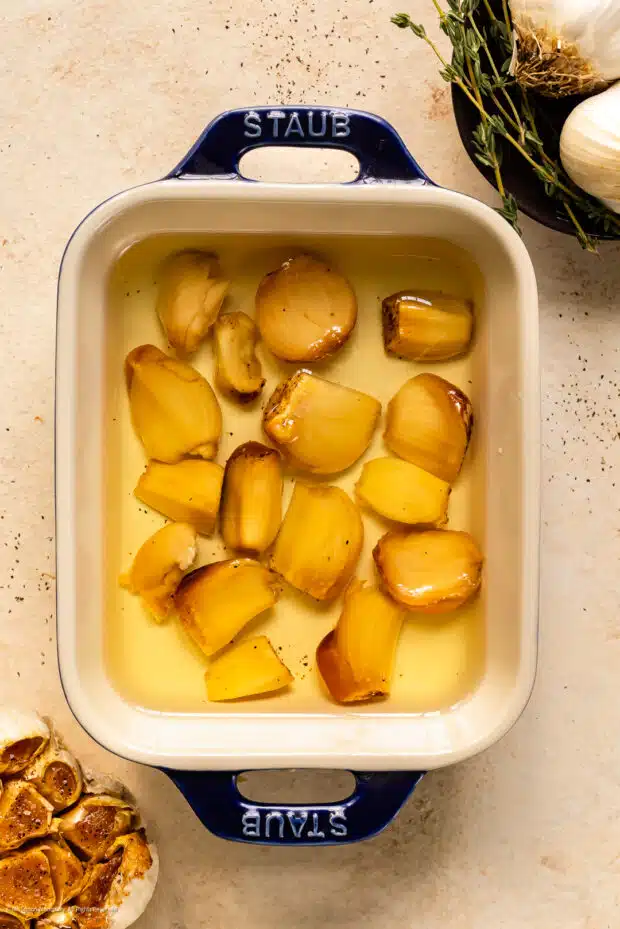
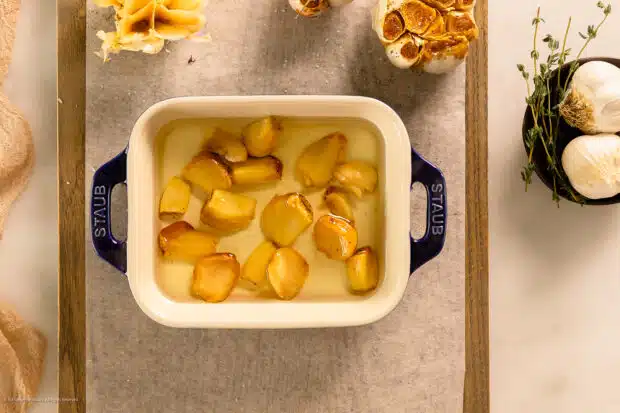
- Option 1: Oil and Airtight Container (recommended). Transfer the roasted cloves of garlic to a canning jar or airtight container. Add enough olive oil to cover and submerge all the cloves. Cover and store in the fridge for up to 2 weeks.
- Choice 2: Airtight Container. Add the roasted garlic cloves to a canning jar or airtight container. Cover and store in the fridge for up to 5 days.
- Possibility 3: Foil. Place the cloves of roasted garlic onto a large sheet of aluminum foil. Wrap the cloves tightly and store in the fridge for up to 5 days. NOTE: If you have other foods in the fridge that are susceptible to picking up flavors (e.g. butter, whipping cream, cakes, etc), this is not ideal. To prevent *everything* from tasting like roasted garlic, tuck the foil-wrapped ball inside a zip-top bag.
- Option 4: Freeze Whole Roasted Cloves. Place the roasted garlic cloves onto a wax-paper-lined baking sheet. Flash freeze until frozen. Then, transfer the frozen roasted cloves of garlic to a freezer-safe storage bag, remove all the air, seal, and store in the freezer for up to 3 months.
- Alternative 5: Freeze Mashed Roasted Garlic. Mash all the garlic cloves and divide the garlic into 1 teaspoon or 1 tablespoon blobs. Transfer the mashed garlic to the tins of an ice cube tray and cover. Store in the freezer for up to 3 months.
Expert tips for roasting garlic cloves in the oven
- Slow roasting the garlic at a lower temperature (325 versus 400 degrees) ensures the garlic cloves caramelize and cook through evenly, lending the best flavor and soft, spreadable texture.
- In a rush? If you are in a hurry, you can roast your garlic cloves at 350-degrees, 375-degrees, or 400-degrees, depending upon your time constraints. Wondering how long to roast garlic in the oven? It depends on the temp you choose. Roasting a garlic bulb at 400-degrees will take approximately 40-45 minutes.
- Don’t totally peel the garlic.
- Hold On Wrap it Loosely. Wrapping the aluminum tightly around the garlic bulb increases the chances of your garlic sticking to the aluminum. Use a light touch — if it clings too tightly, you’re gonna lose the cloves!
- Keep ‘em cozy. The garlic cloves are easiest to squeeze out of their skins while they are still warm, so don’t let the roasted garlic bulb cool completely!
Recipes using oven roasted garlic
While there are TONS of ways to put your oven-roasted garlic cloves to good use, these are my absolute favorite recipes using roasted garlic:
- How to Make Garlic Butter (swap out the raw garlic cloves and use roasted cloves instead.)
- Whipped Ricotta Dip
- Garlic Garlic Bread
- Roasted Garlic Potato Soup
- Marinated Cherry Tomatoes
- Little Roasted Potatoes with Garlic
- Honey Garlic Shrimp
- Gremolata Sauce Pork Chops
- Rosemary Garlic Chicken Skewers
- Mojo Sauce
- Cuban Beans
- Cumin Chicken
- Black Beans Tacos
Other ways to use oven garlic
Roasted garlic cloves are one of those treasured ingredients that can make just about anything taste better. Its uses are only limited by your imagination! Here are some fun ideas for using oven roasted garlic to get you started:
- Sauces and Dips: Blend roasted garlic into your favorite sauces or dips for a boost of garlicky goodness. Think pasta sauces, aioli, hummus, or tzatziki.
- Dressings: Amp up your salad game by incorporating roasted garlic into vinaigrettes or creamy dressings.
- Spreads: Mash roasted garlic with some butter, herbs, or even cream cheese for a delectable spread perfect for bread, crackers, or bagels.
- Soups and Chilis: Stir in roasted garlic for an extra depth of flavor in everything from creamy soups to hearty stews.
- Rice and Pastas: Toss roasted garlic into your risotto, quinoa, or pasta dishes for a hint of sweet, savory goodness.
- Pizza and Flatbreads: Smear roasted garlic as a base or sprinkle those golden cloves on top before baking. A garlic lover’s dream!
- Marinades: Infuse your marinades with the mellow, nutty flavor of roasted garlic to give your meats and vegetables a special touch before grilling or baking.
- Side Dishes: Toss it into your sautéed or roasted veggies, mashed potatoes, or grains like rice and quinoa for an aromatic and satisfying twist.
Remember, roasted oven garlic brings a delightful depth of flavor to a range of dishes and these ideas are just the tip of the iceberg. Feel free to get creative and let roasted garlic work its magic across your culinary canvas!
FAQs: frequently asked questions
How long does it take to roast garlic cloves in oven?
That depends on the temperature of your oven. It can take anywhere from 75 minutes at 325 to just 45 minutes at 400 to roast garlic cloves in the oven.
Does oven roast garlic need to be refrigerated?
Yes, unless you’re immediately putting the roasted garlic bulb to use, you’ll need to either refrigerate or freeze the garlic cloves using any of the 5 methods I list above.
How long does roasted garlic last in the fridge?
Depending on the method, it can last for 5 days or up to 2 weeks. For longer fridge storage, oil is your friend! Revisit the “how to store roasted garlic” section above for more details.
How to preserve garlic after roasting for longer periods?
Covering the roasted cloves in oil and refrigerating them will keep them good for up to 2 weeks (plus you’ll have some fabulous tasting oil when you’re done!), or you can freeze them for up to 3 months.
Remember, life’s too short for bland food, so keep calm and roast on! With a couple roasted garlic bulbs in your arsenal, you’re never in danger of being in a flavor pickle. Until next time, keep savoring the simple joys and roasting to perfection! Clove you all!
Cheyanne
Craving MORE? Follow all the deliciousness on Facebook, Pinterest and Instagram!
More basic cooking tutorials!
How to roast garlic in an oven👇

Roasting Garlic in the Oven: Culinary Tutorial
Equipment
- 1 Chef's Knife
- 1 Cutting Bard
- 1 Baking Sheet or Muffin Pan
- 1 Aluminum Foil
Ingredients
- 2 bulbs Garlic
- 3 TBS Neutral Oil - such as canola or vegetable
- 4 whole sprigs Fresh Thyme - OPTIONAL
Instructions
- Preheat oven: Arrange oven rack to middle position and preheat the oven to 325-degrees Fahrenheit. (Why? Slow roasting the garlic at a lower temperature - 325 versus 400 degrees – ensures the garlic cloves caramelize and cook through evenly, lending the best flavor and soft, spreadable texture.) (In a rush? With all that said, if you are in a hurry, you can roast your garlic cloves at 350-degrees, 375-degrees, or 400-degrees, depending upon your time constraints. Roasting a garlic bulb at 400-degrees will take approximately 40-45 minutes.)
- Prep garlic: Place the whole heads of garlic on a clean work surface. Starting at the stem, use your fingers to pull off and discard the loose papery skin from around the heads of garlic. (Why? Removing the outer layer of papery skin allows you to see where each clove of garlic is located within the bulb. However, you don’t want to completely peel the garlic.)

- Remove top of garlic bulb: Using a sharp knife, slice off ¼ to ½-inch of the top (stem end) of the garlic bulbs and discard – make sure you keep the head of garlic intact at the root; you just want to trim off a small portion of the top to reveal the cloves slightly. However, you do want some portion of the ALL the cloves exposed.
- Season garlic before roasting: Drizzle 1 ½ tablespoons of oil over the top of each bulb, making sure to coat each evenly. Use your fingers to massage the oil onto the exposed portion of the garlic’s surface. Then, season the top generously with salt and pepper. Next, arrange two sprigs of thyme on top of each bulb (if using).
- Cover Garlic: You’ll need to wrap and cover the garlic before roasting. You can do this one of two ways:Option 1 - Aluminum Foil: Rip two sheets of aluminum foil large enough to wrap one garlic bulb. Then place one bulb, exposed-side-up, on top of each separate piece of foil. Next, wrap the bulbs loosely in the aluminum foil and place the foil packets of garlic onto a baking sheet. (Why? Wrap the aluminum tightly around the garlic bulb increases the chances of your garlic sticking to the aluminum. Use a light touch and wrap it loosely to prevent sticking.)Option 2 - Muffin Pan: Place each garlic bulb into the tins of a muffin pan. Cover the garlic with another muffin tin (upside down) or aluminum foil.
- Roast garlic: Transfer the heads of garlic to the preheated oven. Bake the garlic in the oven until the cloves are nicely caramelized, golden in color, and very soft to the touch, about 1 hour and 15 minutes at 325-degrees Fahrenheit.If roasting at 350-degrees, cook the garlic for 1 hour. Remove from the oven and check the cloves. If they aren’t soft, continue to roast in 15-minute increments until very soft to the touch and caramelized in color.If roasting at 400-degrees, cook the garlic for 45 minutes. Remove from the oven and check they cloves. If they aren’t soft, continue to roast in 5-minute increments until very soft to the touch and caramelized in color.
- Cool slightly: Remove the bulbs from the oven and unwrap the foil packets. Remove and discard the thyme sprigs. Set the garlic aside until it’s cool enough to handle. (Tip: The garlic cloves are easiest to squeeze out of their skins while they are still warm. So, don’t let them cool completely!)
- Squeeze to remove cloves from papery skin: Once the garlic is cool enough to handle, use your fingers to squeeze the cloves out of their skins. Alternatively, you can use the tins of a fork to carefully lift the clove out of its skin.
- Use or store: Use the roasted garlic cloves in your favorite recipes or store them for later according to the directions in the notes section below.

Notes
- Garlic: This recipe works for one bulb, or as many heads of garlic as you need.
- Oil: Do not use extra virgin olive oil for roasting – this oil does not hold up well to heat. I recommend a neutral oil, such as canola or vegetable oil; however, you may use regular olive oil.
- Storing roasted garlic: Once you roast garlic, I recommend removing the cloves from the bulb. There are a few different storing options, depending upon your preferences and needs:
- Oil and Airtight Container (recommended): Transfer the roasted cloves of garlic to a canning jar or airtight container. Add enough olive oil to cover and submerge all the cloves. Cover and store in the fridge for up to 2 weeks.
- Airtight Container: Add the roasted garlic cloves to a canning jar or airtight container. Cover and store in the fridge for up to 5 days.
- Foil: Place the coves of roasted garlic onto a large sheet of aluminum foil. Wrap the cloves tightly and store in the fridge for up to 5 days.
- Freezer Option 1 – whole roasted cloves: Place the roasted garlic cloves onto a wax-paper-lined baking sheet. Flash freeze until frozen. Then, transfer the frozen roasted cloves of garlic to a freezer safe storage bag, remove all the air, seal, and store in the freezer for up to 3 months.
- Freezer Option 2 – mashed roasted garlic: Mash all the individual cloves of garlic and divide the garlic into 1 teaspoon or 1 tablespoon blobs. Transfer the mashed garlic to the tins of an ice cube tray and cover. Store in the freezer for up to 3 months.
Nutrition
Did you make this recipe?
Mention @nospoonnecessary on Instagram and tag it #nospoonnecessary!
©No Spoon Necessary. All images and content are under copyright protection. Please do not use any images without prior permission. Please do not publish this recipe without prior consent. To reference this recipe, please link directly to this post.