This post may include affiliate links. Thank you for your support.
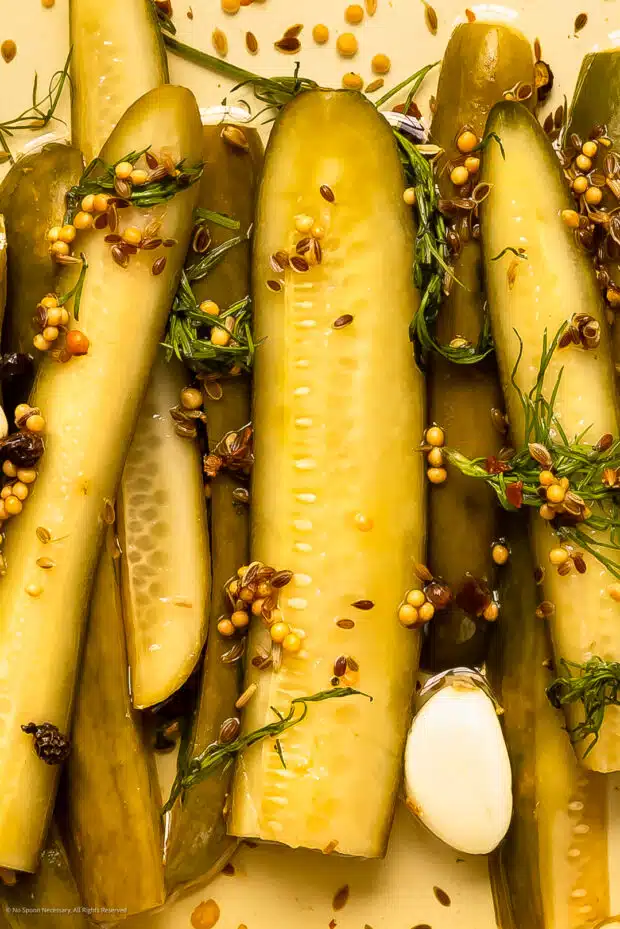
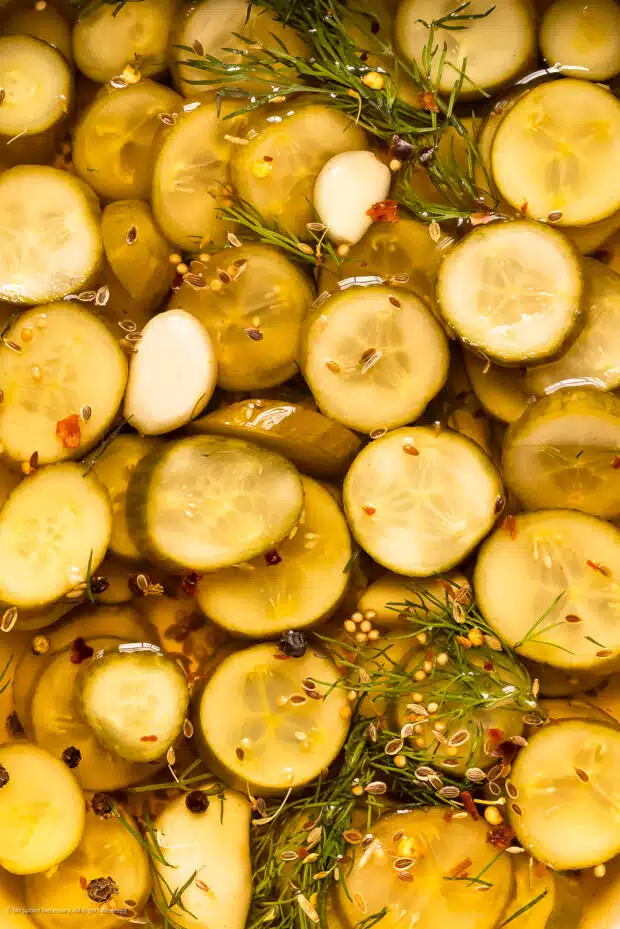
Get ready to experience pickle perfection with my shiny new recipe for Homemade Dill Pickles. In just 15 minutes of prep time using only 8 simple ingredients, you’ll have an irresistibly crunchy batch of fresh refrigerator pickle goodness that’s bursting with garlicky dill-iciousness. 🥒
This time-tested method is perfect for using up a bumper crop and will have you channeling your inner Granny in no time. So, grab your cucumbers, embrace the tang, and let’s get pickling!
Table of Contents
About this dill pickle recipe
Get ready to embark on a crunchy, tangy, and delightfully dilly adventure as we learn how to make dill pickles from cucumbers! 🥒🌱
Now, I know you’re probably thinking: “Aren’t homemade pickles supposed to be a time-consuming process that involves secret family recipes passed down through generations?” Well, hold onto your aprons, because we’re about to break all those stereotypes faster than you can say “I’m a pretty big dill!”
Why you’ll love these refrigerator pickles
Aside from being perfectly crunch-tastic and refreshingly tangy, this recipe for refrigerator dill pickles is also:
- Quick & Easy. With just 15 minutes of prep time, you can transform ordinary cucumbers into marvelous, lip-smacking pickles that will elevate any burger, sandwich, snack board, and tuna salad you can think of. And, since there are refrigerator dill pickles, there no need to break out the canning equipment or fire up the stove. It’s as easy as slice, mix, and chill.
- Made With Only Simple Ingredients. Just 8 easy-to-find components are all you need to bring forth pickle perfection. Think cucumbers (obvi), fresh dill, garlic cloves, and a few pantry mainstays. That’s it! Simple, straightforward, and nothing too fancy.
- Absolutely Foolproof. Oh, did I mention that this fresh pickle-making method has been around for ages? We’re talking about a tried-and-true technique here.
So, whether you’re looking to put that bumper crop of cucumbers to good use or you simply have an insatiable pickle craving that needs immediate satisfaction, this homemade pickle recipe is for you. Get ready to experience the crisp, zesty magic of my easy dill pickles. Trust me, your inner Granny will be SO proud. Now, let’s get pickling! 🥒💚
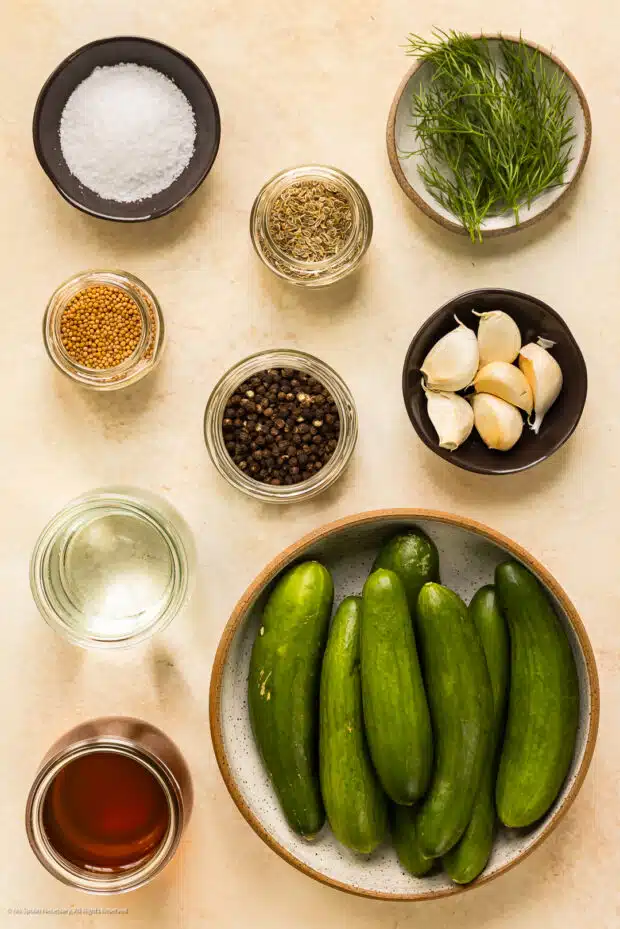
Ingredients for homemade dill pickles
As promised, you only need a handful of ingredients to make this homemade dill pickle recipe:
- Cucumbers – In case you didn’t know, fridge dill pickles are actually pickled cucumbers.
- You can also pickle just about any fresh veggie you’d like, such as carrots, cauliflower, and beets.
- Filtered Water – Using filtered water ensures you only taste the briny, dilly, garlicky goodness.
- Apple Cider Vinegar – I love the subtle sweetness this vinegar brings to the table.
- You’re welcome to swap in white distilled vinegar for a more classic recipe for dill pickles instead.
- Pickling Salt – Use pickling or canning salt if you have it.
- If not, kosher salt is perfectly fine! Just make sure your kosher salt doesn’t contain any anti-caking agents or it will cloud the brine and impede the pickling process.
- Garlic – I love garlic and use 10 cloves without blinking. You can absolutely use less, just make sure they’re fresh.
- Fresh Dill – You can’t have dill pickles without dill for pickling them in!
- Whole Dill Seeds – The unsung heroes of dill pickles! These tiny powerhouses play a crucial role in adding that signature dill flavor and aroma to your homemade pickles. When submerged in the brine, dill seeds release their essential oils, infusing the pickles with their distinct, herbaceous taste.
- Black Peppercorns – Whole peppercorns add a bit of tongue-tingling heat without making the fresh pickles spicy.
- Yellow Mustard Seeds – These little beauties give this dill pickle recipe some extra zing!
- You can also use brown mustard seeds if you prefer.
The best cucumbers for pickling
Not all cucumbers are created equal! The ideal cucumber for pickling should be firm and short (about 4 inches long), with thin, bumpy, mat skin. That said, bumpy skin isn’t a requirement for this or any homemade dill pickle recipe!
If you have a variety to choose from at the farmer’s market or are looking to plant your own cukes for pickling, these are the best options:
- Kirby Cucumbers are the most common to brine and pickle.
- Mini Cucumbers are also known as Mini Persians, shown here. These are the most readily available cucumbers
- Northern Pickling
- Ashley
- Boston
- Busk
- Calypso
- Carolina
- Marketer
- Marketmore 76
- Muncher
Variations of dill pickles
As much as I love this pickled cucumber recipe with dill, there are a few ways you can shake things up if you like. Here are some ideas to get get you started:
- Spicy Dill Pickles – If you like a spicy pickle, use up to 2 teaspoons of red chile flakes. You can also add some fresh sliced jalapeños to the mix if you like.
- Sweet Dill Pickles – If I add red pepper flakes, I will typically ALSO add a generous pinch of sugar (½-1 teaspoon) to the brine. If you prefer a sweeter dill pickle, use up to ¼ cup of granulated sugar, cane sugar, or agave, with or without the red pepper flakes.
- Non-Cucumber Pickles – This refrigerator dill pickles recipe teaches you the basics of making pickles without canning. It’s SO easy! Once you get the hang of it you can apply the same concept to any of your favorite pickling veggies like okra, green beans, asparagus, or peppers.
How to make pickles dill
Wondering how to make dill pickles with cucumbers from scratch? This easy refrigerator dill pickles recipe comes together with just a few simple steps:
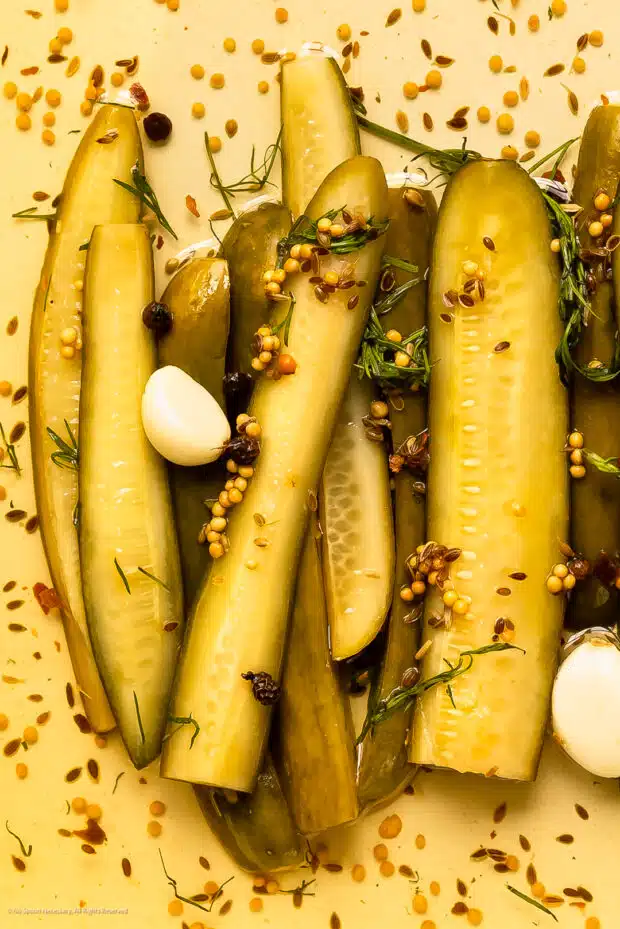
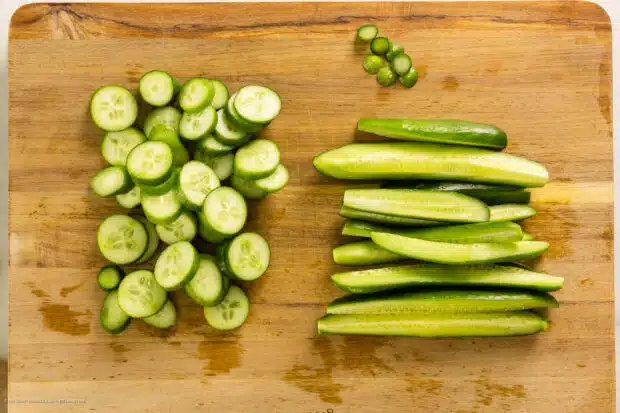
- Prepare cucumbers for pickling: Wash and dry the cucumbers. Use a sharp paring knife to remove the blossom end (opposite side from the stem end) of the cucumbers. Then cut each cucumber into spears or ¼-inch-thick chips. Alternatively, you can leave them whole if you prefer. (SEE NOTES)
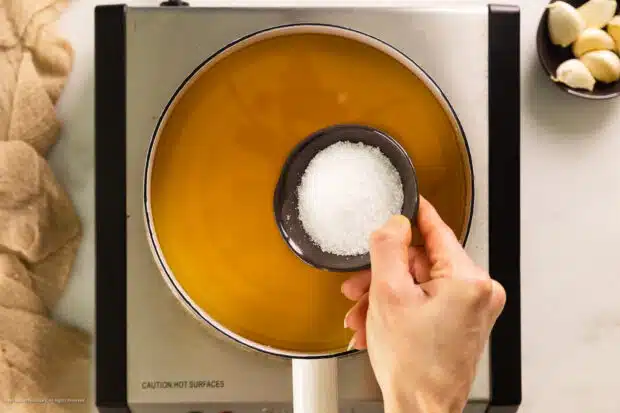
- Make the pickle brine liquid: In a medium saucepan, add the water, vinegar, salt, and optional sugar if using. Place over high heat and bring the contents to a boil, stirring occasionally, to help the salt dissolve. Immediately remove the pan from the heat and set aside.
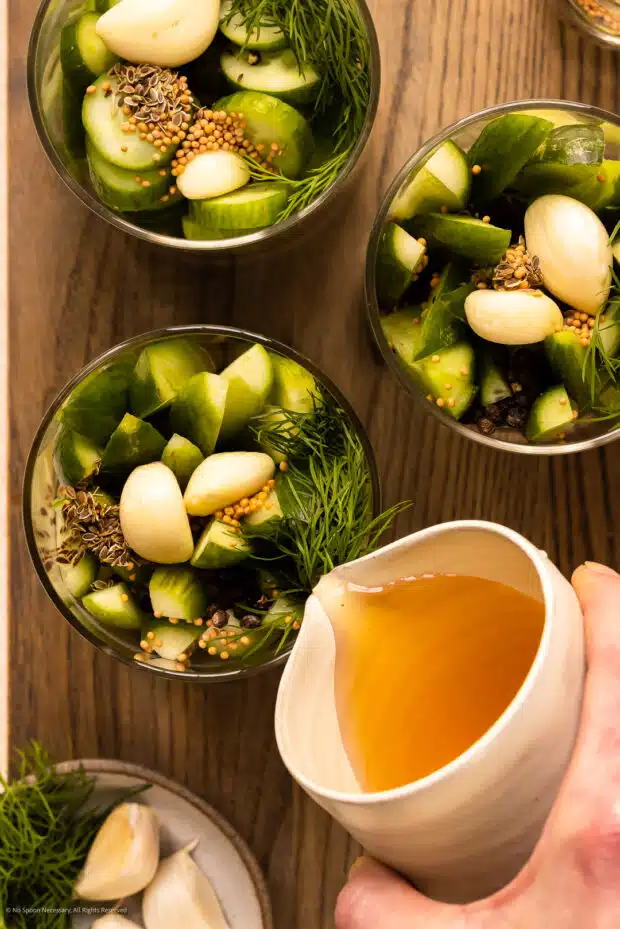
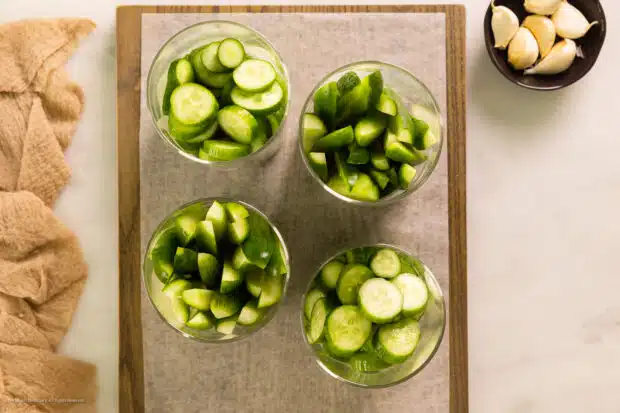
- Add cucumbers to storage jars: Equally divide the cucumber spears or cucumber slices and add them to storage jars (like a mason jar), arranging so the pickles fit snugly, but not packed too tight.
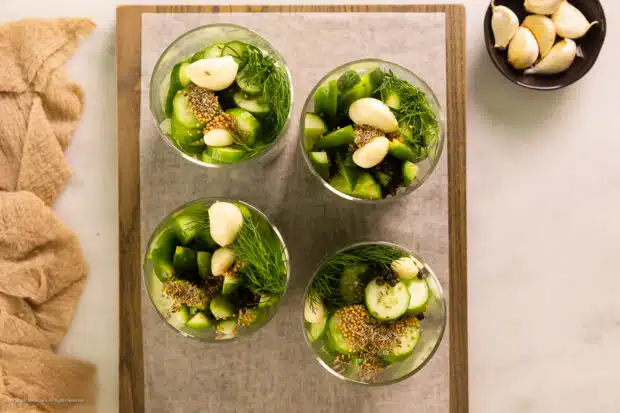
- Followed by the dill flavoring ingredients: Equally divide the garlic, fresh dill sprigs, dill seeds, black peppercorns, and mustard seeds, along with the red pepper flakes if using, among the jars with the cucumbers.
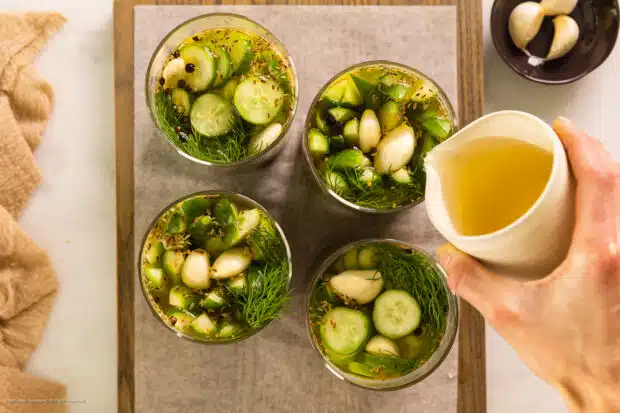
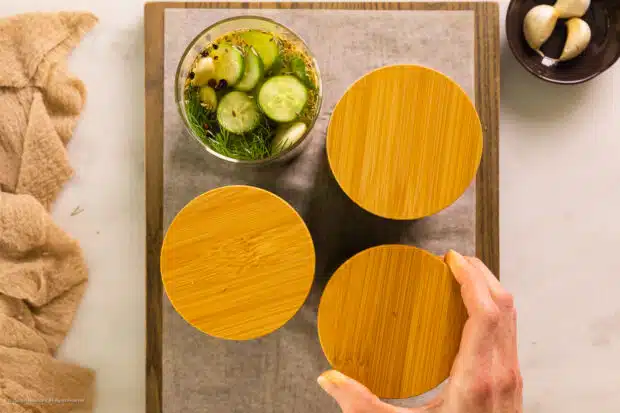
- Then add the brine: Pour enough vinegar mixture into each jar to completely cover to cucumbers, leaving ¼-inch of headspace between the brine and the rim of the jar. Seal with an airtight lid.
- Let cucumbers pickle in the refrigerator: Place the jar of cucumbers into the fridge and let rest (pickle) for at least 5 days before enjoying.
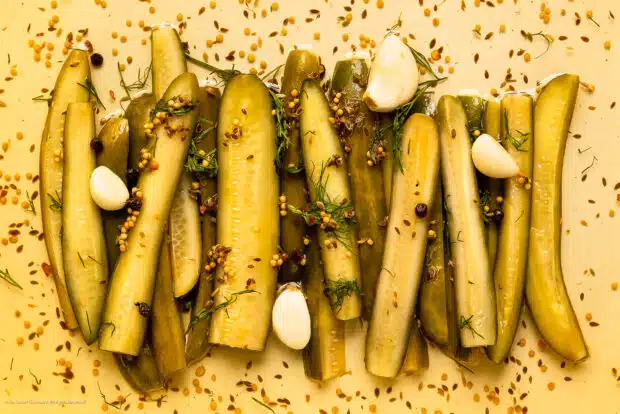
- Enjoy homemade pickles: After five or more days of pickling the cucumbers in the dill and garlic brine, remove the homemade dill pickles from the fridge. Eat straight from the jar, on sandwiches and burgers, or however your heart desires. Enjoy!
Expert tips for dill refrigerator pickles
Alright, fellow pickle enthusiasts, listen up! I’ve got some expert tips for taking this refrigerator pickles recipe from good to mind-blowing fantastic. Brace yourselves for a flavor explosion in every jar!
- Look for pickling cucumbers or small, firm cucumbers at the farmers’ market or grocery store. They’re the perfect canvas for pickle greatness. If your cucumbers have any soft spots, give ’em a pass. We want crispness, not squishiness!
- Make sure you slice off and discard the blossom end of the cucumber. You can tell the blossom end from the stem end by using your sense of touch. The stem end will feel smooth with an indented or concaved dot. The blossom end, which you will want to remove, will feel like a rough, curved outward dot
- Now, let’s talk brine. Don’t be shy with the vinegar and salt! They’re the dynamic duo that ensures your pickles stay crunchy and flavor-packed. Use the salt to taste. If you prefer a saltier pickle, use the full 2 tablespoons of salt. (For reference, I typically use 1 ¾ Tablespoons)
- Experiment with different vinegar varieties like white vinegar, apple cider vinegar, or even rice vinegar for some tangy excitement. You can also spice things up with the addition of red pepper flakes or fresh sliced jalapeños.
- Lastly, remember: patience is a virtue! I know it’s tempting to dive into that jar of pickles right away, but let them hang out in the refrigerator for a few days. This allows all those incredible flavors to mingle and intensify. Trust me, it’s worth the wait. For authentic dill pickles, let the cucumbers sit in the vinegar pickle mixture for the full 10 days. However, if you’re impatient and don’t mind a light vinegar flavor, you can start eating them around day 5.
So, gather your cucumbers, get creative with your brine, and let time work its magic. Soon enough, you’ll be enjoying the most flavorful homemade dill pickles recipe you’ve ever tasted. Happy pickling, my friends! 🥒🌶️👩🍳
FAQs: refrigerator dill pickles recipe
What makes homemade dill pickles go cloudy?
Ah, the cloudy conundrum of homemade dill pickles! Fear not, my pickle-loving pals, for I have the answer. The cloudiness you might notice in your homemade pickles is completely natural and nothing to fret about.
You see, that cloudiness comes from a friendly bacteria called lactobacillus. These little fellas work their magic during fermentation and contribute to the tangy flavor we adore in dill pickles. As they do their happy dance, they can create a harmless cloudiness in the brine. If you’re not a fan of that cloudy color, consider using proper pickling salt or canning salt
Now, don’t confuse this cloudiness with spoilage. If your pickles smell off or have an unusual texture, that’s a different story. But a bit of cloudiness? Totally normal. Embrace it as a sign that your homemade pickles are happily fermenting away, building layers of flavor for your enjoyment.
How do you keep a homemade dill pickle crisp?
I have some tried-and-true tips to keep your homemade dill pickles as crisp as can be.
First things first, fresh and firm cucumbers are your best friends. Look for pickling cucumbers or small, unwaxed cucumbers for optimal crunchiness. Avoid cucumbers that are soft or have any mushy spots – we want that satisfying snap!
Next up, pay attention to the brine. A higher ratio of vinegar to water helps maintain crispness. So don’t be shy with the vinegar! Also, using pickling or kosher salt instead of regular table salt can make a difference. The larger salt crystals contribute to the pickles’ texture and help retain their crunch.
Now, here’s a secret weapon: calcium chloride. Adding a small amount of food-grade calcium chloride to your brine can work wonders for pickle crispness. You can find it in stores specializing in canning supplies or online. Just a touch of this magical ingredient helps the pickles stay wonderfully crunchy.
Last but not least, refrigeration is key. Unlike traditional canning methods, refrigerator pickles retain their crispness. So once you’ve prepared this homemade dill pickle recipe pop them in the fridge and let them chill. Give them a few days to absorb all those incredible flavors while maintaining their delightful crunch.
How easy is it to make homemade pickles?
Making this recipe for refrigerator dill pickles is easier than sliding down a water slide on a hot summer day! It’s easier than cracking a smile when you see a cute puppy, and WAY easier than finding a way to work “pickle” into a conversation (trust me, I’m an expert at that)!
Picture this: You slice up some cucumbers, whip together a simple brine, throw in some herbs and spices, and let your fridge do the rest. It’s like magic, but without the rabbits and top hats. Seriously, this dill pickled cucumbers recipe is easier than trying to untangle a bunch of earphones in your pocket. (Why are they always so tangled? It’s a mystery for the ages.
No fancy equipment needed, no complicated steps to follow. Just good old-fashioned dill pickle fun with ingredients you probably already have in your kitchen. Learning how to make a pickle is easier than trying to parallel park on an empty street or trying to resist eating that last slice of pizza.
So, if you’ve been hesitant to jump on the fresh pickle bandwagon, fear not! This dill pickle recipe for cucumbers is easier than getting out of a blanket burrito on a lazy Sunday morning. Give it a whirl, and soon you’ll be the proud creator of the crunchiest, most delicious pickles around. Get ready to impress your friends and family with your pickle prowess! 🥒😄👩🍳
Serving homemade dill pickle
Get ready for some mouthwatering ideas that will make this refrigerator dill pickle recipe an essential for all your summer get-togethers.
- Classic Pairings: Elevate your deli meat sandwiches, bean burgers, and beef burgers by adding a layer of homemade dill pickles. The tangy crunch will make them legendary!
- Pickle Dip: Put your homemade pickles to good use and make the most amazing fried pickle ranch dip you’ve ever tasted.
- Pickle Platters: Impress your guests with a beautiful assortment of pickles, sliced cheese, crackers, and cured meats. It’s pickle charcuterie at its finest!
- Genius Appetizer Idea: Create pickle wraps by rolling deli meat, cream cheese, and pickles together. Slice into bite-sized pieces for an addictive appetizer.
- Pickle-Infused Salad Goodness: Chop up your homemade dill pickles and add them to potato salad, egg salad, tuna salad, tuna macaroni salad, coleslaw, and chicken salad recipes. Get ready for a tangy twist that’ll make you do a happy pickle dance!
- Taco Topper: Use your refrigerator pickles as a relish for tacos, taco bowls, tostadas, and your favorite Mexican hand-held meals.
So, no matter how you serve them, your homemade dill pickles are ready to shine in all their tangy, crunchy glory. Get creative, have fun, and let the pickle party begin! 🥒🎉
Storing refrigerator pickle recipe
- Once made, these pickled dill cucumbers will keep in airtight jars in the fridge for up to 4-6 weeks.
And there you have it, my pickle-loving pals! We’ve reached the end of our pickle-packing adventure. It’s time to relish in the glory of your dill-pickled cucumber delights and savor the tangy triumph of your pickling prowess. Remember, these homemade refrigerator pickles are the real “dill” – they’re crisp, flavorful, and sure to leave your tastebuds “gherkin” with delight! Until next time, remember: the world is your cucumber, waiting to be transformed into a tangy, crunchy delight. Stay briny, stay pickled, and keep embracing the “dill-icious” side of life!
Craving MORE? For more tasty recipe inspiration, be sure to follow me on Instagram, Pinterest, and Facebook.
More pickling recipes!
How to make the best homemade refrigerator dill pickle recipe! 👇
Homemade Dill Pickles
Equipment
- 1 Sharp Paring Knife
- 1 Medium Saucepan
- 1 Storage Jars
Ingredients
- 1 ½ Pounds Cucumbers (SEE NOTES)
- 2 ¼ Cups Filtered Water
- 2 Cups Apple Cider Vinegar (sub: white distilled)
- 1 ½ - 2 TBS Kosher Salt (sub: pickling salt if you have it!) (SEE NOTES)
- 8-10 cloves garlic – peeled and smashed, to taste (SEE NOTES)
- 8 sprigs fresh dill
- 3 tsp whole dill seeds
- 2 tsp whole black peppercorns
- 2 tsp whole Yellow Mustard Seeds
- Optional Granulated Sugar - to taste
- Optional Pinch Red Pepper Flakes - or more to taste (SEE NOTES)
Instructions
- Prep Cucumbers: Wash and dry the cucumbers. Use a sharp paring knife to remove the blossom end (opposite side from the stem end) of the cucumbers. Then cut each cucumber into spears or ¼-inch-thick chips. Alternatively, you can leave them whole if you prefer. (SEE NOTES)

- Make Pickle Brine: In a medium saucepan, add the water, vinegar, salt, and optional sugar if using. Place over high heat and bring the contents to a boil, stirring occasionally, to help the salt dissolve. Immediately remove the pan from the heat and set aside.
- Divide Cucumbers Among Jars: Equally divide the cucumbers and add them to storage jars, arranging so the pickles fit snugly, but not packed too tight.
- Divide Flavoring ingredients: Equally divide the garlic, fresh dill, dill seeds, black peppercorns, and mustard seeds, along with the red pepper flakes if using, among the jars with the cucumbers.
- Add Brine: Pour enough brine into each jar to completely cover to cucumbers, leaving ¼-inch of headspace between the brine and the rim of the jar. Seal with an airtight lid.
- Let Cucumbers Pickle in Fridge: Place the jar of cucumbers into the fridge and let rest (pickle) for at least one week before enjoying. (Note: 5 days = mild pickle flavor, 7 days = medium pickle flavor; 10 days for a strong pickle flavor)
- Enjoy: After five or more days of pickling the cucumbers, remove the homemade dill pickles from the fridge and eat straight from the jar, on sandwiches and burgers, or however your heart desires. Enjoy!

Notes
- Cucumbers: Not all cucumbers are created equal! The types of cucumbers that are best for pickling are Kirby, Mini Cucumbers (Persian Cucumbers), Northern Pickling, Ashley, Boston, Busk, Calypso, Carolina, Marketer, Marketmore 76, Muncher, etc. Shown here are mini cucumbers. The ideal cucumber for pickling should be firm and short (about 4 inches long), with thin, bumpy, mat skin. (Note: bumpy skin isn’t a requirement!)
- 1 ½ pounds Kirby Cucumbers = about 6 to 7 whole cucumbers
- 1 ½ pounds Mini Cucumbers = about 10-12 whole cucumbers
- Trimming Cucumbers: Make sure you slice off and discard the blossom end of the cucumber. You can tell the blossom end from the stem end by using your sense of touch. The stem end will feel smooth with an indented or concaved dot. The blossom end, which you will want to remove, will feel like a rough, curved outward dot
- Salt: Use pickling or canning salt if you have it; if not, kosher salt is perfectly fine! Just make sure your kosher salt doesn’t contain any anti-caking agents or it will cloud the brine and impede the pickling process. Use the salt to taste. If you prefer a saltier pickle, use the full 2 tablespoons of salt. (I typically use 1 ¾ Tablespoons)
- Granulated Sugar: This ingredient is also optional; however, if I add red pepper flakes, I will typically add a generous pinch of sugar (1/2 tsp to a 1 tsp) to the brine. If you prefer a sweeter dill pickle, use up to ¼ cup granulated sugar, cane sugar, or agave.
- Garlic: Use the garlic to taste. I love garlic and use 10 cloves; however, you can absolutely use less.
- Crushed Red Pepper Flakes: This ingredient is entirely optional. If you like a spicy pickle, use up to 2 tsp red chile flakes.
- Pickling Time: For authentic dill pickles, let the cucumbers sit in the vinegar pickle mixture for the full 10 days. However, if you’re impatient and don’t mind a light pickle flavor, you can start eating them around day 5.
- Storage: Pickles will keep in airtight jars in the fridge for up to 4-6 weeks.
- Recipe yield: 3 Quart-size Jars of Pickles
Nutrition
Did you make this recipe?
Mention @nospoonnecessary on Instagram and tag it #nospoonnecessary!
©No Spoon Necessary. All images and content are under copyright protection. Please do not use any images without prior permission. If you want to reference this recipe, please link directly back to this post.
Metzy
so yummy and delicious, thank you for sharing!